Some 1999-2003 Windstar and 2004-’07 Freestar /Monterey vehicles built prior to June 22, 2006, may exhibit engine/transmission driveability issues due to water entering the powertrain control module (PCM) or transaxle vent. The water leakage may be due to the PCM connector cover not seating completely and water leaking down from the cowl panel grille (cowl top vent panel) area.
Symptoms may include various diagnostic trouble codes, harsh or delayed transmission shifts or engagements,
no reverse engagement, engine overheat, engine lean conditions causing a misfire (possibly leading to melted electrodes on the spark plugs) and rough idle.
Inspect for evidence of water damage at the PCM, PCM connector and/or transaxle. If present, inspect the sealing area of the PCM cover, seal the water leak path in the cowl panel grill area and service the PCM as needed per the following Service Procedure.
Service Procedure
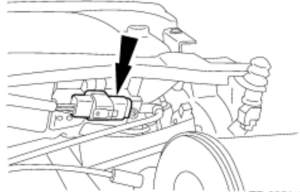
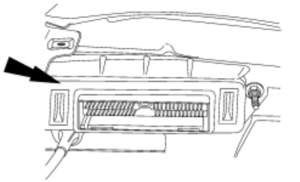
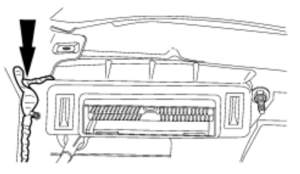
Disconnect the PCM connector. Remove the PCM cover from the studs in the bulkhead (Fig. 1). Inspect the body sealant on the bulkhead to ensure it’s not protruding out and causing the cover not to seal properly in that area (Fig. 2). If sealant is interfering with the PCM cover, remove the excess with a sharp tool. Reinstall the PCM cover and ensure that the cover seals properly and is flush with the bulkhead.
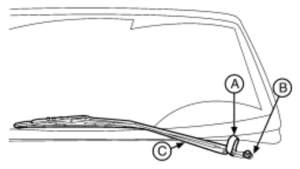
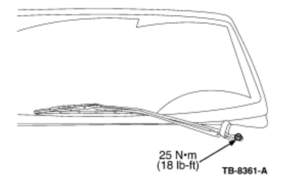
1. Remove the wiper pivot arm. (Fig. 3)
a. Release pivot arm nut cover.
b. Remove the pivot arm nut.
c. Remove the pivot arm.
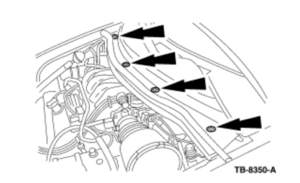
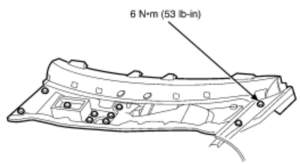
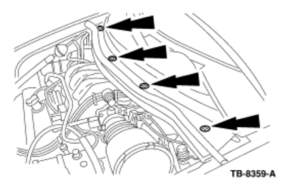
2. Remove the screws. (Fig. 4)
3. Release the clips.
4. Remove the windshield wiper hose.
5. Remove the upper cowl panel grille.

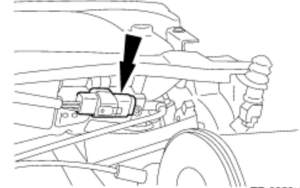
6. Disconnect the electrical connector. (Fig. 5)
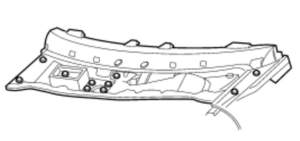
7. Remove the lower cowl panel assembly. (Fig. 6)
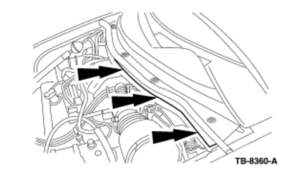
a. Remove the 10 bolts.
b. Remove the lower cowl panel assembly.
8. Obtain two PVC soft foam adhesive stripes from the Rotunda Squeak And Rattle Kit.
9. Cut both of the PVC soft foam adhesive stripes in half, lengthwise, so you have four 7/8” x 6” pieces. (Fig. 7)
10. Clean the metal body surface under the lower cowl panel, in the area above the transaxle and the area above the PCM.
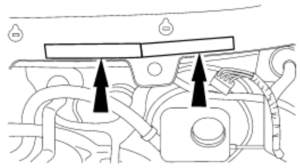
11. Place two of the cut pieces of the PVC soft foam adhesive stripes on the metal body surface over the transaxle area. The two ends need to touch; do not allow any gap between the two ends. (Fig. 8)
12. Place the other two cut pieces of the PVC soft foam adhesive stripes on the metal body surface over the PCM area. The two ends need to touch; do not allow any gap between the two ends. (Fig. 9)
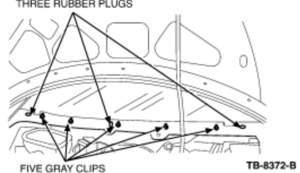
13. Check that the three rubber plugs and five gray plastic clips are fully seated. Add clear silicone rubber around the three rubber plugs and the five gray plastic clips. (Fig. 10)
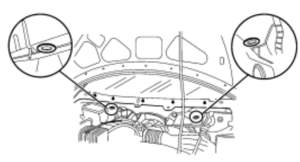
14. Remove and discard the two rubber plugs on the bottom of the cowl sheet metal. (Fig. 11)
15. Install the lower cowl panel and 10 retaining bolts. (Fig. 12)
16. Connect the electrical connector. (Fig. 13)
17. Install the upper cowl panel grille.
18. Install the windshield wiper hose.
19. Install four new pushpin screw/rivets to secure the upper cowl to the lower cowl. Add clear silicone rubber to the four pushpin screw/rivets to make a watertight seal around them. (Fig. 14)
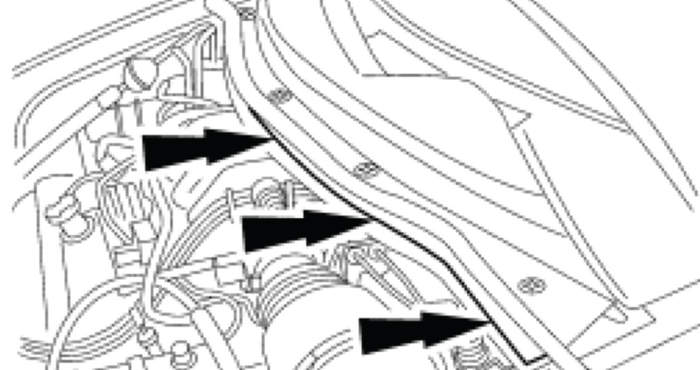
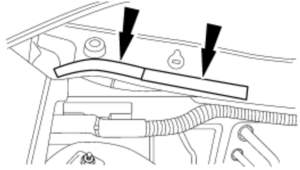
20. Add clear silicone rubber to the front seam between the upper and lower cowl in the area above the transaxle. (Fig. 15)
21. Install wiper pivot arms. (Fig. 16)
22. Check the wiper pivot arm adjustment.