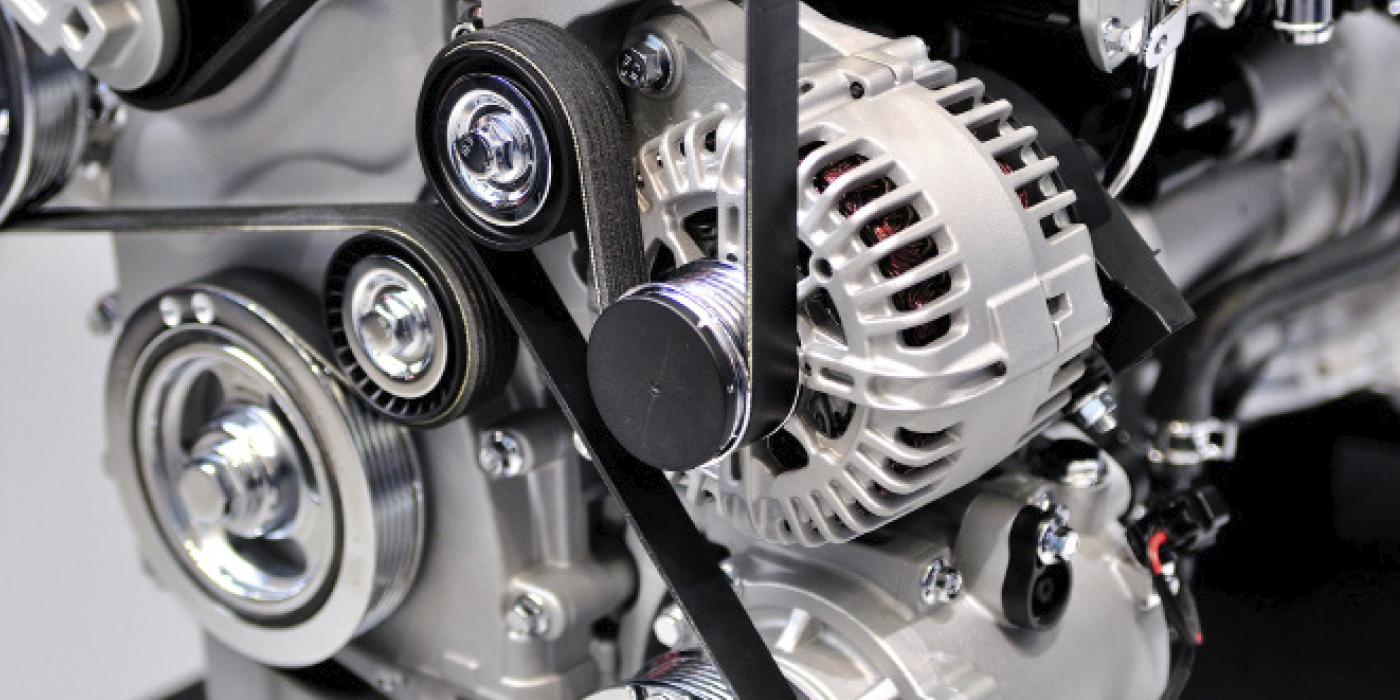
More and more A/C compressors are being driven by stretch-fit serpentine belts. Similar in external appearance to a conventional serpentine belt, these belts have a unique internal construction that allows them to be self-tensioning. This design construction eliminates the automatic tensioner assembly, allowing more compact accessory drives with greater belt contact on high-load components.
Stretch belts use polyamide tensile cords, which are engineered with a specific amount of elasticity, creating the stretch-fit feature that maintains a “controlled” or “constant” stretch once installed.
These belts began to appear on vehicles as a separate belt drive powering water pumps, A/C compressors or power steering pumps about 15 years ago. They’re usually short belts, designed for two, three, or four-point routing – this can mitigate much of the noise and slippage found in longer belt spans, and reduce friction losses.
A late-model vehicle without an automatic tensioner with a belt that runs between just two pulleys probably uses a stretch belt. They may look and feel similar to conventional serpentine belts, so it is important to recognize these belts and to understand the proper service procedures and installation tools. Some OE stretch belts will have the words “stretchy” or “stretch” written on the back.
GM started to use stretch belts to power the A/C compressor on 2009 models powered by the LS V8. Ford has been using stretch belts to turn the power steering pump on the 3.5 V6 since 2007. Ford also uses stretch belts to turn the camshaft-driven water pump on the 3.0 V6. Most import nameplate vehicles, including Mazda, Subaru and Toyota started using stretch belts in 2009.
Stretch belts can last 100,000 miles or more (depending on the vehicle’s environment and where it is mounted, of course), which is why inspection is so important — you cannot simply go by mileage recommendations.
Modern materials used to make a stretch belt do not crack before the grooves are worn so you won’t necessarily be able to see the damage. Belt gauges will help detect excess stretch in a worn belt, but also inspect the pulleys.
When a stretch belt exceeds wear specifications, it’s no longer able to effectively grip the pulleys and will start slipping. However, when a stretch belt slips it’s not always for a reason you expect. As it turns out, the primary cause of slipping is material being removed from the belt’s grooves, not belt stretching. Debris and the interaction with the pulleys will wear the shoulders and valleys of the grooves over a period of time, and when the grooves get too shallow, the pulleys bottom out. The walls of the groove no longer grip the pulley. Inspecting the depths of the grooves is critical when determining when to replace belts.
Replacements
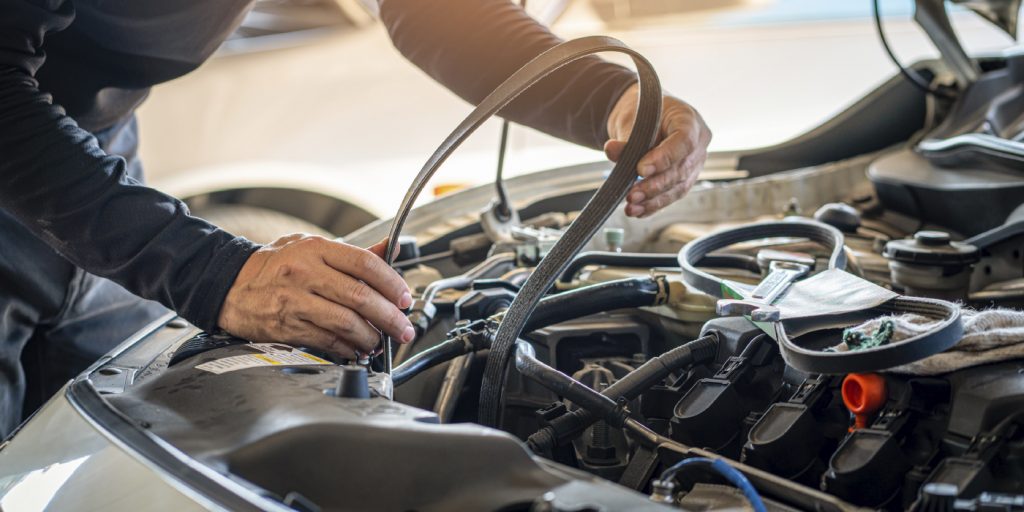
Stretch belts are designed to be a “one-time use” component. The reason for this is because as the belt is heated, it shrinks in size to set the correct belt tension. In most service situations the technician simply removes the original belt by cutting it off with diagonal cutters or a utility knife. If the belt is original, or if the vehicle’s prior service history is unknown, best practice is to recommend a new belt. However, if the belt is in good condition, or has been replaced very recently, it may be possible to gently remove it, using a tool designed for this purpose.
Whenever selling stretch belts, additional service items, as well as the serpentine belt, its tensioner, and idler pulleys also can be recommended for the most complete repair.
Installation of the new belt requires the technician to “walk” the belt onto the pulley, and belt installation tools are a popular new category, available from many belt manufacturers as well as tool companies. The installation tool is attached over the outer lip of the largest pulley in the belt drive (or sometimes just the most accessible!), and the pulley is rotated until the belt is seated entirely in its grooves. Many of these belts are very narrow (3 or 4 ribs), so sometimes a small zip-tie can be used to keep the belt in place as it is started over the pulley.
Never use a screwdriver or other sharp object to install the belt because if the belt is cut or the surface or grooves of the pulleys are damaged, the belt will eventually fail. Special tools are available from various tool and belt manufacturers that act as a ramp on the leading edge of the pulley. Some applications – for example the Subaru A/C compressor pulley – will require special tools to hold the belt on a pulley. Always follow the directions for proper tool placement and to determine the correct direction to turn the crankshaft.
After the belt is installed, always confirm the belt is in the grooves and re-check that there are no alignment problems.
On smaller width stretch belts that are driven by the camshaft, like on some Ford and Mazda V6 water pump applications, you can use zip ties to install the belt. Simply zip tie the belt to the camshaft pulley and turn the engine until the belt is seated, then cut the tie. This method can also be used to keep some belts in place during installation.
After the belt is installed, always confirm the belt is in the grooves and re-check that there are no alignment problems. Run the engine for a few seconds before checking.