For techs working on Nissan’s Continuously Variable Transmission (CVT), understanding the subtleties of fluid level maintenance is key to ensuring optimal transmission health and function.
The CVT Fluid Level Quick Check Gauge is a specialized tool designed to facilitate accurate checks and adjustments to the CVT fluid levels within a range of Nissan models. This technical service tip provides a systematic approach to using the CVT Oil Level Quick Check Gauge (J-51155) and the CVT Charge Pipe Cap Release (J-52611), ensuring that your Nissan’s CVT fluid is not only at the proper level but also properly distributed throughout the system for smooth, efficient operation. Follow the detailed steps outlined below to maintain the CVT system in the specified Nissan models, ensuring each vehicle runs at its best.
Models
2013-2018 Altima Sedan
2015-2017 Quest
2016-2019 Maxima
2014-2019 Rogue
2015-2019 Murano
2017-2019 Rogue Sport
2013-2019 Pathfinder
2017-2019 Sentra Turbo
*APPLIED VEHICLES equipped with CVT ONLY
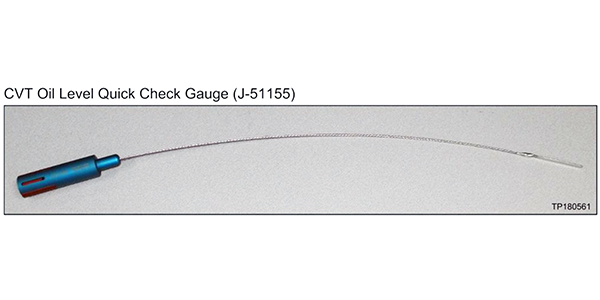
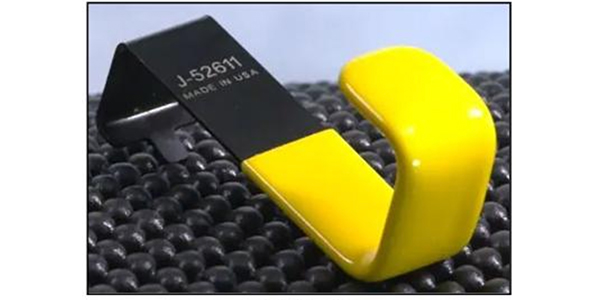
Special tools CVT Oil Level Quick Check Gauge (J-51155) and CVT Charge Pipe Cap Release (J-52611) are now available from Nissan and dealers, Figure 1 and 2. Also, tools can be obtained from Tech-Mate at 1-800-662-2001.
Checking CVT Fluid Level
Steps 1 through 6 will ensure that CVT fluid is properly distributed throughout the transmission. A video on how to use tools is available on nissantechmate.com. Search for J-5261 and then select the Charge Pipe Cap Release Tool.
1. Park the vehicle on level ground (engine running, parking brake set).
2. Using a scan tool, ensure that the CVT fluid operating temperature is within the range of 170°F-180°F (77°C-82°C).
3. Shift the transmission into REVERSE for 5 seconds.
4. Shift the transmission into DRIVE for 5 seconds.
5. Shift the transmission into REVERSE for 5 seconds.
6. Shift the transmission into PARK.
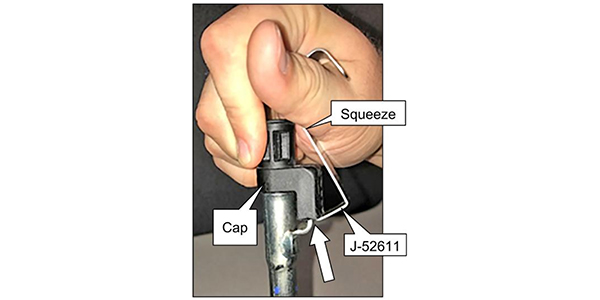
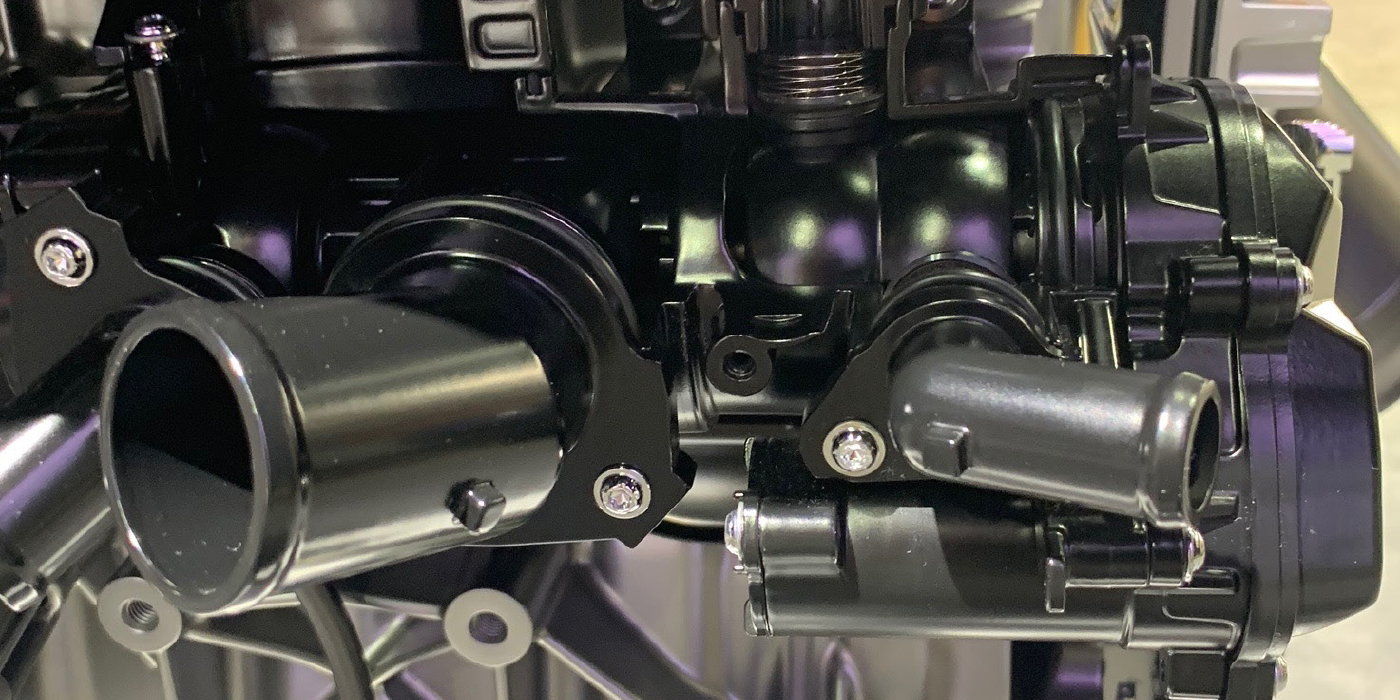
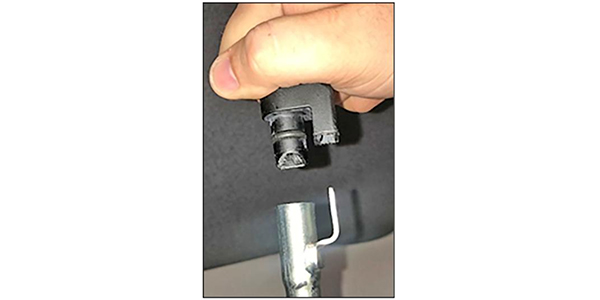
7. Install special tool CVT Charge Pipe Cap Release (J-52611) where shown in Figure 3.
NOTE: The tool shown in Figures 3 and 4 is the same as the one shown in Figure 2, but looks slightly different.
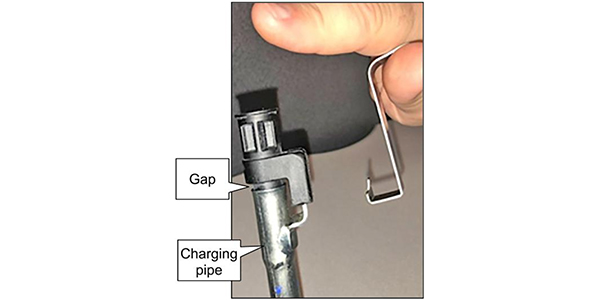
8. Squeeze the tool toward the cap, and then slightly lift the cap (see Figure 3). The cap’s locking tab is unlocked while squeezing. Notice the gap between the cap and charge pipe in Figure 4.
9. Remove tool J-52611 from the cap (see Figure 5).
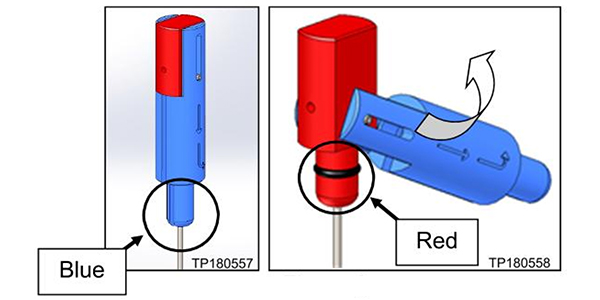
10. Pull to remove the cap from the charging pipe. Tool CVT Oil Level Quick Check Gauge (J-51155) can now be used to determine the CVT fluid level. The handle on tool J-51155 has two positions, red and blue (see Figure 6 and 7). Refer to Table A for the correct position for a given vehicle.
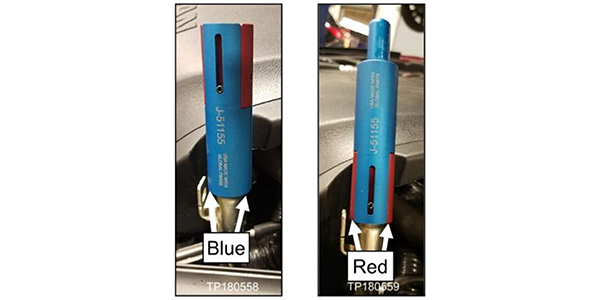
11. With the vehicle in PARK and the engine running, insert tool J-51155 into the pipe. Make sure to use the correct handle position (refer to Table A and Figure 8).
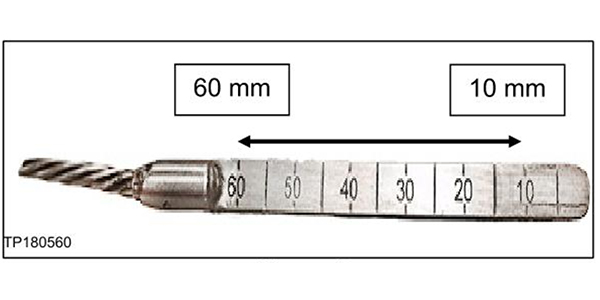
Table A
2013-2018 Altima Sedan (QR25): 23-30mm (blue)
2013-2018 Altima Sedan (V035): 14-22mm (red)
2016-2019 Maxima: 14-22mm (red)
2015-2019 Murano (non-hybrid): 14-22mm (red)
2013-2019 Pathfinder (non-hybrid): 14-22mm (red)
2015-2017 Quest: 14-22mm (red)
2014-2019 Rogue (US. and Japan built) (non-hybrid) : 44-51mm (blue)
2015-2019 Rogue (Korea built) (non-hybrid): 50-57mm (blue)
2017-2019 Rogue Sport: 10-17mm (blue)
2010-2017 Sentra (turbo ONLY) 10-17mm (blue)
12. Inspect tool J-51155 to determine the CVT fluid level in millimeters, and then compare the reading to the specifications in Table A.
Adjust CVT Fluid Level
13. Adjust the fluid level from the bottom of the CVT according to the procedure in the service information.