Compliance Bushings: Honda Pilot Clicking Noise Front Suspension

2009-’10 Honda Pilot Clicking Noise Coming From the Front Suspension During Acceleration or Braking

If a 2009-'10 Honda Pilot owner complains that the vehicle is making one or more clicking noises from the front suspension while accelerating or braking, it could be due to a faulty front suspension rear lower arm bushing bracket. If this is the case, replace both front suspension rear lower arm bushing brackets, and check the wheel alignment.

If a 2009-’10 Honda Pilot owner complains that the vehicle is making one or more clicking noises from the front suspension while accelerating or braking, it could be due to a faulty front suspension rear lower arm bushing bracket. If this is the case, replace both front suspension rear lower arm bushing brackets, and check the wheel alignment.

Parts & Tool Information:

Lower Arm Bushing Bracket Set      P/N 04513-SZA-000

Ball Joint Castle Nut (2)                   P/N 90365-STX-A00

Lower Arm Flange Bolt, 14 mm (4)            P/N 90118-STX-A00

Lower Arm Flange Bolt, 16 mm (2)            P/N 90118-SJC-A00

Ball Joint Remover, 32 mm              T/N 07MAC-SLOA102

Ball Joint Thread Protector, 14 mm            T/N 071AF-S3VA000

Diagnosis:

Listen for one or more clicking noises from the front suspension while accelerating from a moderate stop (between normal and abrupt), or while braking.

– If you hear the noise, go to the Repair Procedure. figure 1
– If you don’t hear the noise, continue with normal troubleshooting.

Repair Procedure:

1. Raise the vehicle on a lift.

2. Remove the front wheels.

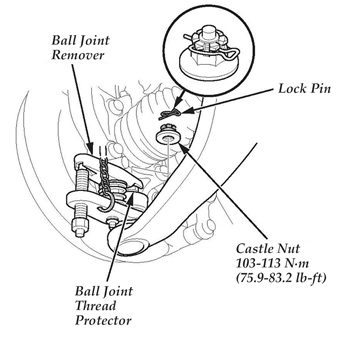
3. Remove the lock pin from the lower arm ball joint, then remove the castle nut. See Fig. 1.

4. Disconnect the lower arm ball joint from the knuckle using the ball joint thread protector and the ball joint remover. figure 2
Note: Be careful not to damage the ball joint boot when installing the remover. Do not force or hammer on the lower arm, or pry between the lower arm and the knuckle. You could damage the ball joint.

5. Remove the mounting bolt from the rear side of the stabilizer bar bushing holder. figure 3
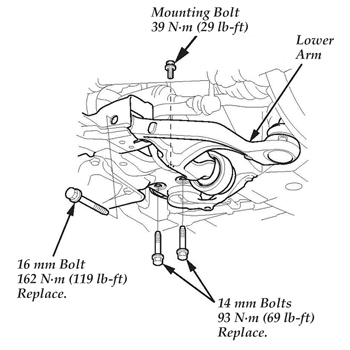
  6. Remove the 14 mm and 16 mm lower arm mounting bolts, then remove the lower arm. See Fig. 2.

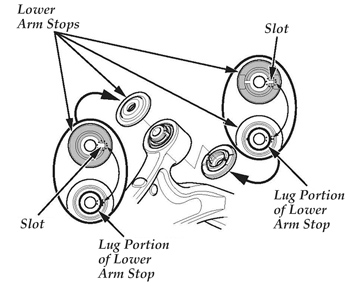
7. Remove the lower arm stops. See Fig. 3. figure 4
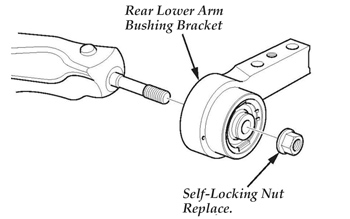
8. Remove the self-locking nut from the rear lower arm bushing, then remove the rear lower arm bushing bracket. See Fig. 4.

9. Install a new bushing bracket on the lower arm, and then align the angle of the lower arm center line and the lower edge line of the bushing bracket as shown in Fig. 5. Figure 5
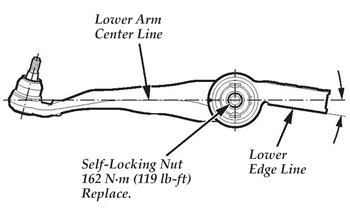
10. Install a new self-locking nut, and then tighten it to 162 Nm (119 lb.-ft.).

11. Install the lower arm stops. See Fig. 3. Note: Align the slot on the lower arm stop with the lug portion on the front side of the lower arm bushing.

12. Install the lower arm with new bolts:

– Lightly tighten the bolts.

– Raise the suspension to load it with the vehicle’s weight before fully tightening the bolts. Do not place the jack against the ball joint on the lower arm.

– Torque the 14 mm bolts to 93 Nm (69 lb.-ft.), and torque the 16 mm bolt to 162 Nm (119 lb.-ft.).

– Install the mounting bolt on the rear side of the stabilizer bar bushing holder, and torque it to 39 Nm (29 lb.-ft.)

13. Degrease the threaded section and the tapered portion of the ball joint pin, the ball joint connecting hold, and the threaded section and mating surfaces of the castle nut. Connect the ball joint to the lower arm, being careful not to damage the ball joint boot when connecting the knuckle.

14. Torque the castle nut to the lower torque specification (103-113 Nm [76-83 lb.-ft.]), then tighten it only far enough to align the slot with the ball joint pinhole. Do not align the castle nut by loosening it. Insert the lock pin.

15. Repeat steps 3 through 14 on the other side of the vehicle.

16. Clean the mating surfaces on the brake discs and the inside of the wheels, then install the front wheels.

17. Check the front wheel alignment, and adjust it, if needed.

Courtesy of Mitchell 1.

You May Also Like

HVAC Sensors: More Than Just Temperature

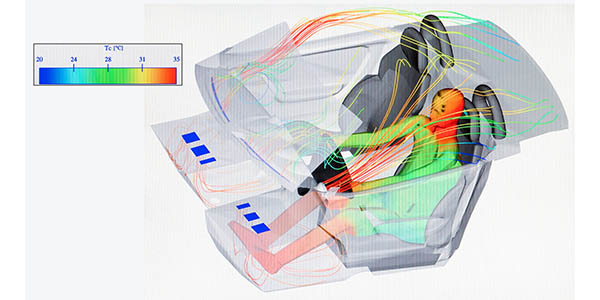
When a driver sets a temperature in the control head of an HVAC system, what does it mean to the vehicle? Seventy-two degrees could mean many different settings depending on the outside temperature, humidity and even the position of the sun.

When a driver sets a temperature in the control head of an HVAC system, what does it mean to the vehicle? Seventy-two degrees could mean many different settings depending on the outside temperature, humidity and even the position of the sun.

When a passenger decides that 70 degrees is a better temperature for their zone, things get even more complicated. Automatic Temperature Control (ATC) systems require a complex array of internal and external sensors that include ambient air temperature sensors, interior temperature sensors, outlet duct and evaporator temperature sensors, pressure sensors, humidity sensors, blend door position sensors and sunload sensors.

Nearly 5,000 To Participate In Auto Value, Bumper To Bumper ‘Festive Walk’ To AAPEX 2018

On Thursday, Nov. 1, nearly 5,000 Auto Value and Bumper to Bumper automotive professionals wearing matching yellow shirts will begin their “festive walk” from the Mirage hotel to AAPEX 2018 at the Sands Expo, temporarily shutting down the busy Las Vegas Boulevard along the way.

Drive Belt Checklist: What Are You Missing?

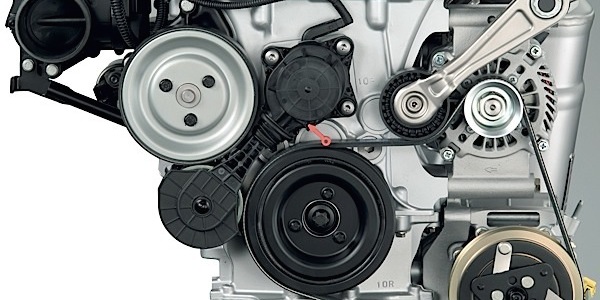
You might have only one chance to sell a customer a new serpentine belt. With belts lasting roughly 90,000 miles, proper inspection at the time of failure is critical not only for selling the belt, but also for ensuring add-on sales and better customer satisfaction.

VIDEO: Using Airflow To Sell Cabin Air Filters

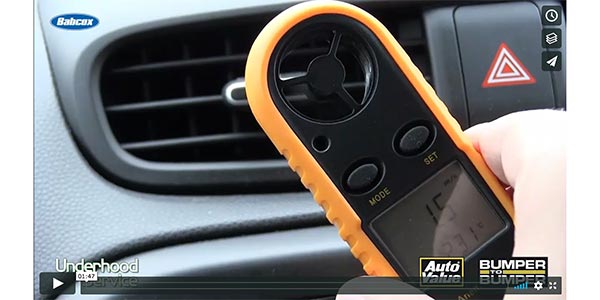
Andrew Markel introduces an inexpensive tool that can assist in selling cabin air filter replacements. Sponsored by Auto Value and Bumper to Bumper.

airflow-selling-cabin-air-filter-video-featured
Air Conditioning Odor Causes

Air conditioning odors typically result from the uncontrolled growth of bacteria and other microorganisms in the evaporator. Research by independent laboratories has found fungi such as Aspergillus, Cladesporium, Penicillium and others growing on cooling coils and other A/C system areas.

ac air conditioning smells featured

Other Posts

Wheel Bearings Components

Follow along to learn what you may encounter when dealing with a Gen 1 wheel bearing. This video is sponsored by The Group Training Academy.

Bolster Your Steering and Suspension with Delphi!

A vehicle’s steering and suspension system is integral to its ride, handling, safety, and must always be up to the job–that’s where Delphi comes in. All Delphi chassis parts undergo rigorous dimension, material, durability, temperature, and performance tests to ensure they meet or exceed OE specifications at every turn. Because Delphi’s debut in steering and

Climate Control Modules

HVAC control modules may fail when the contacts and switches become inoperable. Sponsored by The Group Training Academy.

Paired Ride Control (VIDEO)

It’s always best to replace ride control parts in pairs. Sponsored by GSP North America.