Tech Tip: ECM Replacement Service Procedure for Nissan Vehicles – UnderhoodService

Tech Tip: ECM Replacement Service Procedure for Nissan Vehicles

If you confirm that the Electronic Control Module (ECM) needs to be replaced on a 2000 MY or later Nissan vehicle, or a 1999 MY vehicle Frontier (D22), Quest (V41) or Pathfinder (R50) from VIN JN8AR07**XW350101, complete the actions listed in this Tech Tip.

If you confirm that the Electronic Control Module (ECM) needs to be replaced on a 2000 MY or later Nissan vehicle, or a 1999 MY vehicle Frontier (D22), Quest (V41) or Pathfinder (R50) from VIN JN8AR07**XW350101, complete the following actions.

Caution: Failure to perform all of the work steps in the specified order can cause poor engine running, MIL on or vehicle emission test rejection.

SERVICE PROCEDURE:

Check NATS on the Vehicle
1. Check if the vehicle you’re working on has “ECM based” NATS V2.0 or V5.0.

a. If so, it will not start after you install a service replacement ECM. So you’ll have to re-register all ignition keys, including spare keys with CONSULT-II and the purple NATS card. After you do this, proceed with step 2.
• If you do not know how to re-register the keys, refer to the ESM for the NATS key re-registration procedure.
b. If the vehicle has “BCM based” NATS, you do not have to re-register the ignition or spare keys. Proceed with step 2.

Check for ECM Data Updates in ASIST
2. In ASIST, select CONSULT Utilities >> ECM/TCM Data. Then choose Model and Model Year.

3. Look for ECM Data Updates (listed by ECM P/Ns and vehicle configuration) in the top, center display panel of the ASIST screen.

a. If there are no updates listed for your vehicle configuration, you do not have to reprogram the service replacement ECM. Proceed with step 5.
b. If there are updates listed for your vehicle configuration, see if they apply to the service replacement ECM you’re going to install. Do this by performing step 4.

4. Select the configuration on the screen for the vehicle you’re working on. Then confirm that your ECM is listed in the “Replaces 2371 0-XXXXX, -XXXXX, etc” section in the lower, center “Details” panel of the ASIST screen.

a. If your ECM is listed in the “Details” panel, you must reprogram the ECM with the latest data update. After you do this, proceed with step 5.

Caution: The 1999-2000 Frontier and 1999-2000 Pathfinder have a gray CONSULT connector and a white GST connector. Do not attempt to perform the ECM Reprogramming procedure with CONSULT-II connected to the gray CONSULT connector. See the appropriate engine service manual for further details if necessary.

b. If your ECM is not listed in the “Details” panel, you do not have to reprogram the ECM. Proceed with step 5.

Accelerator Pedal and Throttle Valve
Closed Position Learning

5. Perform as follows:

a. Make sure the accelerator pedal is fully released.
b. Turn the ignition switch “On” for 2 seconds.
c. Turn the ignition switch “Off” for 10 seconds.
d. Turn the ignition switch “On” for 2 seconds, then
e. Turn the ignition switch “Off” again for 10 seconds.
f. Proceed with step 6.

Perform Idle Air Volume Learning (IAVL)
Note: Make sure all electrical loads are turned off, including A/C, defroster, radio, lights, etc. while performing the following procedures. Also, make sure the engine cooling fans are not operating during the following procedures.

6. Perform as follows:

a. Connect CONSULT-II to the vehicle.
b. Warm up the engine and transmission to operating temperature.
c. In the CONSULT WORK SUPPORT mode, select IDLE AIR VOL LEARN.
• If IDLE AIR VOL LEARN is not shown as a SELECT WORK ITEM on CONSULT, the vehicle does not need the procedure.
• In this case only, this bulletin is complete, no further action is needed.
d. Press START on the “IDLE AIR VOL LEARN” screen.
e. Press START on the “WORK SUPPORT” screen to begin the Idle Air Volume Learning (IAVL) procedure.
• The IAVL procedure will take several minutes to complete.
• CONSULT will display “Please Wait” in the center of the screen while the IAVL procedure is in process.
• CONSULT will display “CMPLT” in the top right corner of the screen when the IAVL procedure is finished.

f. Once the IAVL procedure is finished, proceed with step 7.

For 2005 and Later MY Vehicles Only:
7. Enter the VIN into the new service replacement ECM as follows:

a. Select ENGINE on the “Select System” screen.
b. Select WORK SUPPORT on the “Select Diag Mode” screen.
c. Scroll down and select VIN REGISTRATION on the “Select Work Item” screen.
d. Press START on the “VIN Registration” screen.
e. Select INPUT on the “VIN Registration” screen.
f. Enter the entire VIN using the keyboard.

• Use CHNG to switch between the letters and numbers keyboard screens.

g. Once the entire VIN is entered, select ENTER on the keyboard screen.
h. Select INPUT on the “VIN Registration” screen and enter the entire VIN again. Then hit ENTER.

• You must enter the VIN a second time for confirmation purposes.

i. Select START on the “VIN Registration” screen to complete the VIN registration process.
j. Turn off the ignition switch and wait at least 10 seconds.

Courtesy of Identifix.

For additional information, visit www.identifix.com.

You May Also Like

Check Out The December Issue Of Underhood Service Magazine

The digital version of the December issue of Underhood Service is available on-line. Access the easy-to-view digital version that features articles on Spark Plug Service, Hyundai Oxygen Sensor Codes, CAN Bus Diagnostics, Subaru Stretch Belt Replacement, a host of Tech Tips, and more!

The digital version of the December issue of Underhood Service is available on-line.

CLICK HERE to access the easy-to-view digital version that features articles on Spark Plug Service, Hyundai Oxygen Sensor Codes, CAN Bus Diagnostics, Subaru Stretch Belt Replacement, a host of Tech Tips, and more!

Transmission Line Replacement

Transmission fluid likes to be at a constant temperature. If it is too hot or too cold for too long, the performance can fluctuate and potentially cause damage to the transmission.

VIDEO: AAPEX 2016 Insights

Andrew Markel discusses his take on conversations he had with economists at AAPEX 2016, including the future of purchasing parts.

BMW Tech Tip: Oil Separator Replacement

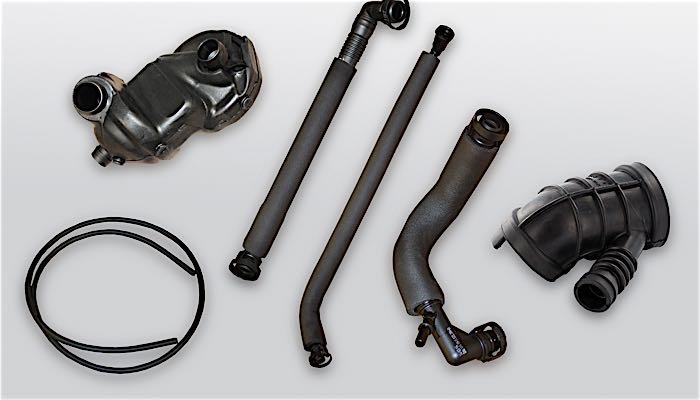
A clogged oil separator valve is a common problem on many BMW DOHC inline sixes. The high failure rate is caused by sludge build-up that can result in oil burning, rough idle and engine fault codes. Although the solution is pretty simple, replacing the valve is labor intensive and can take anywhere from six to nine hours.

New IDUSA Premium Guard Website Offers Easy Access To Wide Range Of Oil, Air, Cabin, Fuel And Transmission Filters

The new website’s bi-lingual, responsive design features look-up powered by ShowMeTheParts.

Other Posts

VIDEO: How To Deal With Air Conditioning Smells

Andrew Markel discusses what to do to get rid of A/C smells after customers have tried to do it themselves.

Oil Bath Air Filters

Long before people started using cotton gauze air filters soaked in oil, the oil bath air filter was the dominant filter on the market. The filter removes debris in the air by running it over oil and a mesh element. These filters worked great when most roads were dirt, but they could be messy to clean.

On The Web – September 2016

Finding Failing O2 Sensors If an O2 sensor gets “lazy” because of old age or contamination, the computer may not be able to adjust the fuel mixture quickly enough as the engine’s operating conditions change. Related Articles – Join Underhood Service On LinkedIn – Honda Tech Tip: Oil Pressure Switch Fails Intermittently – Fuel Trim

Join Underhood Service On LinkedIn

Related Articles – Check Out The August Issue Of Underhood Service Magazine – Hayden Automotive Introduces Low-Profile Fan Clutch – Belt Inspection Checklist                     Underhood Service’s LinkedIn Page                         Underhood Service’s LinkedIn Group