By Larry Carley
Technical Editor
Brake work is fairly routine for most technicians. Even so, it’s easy to overlook some obvious problems with the hydraulic part of the system when replacing pads and rotors. So, following are some things you should always remember to check.
CHECK THE FLUID LEVEL
If the fluid level in the master cylinder is low, it means one of two things: either the brakes are worn causing a drop in the level, or there’s a leak somewhere in the hydraulic system. If a low fluid level is accompanied by a brake pull to one side, a low or spongy feeling (soft) pedal, and/or the red BRAKE warning light comes on when the brakes are applied, there is likely a leak somewhere.
Check the master cylinder, calipers, rear wheel cylinders, and all brake lines and hoses for wet spots or drips. Any leaks in these key hydraulic components must be addressed before going any farther.
If the fluid level is low, but you can’t see any obvious leaks, the fluid could be going one of two places. There could be a leak in a “hidden” steel brake line, such as one that runs inside the chassis under the back seat, or through the trunk or a rocker panel. Or the fluid could be disappearing into the engine through a leaky power brake vacuum booster. The presence of brake fluid inside the brake booster vacuum hose means the diaphragm is leaking and allowing fluid to be siphoned out of the system. In this case, the booster needs to be replaced.
CHECK THE HOSES
In addition to checking the brake hoses for leaks, the hoses need to be carefully inspected for bulges or swelling that would indicate internal damage or deterioration. One way to check for such problems is to have a helper depress the brake pedal while you watch each hose. Make sure your helper presses down hard on the pedal so you get a lot of pressure in the lines.
If a bubble or blister appears on a hose when pressure is applied, or if the hose appears to swell, it must be replaced. Rubber brake hoses have an inner lining that should not expand under pressure. When the inner liner fails, fluid will escape to the outer liner causing a bubble or blister to appear. And, sooner or later, the hose will leak or burst causing a loss of hydraulic pressure in that brake circuit.
Rubber hoses deteriorate with age, becoming hard and brittle. This leads to loss of flexibility, cracking, splitting and bulging. Because of this, brake hoses that are more than seven to 10 years old may need to be replaced. Hoses that are more than 14 years old are probably an accident waiting to happen.
Hoses are also vulnerable to road damage and can be damaged by chaffing, rubbing, pulling and over extension. If you find a damaged hose, check the hose supports or clips to determine why the hose is rubbing against the wheel or chassis. If the hose looks as if it was recently replaced, the hose may have been too long for the application.
Replacement hoses must be the same length as the original. A hose that’s too long (even by only a couple of inches) may chafe or be caught in the suspension. A hose that’s too short may be pulled tight and break when turning the front wheels or hitting a bump.
When a hose is installed, new copper gaskets must be used if the couplings require them. The male end of the hose is usually attached first, and the female end last. The hose must not be twisted during installation (drawing a straight line on it helps) and it must be properly supported.
CHECK THE STEEL BRAKE LINES
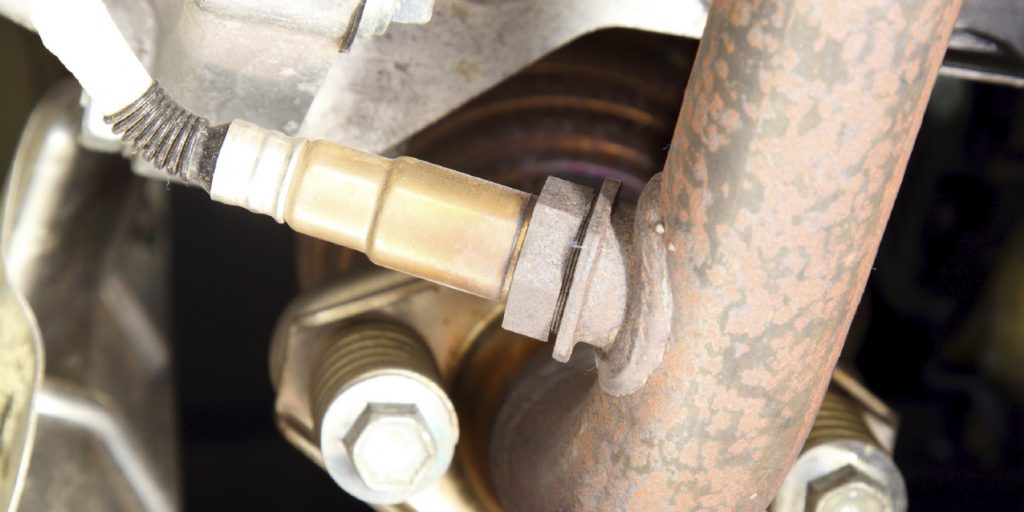
Steel brake lines also need to be checked for leaks, especially around inline connections. They also need to be inspected for dents, kinks, loose or missing clips, and corrosion.
Steel brake lines are vulnerable to both internal and external rust. After 10 to 12 years, brake lines that are exposed to road salt and moisture can often rust through. Brake fluid is “hygroscopic,” meaning it absorbs moisture from the air through microscopic pores in the rubber hoses and seals. Moisture also enters the system every time the master cylinder fluid reservoir is opened.
After a year and a half, the brake fluid in an average car contains about two to three percent water. As the contaminated fluid moves through the lines, the moisture is distributed inside the brake lines, calipers and wheel cylinders where it combines with oxygen to cause internal corrosion. If nobody has ever changed the brake fluid, the lines may be rotting from the inside out.
External rust can also be a problem on brake lines that are routed inside the vehicle if water leaks allow water to puddle around the lines. Water leaking around the rear and side windows, or from the rear wheel housings can wet the lines and cause them to rust.
If a steel brake line has to be replaced, double-walled welded steel tubing must be used because of the high pressures the line must withstand.
Under no circumstances should copper tubing or single-wall steel tubing be used. Replacement lines must also be the same size as the original. A larger or smaller diameter line may alter brake balance, upsetting the braking characteristics of the vehicle. Tubing diameters are commonly 3/16-in. (4.8 mm), 1/4-in. (6.4 mm) and 5/16-in. (7.9 mm).
The ends of the steel brake lines are either double flared or use an ISO (International Standards Organization) flare. The ISO flare is designed to deform when the fitting is tightened which creates a more uniform seal and lessens the danger of overtightening. One type of flare is not interchangeable with another, so the replacement line must have the same type of flare as the original.
Many replacement brake lines come with preformed ends. But on those that don’t, a flaring tool must be used to form the appropriate flare (remember to slip the fittings on the line before forming the end). Also, if the old line has “armor” around it (a spring-like sheath), the armor should be installed on the replacement line to protect it against road damage and to help dissipate heat.
Replacement steel lines should be routed along the same path as the original. If a line passes through sheet metal, it should be protected against chaffing with a rubber or plastic grommet. Brake lines must also be located away from the exhaust system because heat can make the fluid boil (which can lead to brake fade).
CHECK THE CALIPERS & WHEEL CYLINDERS, TOO
To save money, the calipers and wheel cylinders may not be rebuilt or replaced when changing pads on a low-mileage vehicle that shows no signs of leakage. Why fix it if it isn’t broken? But most brake experts say it’s a good idea to rebuild or replace the calipers and wheel cylinders regardless of the age or mileage. Here’s why. You don’t know how long it will be before the brakes are serviced again. Will the calipers and wheel cylinders go another 40,000 to 60,000 miles without sticking or leaking? There’s no way to know.
Any vehicle that’s more than six years old or that has more than 60,000 miles on the original calipers and wheel cylinders should probably have the calipers and wheel cylinders rebuilt or replaced. If the vehicle is on its second brake job, and nothing has been done to the hydraulics, it would certainly need these parts rebuilt or replaced.
Internal corrosion in the caliper bores and on steel pistons acts like an abrasive against the piston seals. Every time the brakes are applied, the seals scrub across a rough surface. Eventually the seal wears out and the caliper or wheel cylinder starts to leak.
Rebuilding the calipers and wheel cylinders when the brakes are being relined can prevent the need for additional brake work down the road, and may actually save your customer money in the long run. If you don’t redo these parts and they start to leak, brake fluid can contaminate and ruin the new linings you just installed. The brakes will have to be redone, and probably at your expense!
Another reason for rebuilding or replacing calipers is because piston travel changes as the pads wear. As the pads become thinner, the piston moves farther and farther out in the caliper bore. The same is true for the wheel cylinders in the back as the shoes wear down. This may cause the piston seal to rub over an exposed area in the bore that may be rough and corroded.
When the piston is shoved back in to accommodate new, thicker pads (or shoes in the rear), any dirt or corrosion on the piston will be forced under the seal. And if the exposed surface of the piston has become rough, it won’t be long before the seal starts to leak.
Piston seals also lose elasticity with age and exposure to heat. On disc brakes, the elasticity of the seal is what pulls the piston back when the brakes are released. Old, hard seals that are stiff and don’t flex much may not pull the pistons back, causing the pads to drag against the rotors. This can reduce fuel economy and may even cause the brakes to pull to one side.
CALIPER REPAIRS
Most technicians don’t rebuild calipers anymore because it’s faster and easier to replace the old caliper with a new or remanufactured caliper. Besides, many calipers are unrebuildable with a simple kit because the bore is too badly worn or corroded.
When a cal-iper is removed, the caliper mounting hardware should be carefully inspected for wear, corrosion, damage or other problems. Close attention should be paid to the condition of the pins or slides on floating calipers. If the inner brake pad is worn more than the outer pad, it’s a good indication the caliper is not sliding back and forth to center itself over the rotor.
The caliper casting needs to be inspected for broken ears, elongated or worn guide pin or mounting holes, cracks in the casting, porosity leaks or worn mounting surfaces — any of which is grounds for replacement.
If the caliper casting is fine, and you want to rebuild it, pay close attention to the condition of the piston bore once you get the piston out. Most bores will show signs of corrosion and pitting. If the surface is not too rough, you can clean it up by lightly sanding it with a fine grade of crocus cloth. The bore should be lubricated with brake fluid and polished with a circular motion to smooth out minor imperfections.
Honing can also be used to restore a more badly worn or corroded caliper. But if the bore can’t be restored to within about 0.002-in. of its original dimensions, the caliper will have to be replaced.
Aluminum calipers should not be rebuilt. The aluminum bore has an anodized surface, and once the protective surface layer has worn away, it can corrode very quickly. Attempting to polish such a surface only succeeds in destroying any of the protective anodized layer that still remains. Aluminum calipers can be salvaged by sleeving, but that’s a job for an aftermarket brake rebuilder.
Under no circumstances should anything other than brake cleaner or brake fluid be used to clean caliper bores or pistons (the same caution applies to wheel cylinders, too). Petroleum or mineral based solvents can leave a residue that will attack and damage the rubber piston seal.
PISTON INSPECTION
Like the bore, the piston(s) must be smooth and corrosion free. Corrosion is not a problem with phenolic pistons, but it is with steel and aluminum pistons. Some discoloration on a steel piston is considered normal, but if it’s rusted, pitted or damaged in any way, it must be replaced. Phenolic pistons need to be checked for cracks, nicks or chips. Replace the piston if it has any damage on the sealing surface. Cosmetic damage on the front of the piston won’t make any difference as long as it doesn’t cause a problem with the brake pad.
Sandpaper or any other abrasive should never be used on a steel piston in an attempt to smooth it. Most steel pistons are nickel- or chrome-plated to protect against corrosion. Sanding the piston can damage this protective barrier.
If a piston has to be replaced, the best advice is to replace same with same. In other words, if the caliper has a phenolic piston as original equipment, then replace it with the same. Likewise, replace steel pistons with steel.
The pistons should also be the same material on both sides of the vehicle. If a remanufactured caliper is being installed on one side of the vehicle, it should have the same type of piston as the original caliper on the opposite side. A difference can sometimes result in a brake pull to one side.
MASTER CYLINDER
Like calipers and wheel cylinders, master cylinders also wear out over time. Because the master cylinder is at the top of the system, sediment and rust are less likely to settle inside it (unless dirt or other contaminants enter the fluid reservoir). Problems that would call for a new master cylinder include any internal or external leakage.
A classic symptom of a bad master cylinder is a brake pedal that gradually sinks to the floor when the brakes are applied at a stoplight.
Master cylinders can be difficult to rebuild, and rebuilding aluminum master cylinders is not recommended because the bore is anodized. Honing or sanding the bore removes this protective, wear-resistant coating.
Installation can sometimes be tricky, especially with those that are mounted at an angle. Air becomes trapped in the high end of the cylinder, making it impossible to bleed once it’s in the car. So a tip here is to bench bleed the master cylinder before installing it in the vehicle.
BLEED THE SYSTEM
When any hydraulic component has been replaced, the entire brake system should be bled to remove air bubbles that can cause a soft pedal. Follow the bleeding sequence recommended by the vehicle manufacturer. On vehicles with ABS brakes, special bleeding procedures (some of which may require cycling the ABS solenoids with a scan tool) may be required to get all of the air out of the system.