One reason why alternators have a high failure rate is because they’re always working under a load. Generating electricity to recharge the battery, run the fuel pump, injectors and ignition system while powering all of the vehicle’s lights and electrical accessories places a substantial load on the alternator that generates a lot of internal heat. This can burn out the diodes in the back of the alternator that convert alternating current (AC) to direct current (DC)—especially in vehicles that spend a lot of time idling with high electrical loads. Heat can also damage the rotor and stator windings, brush connections and wiring leads.
Most alternators fail electronically long before they wear out mechanically. Even so, the shaft bushings and brushes are wear items that don’t last forever. These parts can be ruined if the alternator is mounted low on the engine and is subjected to road splash that contains salt water or debris.
Failure symptoms
If the charging system fails for any reason or does not produce enough power to meet all of the vehicle’s electrical demands, the battery quickly runs down. Once battery voltage drops below a certain threshold, the onboard electronics, ignition and fuel systems may stop working normally or cause the engine to stall. A low battery also may not have enough reserve power to crank the engine, so the vehicle can be stranded until the charging problem can be diagnosed and repaired. Charging problems can be caused by electrical faults in the alternator or voltage regulator, poor wiring connections at the battery or alternator, or a slipping or broken drive belt. Since most late-model import alternators are internally regulated, a failure of the regulator means the alternator must also be replaced. In cases where the powertrain control module (PCM) controls voltage regulation, a problem in the voltage regulation circuit means the PCM will have to be replaced.
Voltage, current checks
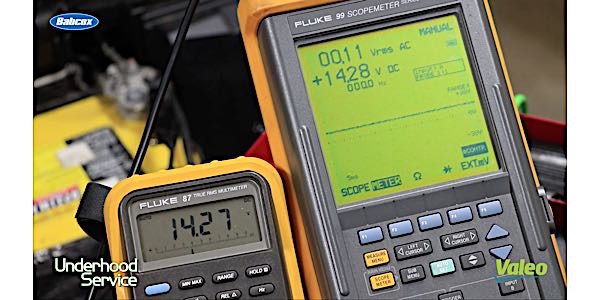
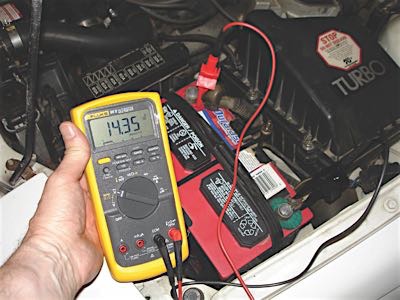
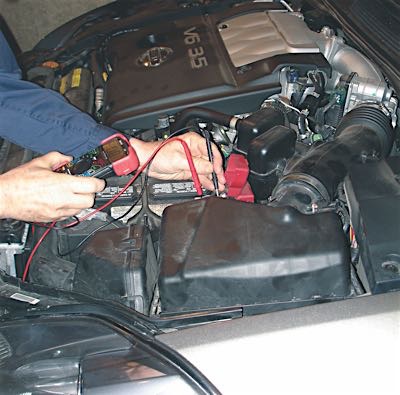
The actual output voltage produced by the alternator will vary depending on temperature and load, and will usually be about 1.5 to 2 volts higher than battery voltage. At idle, most charging systems produce 13.8 to 15.3 volts with no lights or accessories on. You can check the charging voltage by touching the test leads of a DVOM to the positive and negative battery terminals. If the DVOM is not auto ranging, set the scale to 20 volts and select DC. Then, take your reading with the engine idling.
Here’s another check few technicians do, but it’s one that can easily detect bad diodes in an alternator. Switch your DVOM to AC and check the voltage again. If all of the diodes are doing their job, there should be no AC voltage reading at the battery. If you get a voltage reading, it means one or more diodes are leaking and the alternator needs to be replaced. Leaking or shorted diodes can often cause a visible fluctuation in the output voltage of the charging system. Bad diodes can also allow current to leak from the battery back through the alternator to ground, causing the battery to run down overnight. The normal key-off current drain on a battery may be as high as 300 to 400 milliamps right after the engine is shut off. But as a rule, the key-off current drain should usually be less than 50 milliamps one hour after the engine has been shut off and left undisturbed. Once all the modules go to sleep, the current drain drops significantly. Always refer to the vehicle manufacturer’s key-off electrical drain specifications if they’re available.
Diodes usually fail as a result of overheating or overloading. But they may also be damaged by a short in the charging light indicator circuit or by a poor connection between the alternator output terminal (B+) and the battery positive terminal. If a vehicle has a history of repeat alternator failures, one of these may be the cause.
The alternator’s current output (the number of amps it produces) should also be tested. Current typically increases in proportion to the electrical load on the charging system and engine speed. But the PCM may alter the curve depending on what kind of charging strategy has been programmed into it. The PCM may boost the charging current at low rpm when loads are high, or reduce charging output to smooth idle quality or temporarily reduce the charging voltage to maximize engine power when accelerating at full throttle.
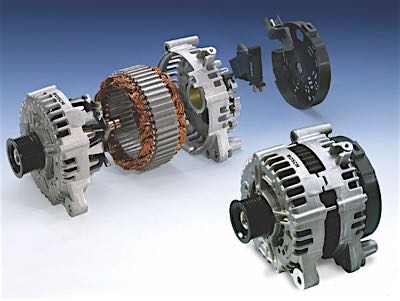
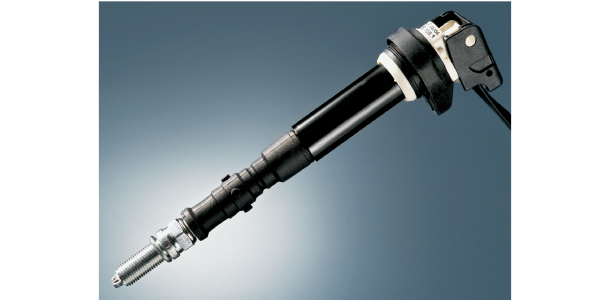
alternator are not the mechanical components, but the diodes in the rectifier. Photo Courtesy of Robert Bosch Corp.
Misdiagnosis
If the charging voltage is low, or the alternator isn’t putting out enough current to keep up with the electrical loads that are placed upon it, don’t automatically assume the alternator is bad and needs to be replaced (unless you’re bench testing the unit out of the vehicle). Many times, an alternator is not working properly because of poor electrical connections in the charging circuit.
Loose or corroded connections on the back of the unit can increase resistance and restrict the current flowing through the circuit. So can broken or frayed wires inside a connector or the alternator wiring harness. The connectors and wires may appear to be OK visually, but unless you actually test them, you have no way of knowing if they’re making good electrical contact and are clean, tight and undamaged.
If the wires and connectors are not checked, you may replace the alternator only to discover the new unit you just installed is “no good.” Now you get to replace it again and, on some vehicles where the alternator is buried under a lot of other stuff, that can result in a lot of lost time and labor.
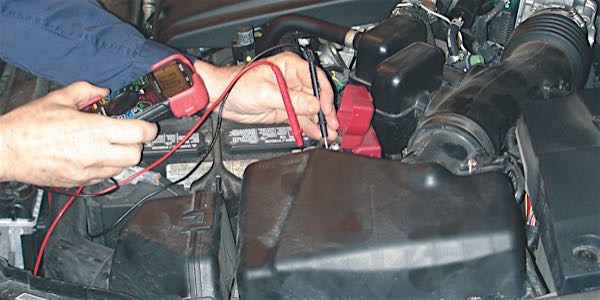
You can do this test by using your voltmeter to perform “voltage drop” checks across the connections when the engine is running. A voltage drop test is done by setting the voltmeter on the 2-volt scale, then touching the positive and negative test leads on opposite sides of a connection. If there is resistance in the connection, some of the voltage will try to bypass the resistance by flowing through the voltmeter. If you see a reading of more than 0.2 volts, it means trouble. Ideally, the voltage drop across any connection should be zero, or less than 0.1 volts.
Check for voltage drops at the positive and negative battery cable connections, the alternator BAT+ power connection and the engine ground strap(s). Poor ground connections are an often-overlooked cause of low charging output and alternator failure. Voltage drops on the positive side of the charging circuit can cause undercharging. Voltage drops on the negative side can cause overcharging.
When a new alternator is installed, check the battery voltage and use a battery charger to bring the battery up to full charge before you return the vehicle to your customer. Also, start the engine and use your DVOM to check the charging output of the alternator. Don’t assume everything is working OK just because you bolted in a new alternator.