More and more vehicles are being equipped with pressed-in wheel bearings. Servicing these bearings requires a little bit more finesse and tools when compared to hub units or tapered roller bearings. With the right tools and information, these jobs can be moneymakers.
The driver of this 2002 Jaguar was complaining of noise, ABS MIL light was illuminated and the speedometer was inoperative. The noise was confirmed on the test drive and was isolated with the vehicle in gear running on the lift. This bearing and knuckle design is used on Ford, Mazda and Volvo. Using a scan tool, no data was coming from the wheel speed sensor. This wheel speed sensor is used by the ECM to drive the speedometer.
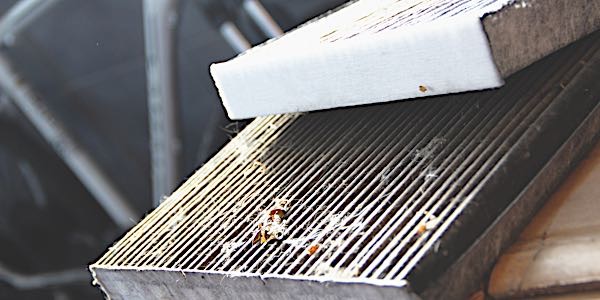
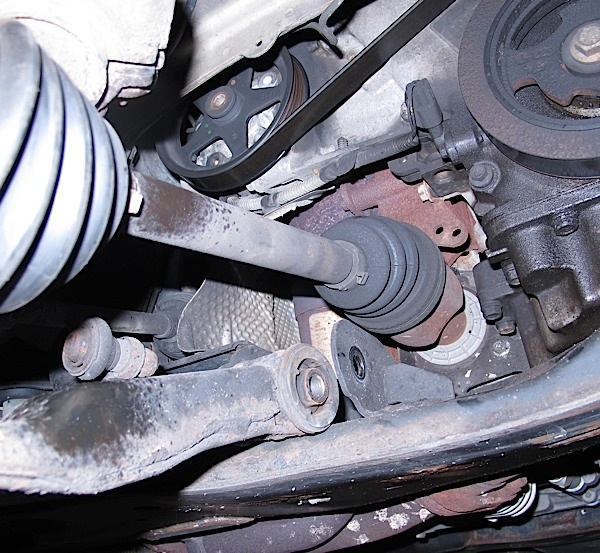
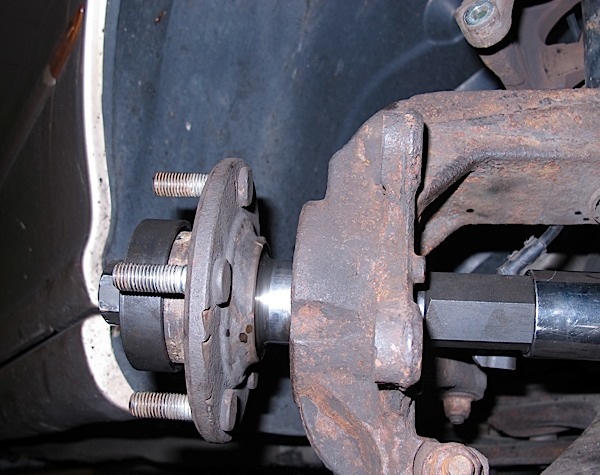
As a rule, there should be no perceptible play in the wheel bearing. On this vehicle (Photo 1), there was no endplay, but the bearing was very noisy.
Removing the axle nut should be performed while the brake caliper bracket is still on the vehicle. Lock the rotor into place with a punch in the fins of the rotor. On vehicles with solid rotors, remove the nut while the vehicle is on the ground with the wheel on the vehicle. Do not use an impact wrench. Damage can occur to the CV joint or differential.
Remove the caliper bracket and rotor. Inspect the wheel flange for damage and any signs of distortion. A damaged flange can cause runout and ultimately a pulsation complaint.
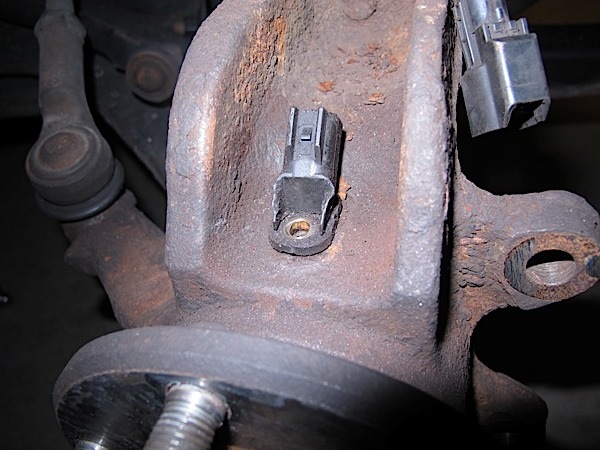
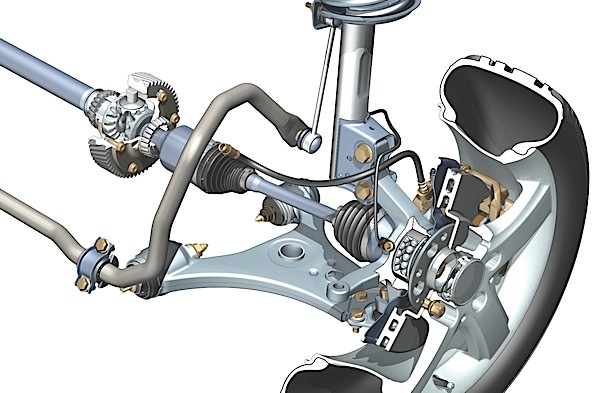
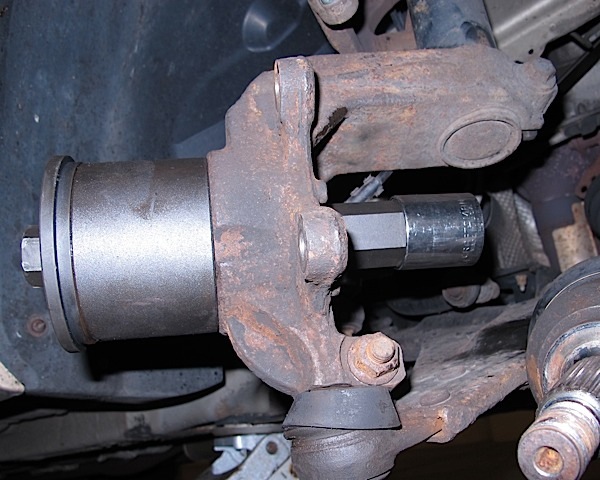
On most late-model vehicles, active wheel speed sensors are mounted in the knuckle (Photo 2). Active sensors have two wires and the relator wheel is part of the rear seal or the bearing. An easy way to identify this type of sensor is the flat blade of the head.
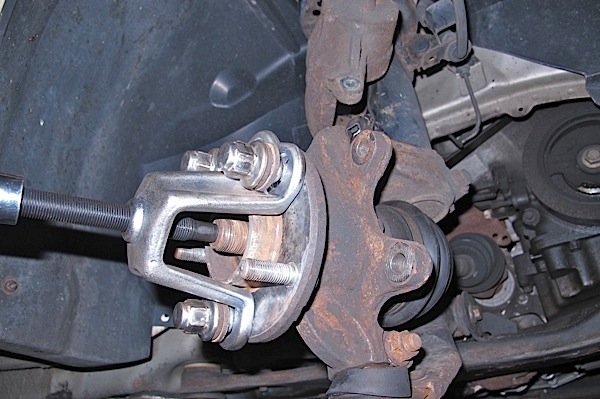
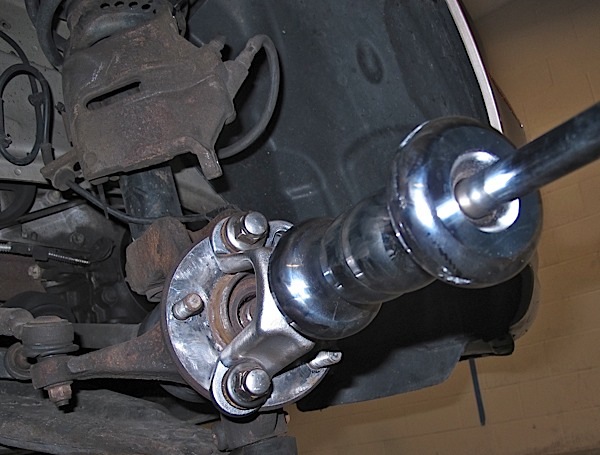
Push the CV joint out of the stub axle with a forcing screw (Photo 3). Using a hammer can damage the threads on the axle. Once the CV joint is free in the splines, use a slide hammer to pull the stub axle from the knuckle (Photo 4).
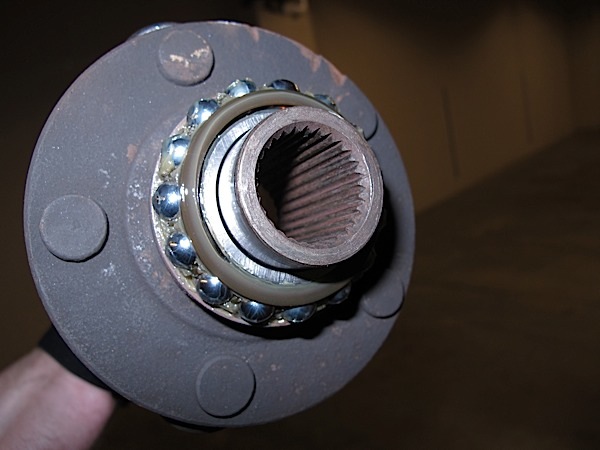
The stub axle will typically come out with the outer seal, race, bearings and carrier (Photo 5).
If equipped, remove any C-clips in the bore.
On this vehicle, the bearing will be removed and a new bearing installed while on the vehicle. Tool kits to perform this type of work are available on most tool trucks and online. They can save time by not having to remove the knuckle from the vehicle. This can save an alignment or making a trip to the press. Most instructions tell users to detach the knuckle at the ball joint. In most cases, this allows the knuckle enough swing to be able to remove the CV axle. But, there is an easier way for some vehicles.
On this vehicle, removing the bolt that holds the front of the control arm allows enough clearance to pull the axle free (Photo 6). This can eliminate damage to the ball joint boot.
Set up the tool so the rear adapter makes contact with the inside part of the bearing and on the other side should be a cup the old bearing will fall into (Photo 7). Lubricate the bolt of the tool before using. I recommend a few drops of 80w-90 gear lube. Do not use lightweight lubricant.
Once the bearing is removed, inspect the bore of the knuckle for damage. The bore should be free from corrosion.
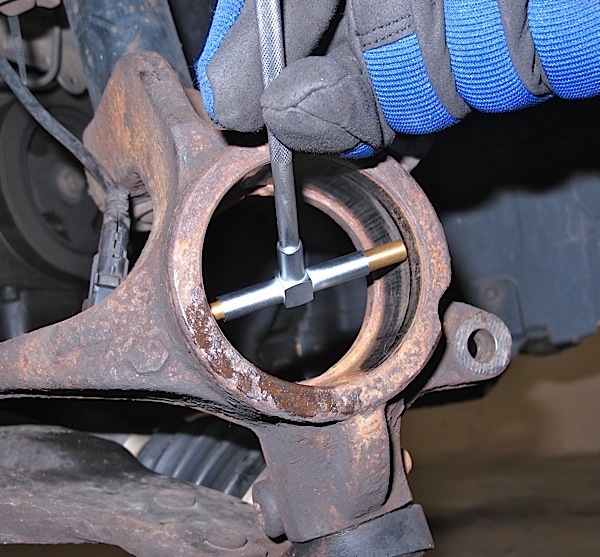
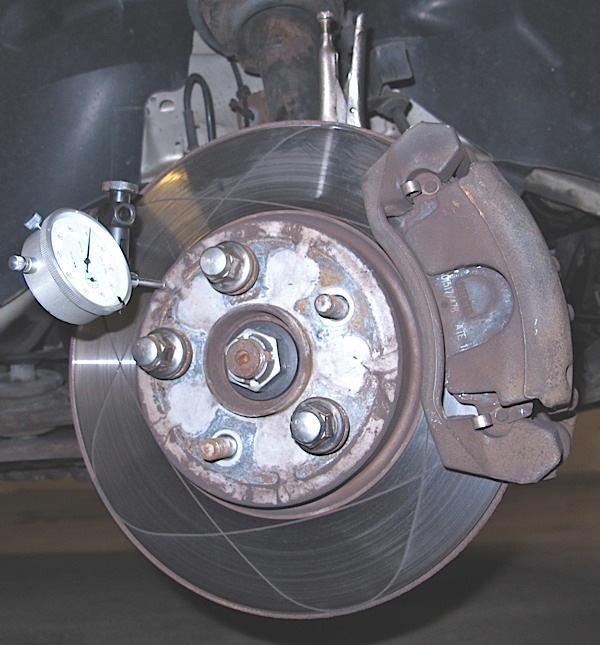
Check the bore for roundness using a snap bore gauge (Photo 8). The gauge should rotate in the bore easily. Any distortion in the bore can cause a new bearing to fail prematurely.
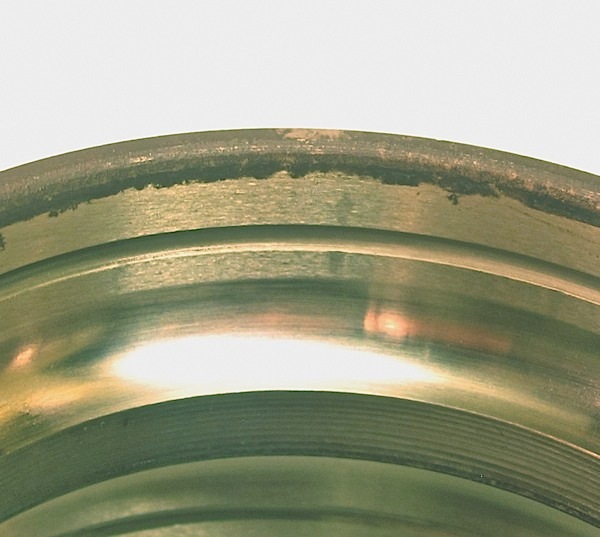
When pressing in the new bearing, make sure the adapter does not come in contact with the seal (Photo 9). Make sure the seal with the tone ring is facing inwards. It is recommended that an impact is not used for this part of the repair.
The stub axle and flange can be installed in a variety of ways. Using a forcing screw can do the least amount of damage if the inner race is supported (Photo 10). Some technicians swear by freezing the flange in a freezer or with dry ice. The stub axle should not be seated fully. The final position of the stub axle should be set when the axle nut is tightened and the final pre-load is applied.
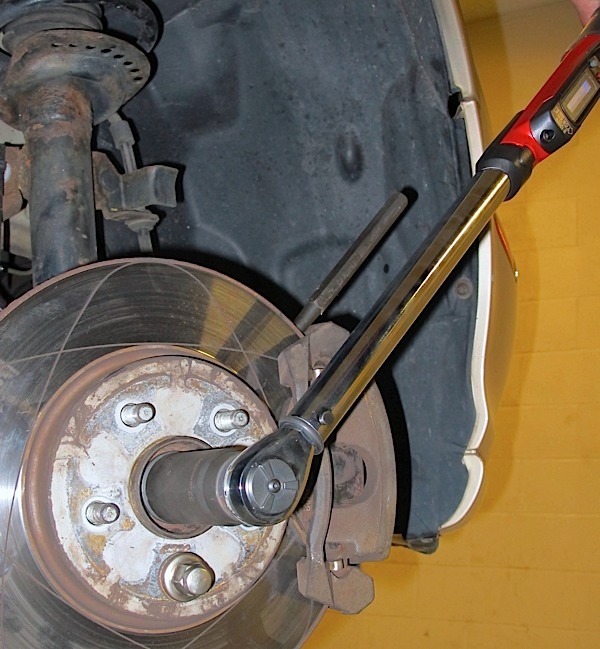
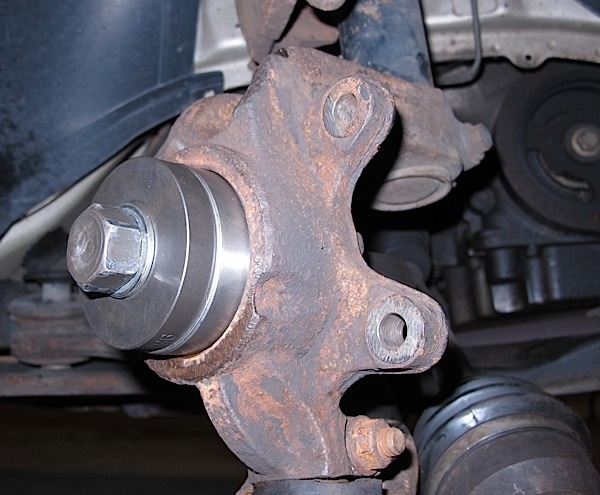
Don’t reuse the old hub nut on the axle if possible. Install a new one and torque to bearing or OEM’s specifications (Photo 11). It is nearly impossible to give a general torque specification for a locking nut. There can be large differences depending on bearing type and housing.
What Failed?
The reason why this bearing failed is two-fold. First, there was a significant impact the caused the balls to make a mark in the outer race. When a vehicle hits a curb, pothole or other object in its path the force is transferred to the small surface area of the bearing. The impact may cause damage to the races and the rollers/balls. This damage is called brinelling.

Brinell marks may cause the bearing to make noise immediately or it may not. But, as the marks keep rotating, it is damaging the entire bearing. If the impact is great enough, the pre-load on the bearing can change. This can lead to more damage and noise.
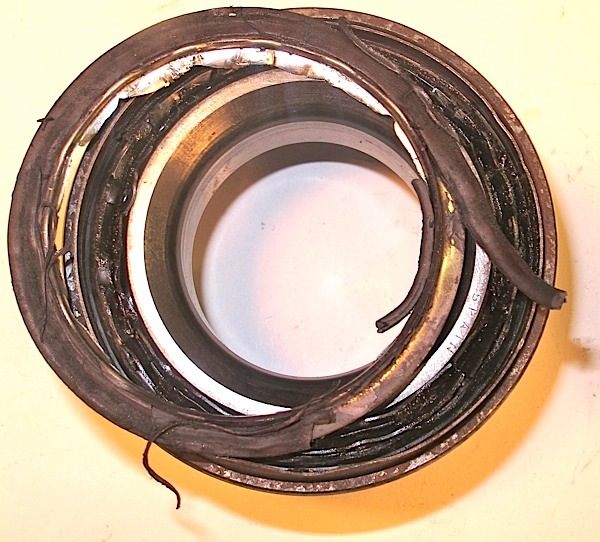
On this bearing, it is obvious the pre-load was destroyed by the condition to the seals (Photo 12). On the inner seal, the balls impacted the seal. The reluctor ring on the outer seal shows signs of heat damage (Photo 13). When the ring separated from the rubber material, the wheel speed sensor stopped working. The tone ring is magnetic and can be detected using a card that detects the permanent magnets in the seal.