and below the intake manifold. When this unit fails, it tends to look like the head gaskets are blown. The oil mixes with the coolant and so on, leading to catastrophic engine bearing failure. Saab recommends flushing the cooling system with Shout, a cleaning agent found in many stores.
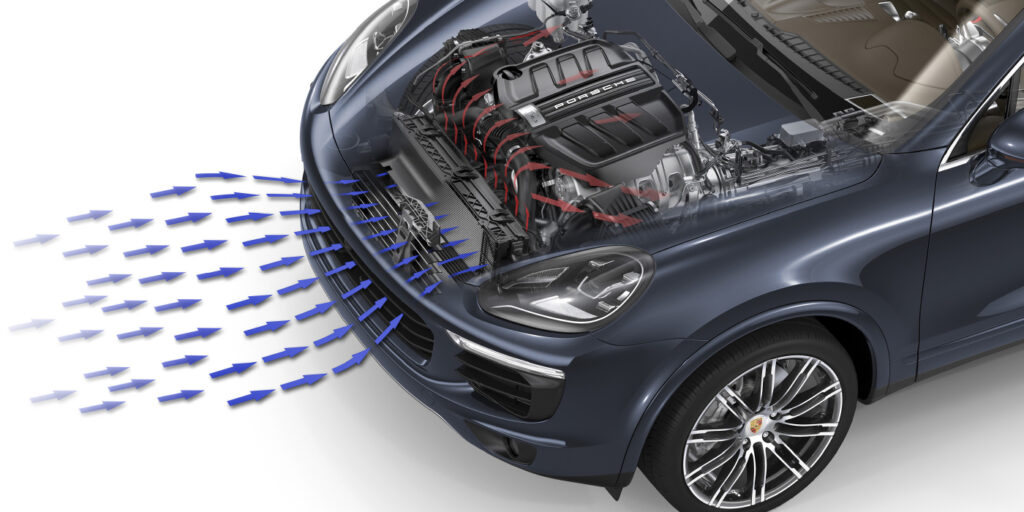
Saab also recommends changing the timing belt every 35,000 miles on the 2.5 L engine and 60,000 on the 3.0 L engine. The timing belt turns four camshafts and runs well in all different climates and high temperatures. Saab utilizes a thick, rubber belt that is tough and durable and made of very strong materials called Highly Saturated Nitrile (HSN). This construction has a very high tensile cord configuration that minimizes stretch and is combined with a tough wear-resistant fabric on the drive tooth area. Timing belts often fail from the inside out, making visual inspections somewhat unreliable. After all, there is no warning before a timing belt fails. The engine just stops, leaving the customer stranded and saddled with a huge repair bill. The engine is an interference design by which the valves will contact the pistons, resulting in catastrophic failure and requiring a major engine teardown.
 Most of the time when a customer comes in for service and repairs, we check the timing belt to see if it needs to be replaced, in an attempt to catch it before any major problems occur. Some shops tend not to tag the timing cover, so there’s really no way to find out at what mileage and date the timing belt was changed. In our repair shop, we tag the cover with a sticker that I had imprinted with our logo for future reference. After the timing belt replacement information is recorded, the sticker is covered with a clear tape so the markings are readable for long periods of time. See Fig. 1.
Some technicians tend to shy away from performing a timing belt replacement because of a lack of knowledge and fear of damaging the engine. But it’s like any other challenge — after performing the job a few times, using the factory tools and instructions, techs can breeze through the job without any complications.
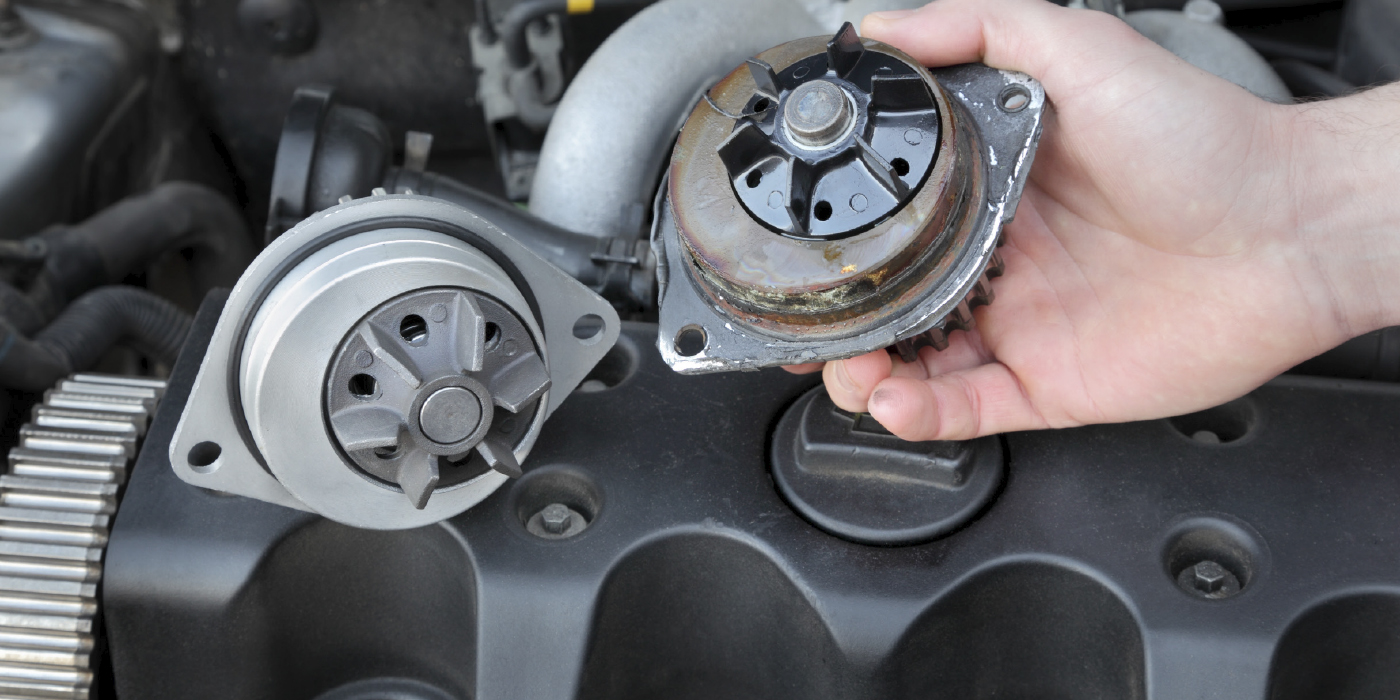
 The belt pulleys and tensioner play a very important role and should be replaced when the timing belt is replaced. The sealed bearings riding the pulleys might look and feel good, but you would be taking a gamble if you don’t also replace them. Cutting corners here is not a good practice.
The timing cover seal should be checked for weakness since it could be pulled in the belt area and cause major problems. Saab came out with an updated cover for the 2.5 L engine to prevent this situation.
Any time the serpentine belt appears to be shredded, it’s a good practice to remove the timing belt cover. Over a period of time, I’ve seen some of the serpentine belt material appear as long strings that get tangled in this area by sneaking behind the water pump pulley.
 It happened to me just last week! We replaced a serpentine belt and pulleys. A few days later, the customer was complaining about erratic idle and loss of power, but no check engine light or fault codes were present. I had a hunch and removed the timing belt cover and pulled out a small pile of old serpentine belt material. The material got caught between the timing belt and bank 1 camshaft number 1 sprocket, knocking off the cam timing for the exhaust (that could have been catastrophic!). The customer’s timing belt was only 10K old, but since it was stretched and jumped timing, I replaced it to avoid any future problems.
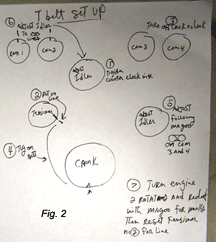
In this article, I’ll cover the procedures to replace the timing belt and all the tensioners with pulleys in a manner I’ve created. After performing this task many times, I’ve developed a rough draft for ease of replacement (See Fig. 2). It’s necessary to purchase the Saab factory timing belt replacement tool kit, P/N K-M 800, to complete the job.
 TIMING BELT REPLACEMENT PROCEDURE — 9000/ 9-5 MODELS
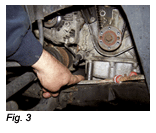
Raise the car on a lift and insert some type of socket to lodge between the frame and oil pan (9-5 model only). See Fig. 3.
Remove the passenger-side wheel and front fender well cover to access the belt area and lower harmonic balancer.
Lower the car and remove the upper engine mount support bracket. The socket that was installed is now holding up the engine.
Loosen up the water pump pulley screws, as well as the power steering pump pulley screws. Use a 15 mm wrench on the tensioner to take the pressure off of the belt.
Remove both pulleys and the belt tensioner, then remove the alternator air intake pipe.
Remove the lower bracket for the engine mount and set it aside (9-5 model only).
Remove all the timing cover screws with the six outer bolts for the crankshaft pulley, but not the center bolt.
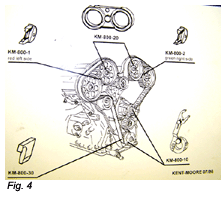
Turn the crankshaft so the No. 1 cylinder is at TDC on the compression stroke. Ensure that the marks on the camshaft sprockets and the timing cover are aligned. See Fig. 4.
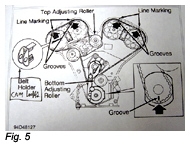
Install camshaft locks on both banks to hold them in place. See Fig. 5.
Remove the belt and all idler pulleys with the tensioner.
Install new pulleys and the tensioner assembly with the new belt.
Align all the white marks corresponding to the camshaft sprocket marks. Correct belt marks must be used.
Ensure the crankshaft and camshaft timing marks are still aligned.
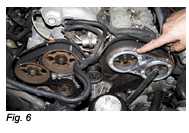
Remove the 2 and 3 sprocket lock, then adjust the lower roller counterclockwise to a belt tension of 205-221 ft.-lbs. until the two marks are aligned with the tool supplied in the kit that was slipped into the sprockets. It has a nickname — Mr. Magoo — and you can see why. Tighten the lock nut. See Fig. 6.
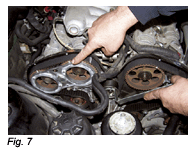
Remove the sprocket locking tool for the 1 and 2 sprocket and place Mr. Magoo into the sprockets and adjust until the marks line up. Tighten to the same belt tension. See Fig. 7.
Using a 5 mm Allen wrench, align the belt tensioner with the line-up marks and tighten.
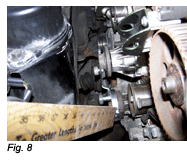
Turn the engine over two revolutions in the normal direction of rotation. Put it on TDC and install the crankshaft alignment tool to check for proper markings. See Fig. 8.
Check with Mr. Magoo on both banks for proper markings and reset the automatic belt tensioner. Line it up, if necessary.
Remove the crankshaft alignment tool and reverse procedure to finish up the job. Check the serpentine belt for cracks and wear marks, and check the small tensioner pulley for bearing failure and replace it, if necessary.
Large profits are in store for your repair shop when belt replacement is due on your customers’ Saabs. Although the factory tools are costly, they’re necessary to effectively do the job. And the profits that come from doing a few jobs will be well worth the investment.