Whether you’re studying for an upcoming ASE brake certification test, expanding your knowledge or honing your brake repair skills, this course is for you. There are no grades and no pop quizzes or tests. It’s not even a pass-fail course. The only credit you’ll receive will be thanks and appreciation from your customers and employer for a job well done. The goal of this course is to help you do better brake jobs and avoid common mistakes that often result in comebacks, unhappy customers and lost time and wages.
 Lesson One: The Basics
Obviously, brakes are an essential safety system because they stop the vehicle. If the brakes can’t do their job, there’s no telling what might happen. So it’s important to make sure every brake job you do is done correctly and to your customer’s satisfaction. There are no exceptions!
First, a rule to live by: A basic brake job does not consist of hanging a set of pads, giving the rotors a quick turn and sending the vehicle out the door. Quickie brake jobs may seem like an easy way to make a buck, but they are less than complete.
“Complete” means “full, finished, ended, perfect or made whole.” If you are doing a “complete” brake job, therefore, you should inspect everything and replace anything that is worn, broken, defective or out-of-specification to restore the brakes to like-new condition. But what about parts that are marginal or questionable? Is it OK to reuse brake hardware? Should the calipers be rebuilt or replaced if they are not leaking? What about wheel cylinders or the master cylinder? What about brake fluid? Is bleeding the air out of the lines all that’s necessary, or should the fluid always be changed?
Many times you have to make judgment calls when deciding what to replace. For years, “industry accepted practice” was the criteria by which most technicians based their decisions. What’s wrong with that? For starters, everybody had their own standards, and it was often hard to get people to agree on many of the finer points of brake service.
For example, should brake linings be replaced only when they are at or below minimum thickness (as defined by the vehicle manufacturer), or is it OK to replace them if they are still above minimum thickness, but getting thin? This is your call when doing a four-wheel brake job because, in most instances, the front pads are worn more than the rear shoes (or pads).
The front pads typically outlast the rear linings by a margin of two or three to one. If the rear linings are still well above the wear limit, there’s no need to replace them. But if they are getting close to the limit, replacing them now may save your customer the cost of another brake job later, as well as possible brake problems down the road.
In some states, such as California, the law stipulates when certain parts may or may not be replaced. Such rules are designed to protect consumers from unnecessary repair expenses, but they also create a roadblock to common sense in some instances. Even so, you have to live by the rules or suffer the consequences.
Lesson Two: Inspection Checklist
All of the following should be inspected when doing a brake job:
Master cylinder: A low level may indicate worn linings or a fluid leak.
Brake lines and hoses: Visually inspect them for leaks, severe corrosion or damage.
Calipers and wheel cylinders: Check for leaks or cracked or missing dust boots.
Disc brake pads: Measure thickness and check for cracks or separation from the backing plates. Also, look for uneven wear between the inner and outer pads, which may indicate a caliper problem.
Brake shoes: Measure their thickness and check for cracks or looseness.
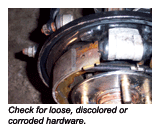
Drum hardware: Check for loose, discolored or badly corroded parts.
Warning lights: Make sure the brake warning light and ABS light come on when the ignition is turned off, and make sure the lights go out and stay out while the vehicle is driven.
If possible, test-drive the vehicle and take note of brake pedal feel and braking action. Pulsation in the pedal usually indicates warped rotors. A low pedal may indicate worn linings or air in the brake lines. A pedal that slowly sinks indicates a worn master cylinder, and noise may indicate loose or worn pads, missing shims or other brake problems. Check the parking brake for travel, the ability to hold the vehicle when stopped and release. Lesson Three: Servicing
Once you’ve inspected the brake system, you can recommend what parts need to be replaced and why. A few recommendations you may have to make during the subsequent brake job may include any or all of the following:
New linings, front and rear.
Resurfacing of both rotors and drums (or replacing them if they are badly worn or cracked or hard spots are found).
Replacing drum hardware and caliper bushings/pins/sleeves.
Rebuilding or replacing calipers and wheel cylinders (depending on mileage and condition).
Replacing brake hoses if they’re leaking or damaged.
Replacing the master cylinder if it’s leaking or worn.
Changing the brake fluid and bleeding all of the lines.
Inspecting wheel bearings (repacking on older vehicles).
Lubricating all critical areas, such as caliper slides and shoe pads with a high-temperature, moly-based brake grease.
Adjusting the parking brake.
Replacing ABS components as needed (such as a defective wheel-speed sensor, hydraulic modulator, accumulator, pump or relay).
Lesson Four: Linings
When replacing brake linings, always replace same with same or better. In other words, pads should be replaced with ones made of the same basic type of friction material as the original.
In some applications, non-asbestos, organic or low metallic pads can be safely substituted for semi-metallics to reduce noise potential. But the tradeoff may be shorter pad life and decreased resistance to heat fade under hard use.
For best results, recommend a premium-grade replacement lining. Many linings today are “application-engineered” to match the brake requirements of specific vehicles.
If you’re installing a loaded caliper assembly with pads already included, the pads should have the same approximate friction characteristics as the ones on the opposite side (if only one caliper is being replaced).
Always use the same type of friction on both sides of an axle to reduce the risk of creating a brake pull.
 Lesson Five: Rotors and Drums
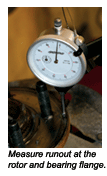
Unless the rotors and drums are in near-perfect condition (no scoring, minimal runout, etc.), resurfacing is a must to restore the friction surface. Resurfacing does shorten the life of rotors and drums because it removes metal, so use the shallowest cut possible to conserve iron and extend the life of these parts.
On-car resurfacing is recommended for vehicles that are especially sensitive to rotor runout or where rotors are difficult to remove, as in trapped rotors, for example.
If rotors are worn to minimum specs or can’t be resurfaced without exceeding the minimum or discard specs, they must be replaced. It’s the same with drums. If the inside diameter exceeds maximum specs, or a drum can’t be resurfaced without exceeding the limit, it must be replaced. There are no exceptions! Also, both drums should have about the same amount of wear. If the difference is greater than about 0.040-inch, both drums (or rotors) should be replaced, even if only one is at or near the discard limit.
Rotors should also be replaced if they have hard spots due to the fact that changes in the metallurgy extend below the surface. Turning the rotor may temporarily restore a flat surface, but the harder metal will still remain and cause the rotor to wear unevenly. Pedal pulsation will return, usually within a few thousand miles.
As for drum hardware, self-adjusters, return springs, shoe springs, etc., and disc hardware, caliper slide pins, bolts, bushings, sleeves, etc. — anything that is obviously worn, damaged or badly corroded should always be replaced. On high-mileage vehicles (with more than 100,000 odometer miles), new hardware is recommended.
If a return spring or shoe spring is stretched or discolored, it has suffered heat damage and must be replaced. Many brake experts say it’s a good idea to replace springs anyway when doing a brake job, regardless of their appearance to assure like-new brake performance and minimize the risk of a comeback.
Lesson Six: Fluid
Every brake job should include a fluid change. Still, surveys have found that half of all cars and light trucks 10 years old or older have never had their brake fluid changed — even when they’ve had the pads replaced once or twice.
The reason it’s so important to change the fluid each time is because you can’t judge the condition of the brake fluid by its appearance alone. Some fluids darken as they become contaminated with moisture, while others don’t discolor. The only way to know for sure is to test it with a brake refractometer, chemical test strips or an electronic tester.
Brake fluid is hygroscopic and absorbs moisture through tiny pores in brake hoses and seals. Over time, it can pick up quite a bit of water, which increases the fluid’s viscosity, lowers its boiling temperature and increases the risk of internal corrosion in the brake system.
Tests have shown that, even after only a year of service, brake fluid in the average vehicle can contain as much as 2% water. After 18 months, contamination levels can reach 3% and continue to climb to 8% or more as time goes on. As the amount of moisture in the fluid goes up, the boiling temperature comes down. Corrosion inhibitors in the fluid also break down, increasing the risk of internal corrosion inside the brake system.
The type of brake fluid required depends on the vehicle application. Always follow the vehicle manufacturer’s recommendations. Most domestic and Japanese cars and light trucks require DOT 3 fluid, while most European cars use DOT 4. But there are exceptions, so check the owner’s manual for the requirements. Also remember that DOT 5 silicone fluid should never be used in any vehicle equipped with ABS.
While we’re on the subject, no parts in an ABS system should have to be replaced unless something has failed.
Wheel-speed sensors can sometimes give bad readings if their magnetic tips become contaminated with metallic debris from the brakes. A simple cleaning may be all that’s needed to eliminate the problem.
Unfortunately, some wheel-speed sensors are sealed inside the wheel bearing assembly and cannot be replaced unless the entire hub assembly is replaced (at considerable cost). But, if that’s the only way to get the ABS warning light to turn off so the ABS system will function normally again, that’s what you have to do.
If you remember nothing else from this course, remember this: There is very little margin for error when doing brake work. Little mistakes can have big consequences. So, inspect the entire brake system end to end, identify any problems that need to be corrected, and replace all the parts necessary to restore the brakes to like-new condition.

