Tech Tip: Uncovering the Cause of Brake Shudder or Vibration – UnderhoodService

Tech Tip: Uncovering the Cause of Brake Shudder or Vibration

Some owners of 2004-2005 Dodge Durango vehicles may complain of brake shudder or vibration. The following technical service bulletin involves installing brake pads, resurfacing the rotors and checking rotor runout. The vehicle may exhibit pulsation or vibration in the brake pedal and/or steering wheel when the brakes are applied. The condition is most noticeable at speeds over 50 mph, but can occur at lower speeds. If the customers indicate that ....

Some owners of 2004-2005 Dodge Durango vehicles may complain of brake shudder or vibration. The following technical service bulletin involves installing brake pads, resurfacing the rotors and checking rotor runout.

Symptom/Condition:
The vehicle may exhibit pulsation or vibration in the brake pedal and/or steering wheel when the brakes are applied. The condition is most noticeable at speeds over 50 mph, but can occur at lower speeds.

Diagnosis:
If the customers indicate that the condition is present, perform the repair procedure.

Repair Procedure:
1. Inspect the front brakes for any signs of abnormal wear or damage. Repair as necessary.

2. Resurface the front brake rotors with a DaimlerChrysler approved on-car brake lathe. If an on-car lathe is not available, the rotor resurfacing must be sublet to a facility with an approved on-car lathe.

3. Remove the calipers.

4. Clean the caliper adapter.

5. Replace the front pads and anti-rattle springs with p/n 05139733AA (brake pads).

6. Mark one wheel stud on each side with a dab of paint or suitable marker.
NOTE: Wheel stud torque is critical to the success of the repair. The following procedure is intended to identify excessive rotor distortion, which could be caused by improper wheel stud torque.
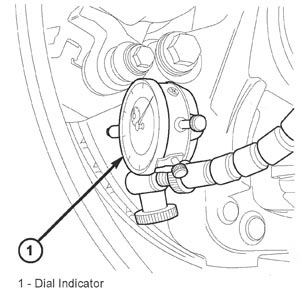
7. Install the wheel and assembly to the hub. Pre-tighten the lug nuts in a cross pattern to 100 Nm (75 ft.lbs.) then final tighten the lug nuts in a cross pattern to 200 Nm (145 ft.lbs) for steel wheels or 175 Nm (130 ft.lbs) for aluminum wheels. Mark the wheel at the same location as the marked wheel stud.

8. Set up a dial indicator to measure mounted rotor runout. Place the dial indicator plunger against the inner machined rotor face, visible between the brake caliper and the front splash shield (Figure 1). Rotate the wheel and tire assembly two turns and take runout measurement. If the measurement is less than .025 mm (.001 in.), no further action is required. If the measurement is greater than .025 mm (.001 in.) remove the lug nuts and relocate the wheel one stud clockwise, tighten the lugs nuts and described in step 7 and check the runout again. Do not remove any brake parts. Repeat step 8 for each wheel location until you achieve the lowest mounted runout. Minimum mounted rotor runout will be achieved by moving the wheel, not the rotor.

Technical service bulletin courtesy of Mitchell 1.

For more information on Mitchell 1 products and services, automotive professionals can log onto the company’s website at www.mitchell1.com.

You May Also Like

Check Out The December Issue Of Underhood Service Magazine

The digital version of the December issue of Underhood Service is available on-line. Access the easy-to-view digital version that features articles on Spark Plug Service, Hyundai Oxygen Sensor Codes, CAN Bus Diagnostics, Subaru Stretch Belt Replacement, a host of Tech Tips, and more!

The digital version of the December issue of Underhood Service is available on-line.

CLICK HERE to access the easy-to-view digital version that features articles on Spark Plug Service, Hyundai Oxygen Sensor Codes, CAN Bus Diagnostics, Subaru Stretch Belt Replacement, a host of Tech Tips, and more!

Transmission Line Replacement

Transmission fluid likes to be at a constant temperature. If it is too hot or too cold for too long, the performance can fluctuate and potentially cause damage to the transmission.

VIDEO: AAPEX 2016 Insights

Andrew Markel discusses his take on conversations he had with economists at AAPEX 2016, including the future of purchasing parts.

BMW Tech Tip: Oil Separator Replacement

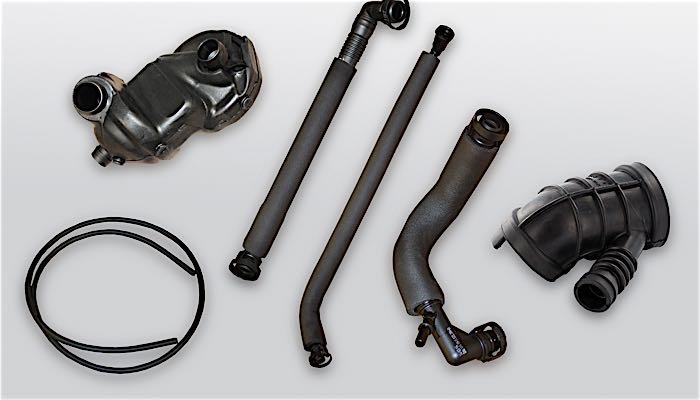
A clogged oil separator valve is a common problem on many BMW DOHC inline sixes. The high failure rate is caused by sludge build-up that can result in oil burning, rough idle and engine fault codes. Although the solution is pretty simple, replacing the valve is labor intensive and can take anywhere from six to nine hours.

New IDUSA Premium Guard Website Offers Easy Access To Wide Range Of Oil, Air, Cabin, Fuel And Transmission Filters

The new website’s bi-lingual, responsive design features look-up powered by ShowMeTheParts.

Other Posts

VIDEO: How To Deal With Air Conditioning Smells

Andrew Markel discusses what to do to get rid of A/C smells after customers have tried to do it themselves.

Oil Bath Air Filters

Long before people started using cotton gauze air filters soaked in oil, the oil bath air filter was the dominant filter on the market. The filter removes debris in the air by running it over oil and a mesh element. These filters worked great when most roads were dirt, but they could be messy to clean.

On The Web – September 2016

Finding Failing O2 Sensors If an O2 sensor gets “lazy” because of old age or contamination, the computer may not be able to adjust the fuel mixture quickly enough as the engine’s operating conditions change. Related Articles – Join Underhood Service On LinkedIn – Honda Tech Tip: Oil Pressure Switch Fails Intermittently – Fuel Trim

Join Underhood Service On LinkedIn

Related Articles – Check Out The August Issue Of Underhood Service Magazine – Hayden Automotive Introduces Low-Profile Fan Clutch – Belt Inspection Checklist                     Underhood Service’s LinkedIn Page                         Underhood Service’s LinkedIn Group