 By Larry Carley
Technical Editor
Anybody can plug a scan tool into a vehicle and read codes. But do they know what the codes mean, how to diagnose the fault or, most importantly, how to fix the vehicle? The problem with reading OBD II codes is that the code tells you only that a fault has occurred. It does not tell you why the fault occurred, what might be causing the problem, or what needs to be repaired or replaced.
OBD II MISFIRE DIAGNOSIS
OBD II can diagnose engine misfires. On most applications, the OBD II system looks for subtle variations in the speed of the crankshaft to detect misfires. The powertrain control module (PCM) monitors the input from the crankshaft position sensor and checks the rpm reading between cylinder firings. If the rpm signal slows slightly, it means the cylinder did not fire and give its normal push to keep the crank spinning. The PCM then calculates which cylinder failed to fire, and logs a misfire for that cylinder. It keeps a running tally for each cylinder, and if the number of misfires over a given period of time exceeds a value that indicates a problem, it sets a diagnostic trouble code (DTC) and turns on the Check Engine light.
A misfire code is bad news because it will prevent a vehicle from passing an OBD II plug-in emissions test. It also means the engine is wasting fuel and may not be getting normal fuel economy. But there’s not a lot of diagnostic information in a misfire code. It tells you a misfire is occurring only in a particular cylinder, or that the engine has a random misfire (code P0300) in multiple cylinders.
With a cylinder-specific misfire code, the cause may be an ignition problem, a fuel problem or a compression problem. If the misfire is ignition related, the underlying cause may be a fouled or worn spark plug, a weak ignition coil or a bad plug wire (if the engine has plug wires). And if the plug is fouled, why is it fouled? Replacing the spark plug may temporarily eliminate the misfire, until the plug fouls again. The underlying cause might be a worn valve guide or seal that is allowing oil to be sucked into the combustion chamber. I’ve also seen plugs foul due to coolant seeping past a failing head gasket.
If the misfire is fuel related, the problem might be a dirty fuel injector, a weak or dead fuel injector (too much electrical resistance), a problem in the injector wiring harness or PCM injector driver circuit, or anything that might be causing a lean fuel mixture. As with an ignition-related misfire, it’s going to take some diagnostic digging to determine the cause.
If the engine is running lean, due to a vacuum leak for example, a leaky EGR valve or low fuel pressure, the long-term fuel trim (LTFT) value will be positive and probably higher than 10. In some cases, removing varnish deposits from the injectors can restore normal fuel delivery and clear up a lean misfire condition. But depending on which type of fuel injection cleaner they buy, the product may not be strong enough to solve their problem. It may take a professional on-car cleaning, or even an off-car cleaning to restore normal fuel delivery.
Going on with our misfire code, if the misfire is being caused by low compression in the cylinder, what’s the fix for this? A new head gasket or a remanufactured cylinder head? You can’t tell what’s causing a compression loss until you do a compression test or a leakdown test. In many cases, low compression is due to worn valve seats, a bent valve or a burned exhaust valve. But it can also be caused by worn rings or a leaky head gasket. OBD II won’t tell you which one it is, only that a misfire is occurring in one or more cylinders.
What about oxygen sensor codes? Many parts store employees assume that any O2 sensor code means the customer needs a new O2 sensor. That may be true if the code is for an O2 sensor heater circuit, but what if the fault is external and is in the wiring circuit rather than the sensor itself? The customer just replaced an O2 sensor unnecessarily. You need to perform some resistance and voltage checks in the O2 wiring circuit to verify it is or is not receiving proper voltage to its heater circuit, and that there is circuit continuity, before condemning the sensor itself.
And what about catalytic converter and Evaporative Emissions Control System (EVAP) related codes?
A converter efficiency code usually means the converter is fouled or worn out and needs to be replaced. But converter efficiency and O2 sensor readings can be adversely affected by air leaks in the exhaust system. A low-mileage converter failure is usually caused by an upstream problem such as an engine misfire or oil contamination. A fouled spark plug or a leaky exhaust valve that allows unburned fuel to flood the converter can fry it rather quickly. If these problems are not identified and corrected, the replacement converter will likely suffer the same fate.
EVAP codes can be very difficult to diagnose. EVAP codes can be set by something as simple as a loose or ill-fitting gas cap, but they can also be set by any number of problems in the purge valve plumbing, tank vapor plumbing or tiny pinhole vapor leaks anywhere in the system. If an EVAP code is for a small vapor leak, you’ll probably have to use a smoke machine to find it. Replacing the gas cap or the canister purge valve won’t solve the customer’s problem if the fault is a pinhole vapor leak.
ADVANCED DIAGNOSTICS
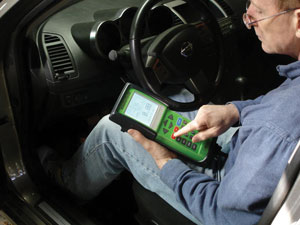
Getting to the bottom of many OBD II faults requires a thorough understanding of not only the particulars of the engine management system on any given year, make and model of vehicle, but also the diagnostic capabilities (and limitations) of your scan tool. At the very least, you need a scan tool or scanner software that can display sensor data, switch status and other OBD II system information.
Looking at individual PIDs can help you see what the PCM is seeing. But, in some cases, even this information can be misleading. Some PIDs may not be real values, but are calculated or simulated values created by the PCM, or substituted by the PCM for missing data.
Professional-grade scan tools with bidirectional capability also open up a whole new realm of diagnostic capability by allowing you to take advantage of various self-tests that may be programmed into the OBD II system. These capabilities will vary from one application to another, but can be real-time savers if you know what tests are available, and how to find and use these tests on your scan tool menu. The software in the factory scan tool will provide access to all of the self-tests that are available on that manufacturer’s vehicles. But some aftermarket scan tools may have all of the tests — which means you may have to test circuits and components using other methods that may be more time-consuming or less helpful.
MODE $06 DIAGNOSTICS
Most technicians who do engine diagnostic work today have heard of Mode $06. Most professional-grade scan tools can access the information, and you can use it to view the unfiltered test results for all non-continuous OBD II monitors. These include the EVAP system, catalytic converter, air system, PCV and EGR systems, engine thermostat, oxygen sensor and engine misfires on some applications. You can use Mode $06 when you are trying to diagnose a vehicle that has an obvious emissions or driveability problem but has not set any codes or turned on the Check Engine light (no code diagnosis). You can also use Mode $06 to detect pending problems that may soon set a code, and to verify repairs you made to solve the problem.
Mode $06 information can be hard to find. On older Snap-on MT2500 scanners, for example, Mode $06 data is located by inserting the “Global OBDII” cartridge into the scanner, then selecting “OBD DIAGNOSE” after powering up the tool. Once communication has been established with the vehicle, you then scroll down the SELECT SERVICE menu to DISPLAY TEST PARAM./RESULTS and press “Y” (Yes) to continue. Then you choose NON-CONTINUOUSLY MONITORED SYSTEMS ($06).
On the Snap-on SOLUS and MODUS, Mode $06 data is still under Generic OBDII, and NON-CONTINUOUSLY MONITORED SYSTEMS ($06) is still under the SELECT SERVICES menu.
On the OTC Genisys, open the Application Manager, choose Scan Diagnostics, then Global OBD II. On the next menu, choose Special Tests, then Component Parameters (Mode 6).
On a MasterTech scan tool, press F1 for SCANTEST when the Main Menu opens. When the FUNCTION MENU comes up, press F1 again. On the next menu, select GLOBAL OBDII. On the next menu, press F1 for OBD II FUNCTIONS. On the next menu, choose F5: SYSTEM TESTS. On the next menu, select F2: OTHER RESULTS. The next screen lists the Mode $06 test information in three columns that are labeled TID$01, CID$01 and PASS/FAIL.
DECIPHERING MODE $06 INFORMATION
One of the difficulties of using Mode $06 for OBD II diagnosis is how some scan tools display the information. On the MasterTech scan tool, for example, the first column is the “TID” or “Test Identification.” (Note: this is now called “MID” for Monitor ID on 2003 and newer vehicles with controller area network or “CAN” systems.) Each line in the TID column stands for a different test. Next is the “CID” or “Component Identification” column, which is the specific component or circuit. The last column shows PASS or FAIL, indicating the component either passed or failed this particular test.
If all of the tests show PASS, you really don’t have to go beyond this point in most cases because everything is functioning within normal limits. Even so, one or more components may be borderline or just under the limit that would cause it to fail. Consequently, you may have to dig deeper to see what’s actually going on and what the actual numeric test values are for a particular line item.
PASS means the test value is within the range allowed. As long as the value remains within that range, it’s assumed to be OK and passes the test. But if it goes beyond the upper or lower limit, it fails the test and may eventually set a fault code.
The limits for these tests are determined by the vehicle manufacturer when they test their emission control systems to find out how much leeway they have in meeting federal emission requirements. If they set the acceptable range for a particular test too wide or the upper limit too high, the vehicle may not meet emissions. On the other hand, if they set the range too narrow or the upper limit too low, the vehicle may be setting codes too often or when it does not really have an emissions problem. This may require a PCM reflash later to correct the problem.
An important point to keep in mind here is that some faults that cause noticeable driveability problems (like a lazy oxygen sensor or a slight misfire in one cylinder) may not be bad enough to set a code and turn on the Check Engine light. Likewise, some faults that may cause a vehicle to pollute may not cause any noticeable driveability problems (such as a bad catalyst, EGR problem or EVAP fuel vapor leak).
HEX CODE DATA
Raw Mode $06 data is in hexadecimal code, which is a base 16 numbering system used in computer programming. Hex code uses digits 0 through 9 and letters A through F. To translate a hex code number into a more familiar decimal number, you can use the calculator that comes with Windows software. Open the calculator, click on VIEW, then choose Scientific. Enter the hex code number in the calculator, then click on the “Dec” button to convert the hex code number to a decimal number. For example, hex code 28A becomes the number 600 in decimal.
What does the number mean? It depends on the test. It may be voltage, amperage, temperature, pressure or whatever. This means the number may have to be multiplied by some conversion factor to end up with the correct units of measure. This kind of information would have to be looked up in a Mode $06 conversion chart for the vehicle if the scan tool or scanner software does not do the conversion for you.


