By Tom Purser, ALLDATA editor, and Jeff Webster, ALLDATA technical writer
Some GM truck, SUV and minivan owners may complain about a rattle-type noise coming from the engine area at approximately 1,800 to 2,200 rpm. The rattle-type noise may be caused by torsional vibration of the balance shaft.
To fix the problem, follow the service procedure below for installing a new tensioner assembly kit. If detonation noise is present, perform detonation/spark knock diagnostic testing first.
Applicable Models: 1996-2003 Chevrolet Astro, Blazer, Express, S-10, Silverado and P Models; 1996-2003 GMC Jimmy, Safari, Savana, Sierra, Sonoma; and 1996-2001 Oldsmobile Bravada (with 4.3L V6 Engine)
PARTS INFORMATION
Part Number Description
12458911 Chain Kit
89017257 Tensioner
10220906 Oil Pan Gasket
88893989 O-Ring and Gasket Kit
3754587 Water Pump Gasket (2)
89017259 Cover
Service Procedure
1. Remove the engine front cover.
2. Remove the crankshaft sensor reluctor ring and line up the timing marks on the crank gear and camshaft gear.
3. Remove the camshaft gear and chain. For model years 1996-’98, remove the crankshaft sprocket using the J 5825-A crankshaft sprocket removal tool.
4. Pull the shipping pin and discard. Remove the nylon timing chain tensioner blade from the timing chain tensioner bracket.
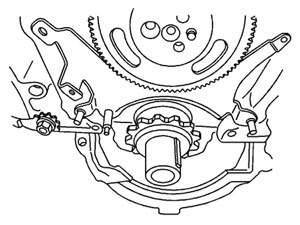
5. Position the bracket on the front of the engine. The upper two attaching holes of the bracket will line up with the center two engine front cover bolt holes. The lower bracket holes will line up with the engine front cover alignment holes (see Figure 1).
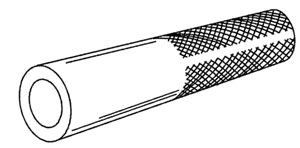
6. Use a hammer and the J 46165 pin driver to install the dowel pins through the two lower holes in the bracket and into the engine block. Make sure that the bracket is held firmly in place before proceeding (see Figure 2).
7. For model years 1996-’98, install a roller-type timing chain set. Install the crankshaft sprocket using the J 5590 crankshaft gear installer. Install the timing chain around the crankshaft sprocket and position the timing chain to the driver’s side of the engine.
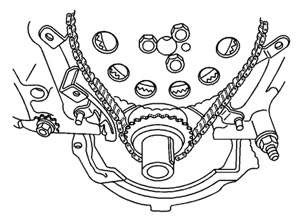
8. Install the nylon timing chain tensioner guide onto the timing chain tensioner bracket pin and
position the top of the guide under the tab at the top of the bracket (see Figure 3).
9. Install the camshaft sprocket into the chain and then to the camshaft. Install the bolts finger-tight. Make sure the timing marks are aligned, then tighten the camshaft sprocket bolt. Tighten the bolt to 18 ft.-lb. (25 Nm).
10. Install the crankshaft reluctor ring.
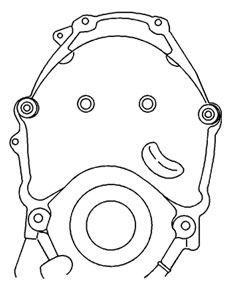
11. Install the engine front cover and place a washer under the two center cover bolts that extend through the tensioner bracket. These washers are required to maintain the proper crush on the engine front cover seal (see Figure 4). Tighten the bolts to 106 in.-lb. (12 Nm).


