Contact between a rotating shaft and a seal causes shaft wear on crankshafts, transmission and driveshafts. Dirt or other abrasive particles can collect under the seal lip and eventually cause a groove in the shaft surface. Grooves from shaft wear can allow oil to leak out, which can result in bearing damage and failure.
Kwik-Sleeve from Timken is a fast, economical and effective way to refinish a seal-worn shaft, according to the company. If you can catch your fingernail in a shaft groove or seal wear track, a Timken Kwik-Sleeve can be installed to prevent leakage.
It’s a precision-engineered sleeve made of stainless steel and then hard chromed for extended life. Because of its thin-wall design, a Kwik-Sleeve can be used without changing the size of the seal and its finish is ideal for lip-sealing applications. No expensive preparation or machining is required before mounting.
Each Kwik-Sleeve comes with a removable installation flange and its own installation tool. The installation tool reduces the possibility of sleeve  distortion and provides for sleeve installation without the removal of the shaft from the serviced equipment. Do not install a Kwik-Sleeve over shaft keyways, splines or ports. The thin-walled sleeve surface may become distorted, causing leakage. Read all of the following installation steps prior to installing a Kwik-Sleeve.
Installation
1. Thoroughly clean the surface where the seal contacts the shaft. Carefully use a fine file, emery cloth or honing stone as appropriate to remove any debris, nicks or burrs.
2. Measure three unworn positions of the shaft diameter where the sleeve will be positioned. Take the average of the three readings (as the shaft may be out of round). If the average diameter is within the range for a given 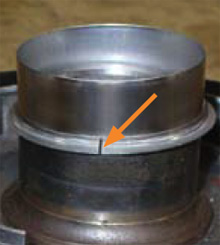 sleeve size, there is sufficient press-fit built into the sleeve to keep it from spinning or sliding.
3. Determine the sleeve position necessary to cover the old seal wear grooves. Measure to the exact point, or mark directly on the surface. The sleeve must be placed over the worn area, not positioned flush with the end of the shaft.
4. Leave the Kwik-Sleeve flange intact unless clearance is required. Determine if the flange should be removed prior to installation. If the flange is to be removed – then prior to installation– use side-cutters to make one perpendicular cut through the flange to the pre-cut line/tear-off groove. Do not cut into the finished sleeve surface.
 5. Fill deeply scored grooves with a thread repair compound. Place the sleeve onto the shaft before the compound hardens. The flange end of the sleeve goes on the shaft first.
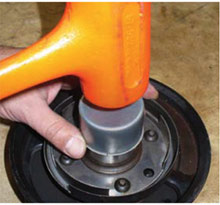
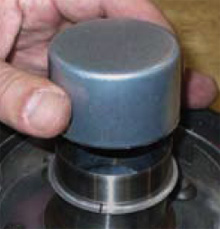
6. Position the open end of the installation tool over the sleeve.
7. Gently strike the center of the installation tool with a large, soft-faced mallet until the sleeve covers the worn seal surface. If thread repair compound was used, thoroughly clean off any filler that gets onto the outer sleeve surface.
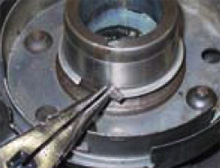
8. After the sleeve is installed, use pliers to pry the cut flange (as determined in Step #4) away from the seal surface and twist it into a coil. Flange removal must be done with care to avoid damage to the sealing surface.
9. After the Kwik-Sleeve is installed, check again for nicks or burrs that could damage the seal.
10. Proceed with seal and bearing installation. Lubricate the sleeve as specified by the seal or vehicle manufacturer.
Courtesy of Timken