By Larry Carley
Technical Editor
You’ve probably heard that nondirectional rotor finishes can lessen the risk of new brake pads squealing. They can, but do you really need to apply a nondirectional finish to freshly turned rotors? And what about new rotors? Should you give them a nondirectional finish if they don’t have one?
Like many issues concerning brake rotors, different people have different opinions about what works best. So with that said, let’s take a closer look at rotor refinishing and what it really takes to guarantee quiet brakes.
 WHEN TO TURN ROTORS
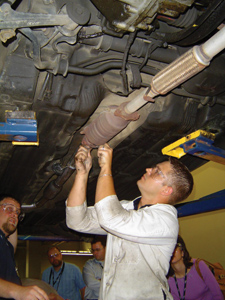
By the time a vehicle needs new brake pads, the rotors may show considerable wear. The areas on the rotors where the pads rub will often have grooves, maybe some minor surface cracking or pitting, and possibly enough variation in thickness due to wear to cause noticeable pedal vibrations when the brakes are applied.
Most shops resurface rotors every time they replace a set of pads. Some would argue that rotors that are in relatively good condition (only minor grooving and no hard spots, cracks or pedal pulsations) do not need to be resurfaced. Not resurfacing the rotors extends their life and saves the vehicle owner some money. Others say the risk of a comeback because the rotors were not resurfaced is reason enough to turn the rotors. Do the job once and do it right the first time is their reasoning.
If the rotors are cracked or have hard spots, most experts agree that replacement is the only option — and certainly if the rotors are worn down to minimum thickness specifications and cannot be resurfaced without exceeding the “machine to” or “discard” thickness.
One OEM advises that rotors should be resurfaced only if the rotors are badly scored and the depth of the grooves exceeds 0.060 inches (1.5 mm), there is excessive corrosion on the rotor faces, more than 0.003 inches (0.080 mm) of lateral runout or more than 0.001 inch (0.025 mm) in thickness variation.
Most OEMs also say that rotors are not to be resurfaced in an attempt to correct the following conditions: noise/squeal, cosmetic corrosion, routine pad replacement or discoloration/hard spots. They site that it’s unnecessary resurfacing that only shortens rotor life — unless it tells you to do so in a technical service bulletin to eliminate a brake noise problem.
ROTOR FINISH
Regardless of when or how the rotors are resurfaced, the surface finish should meet OEM specifications for good braking performance, pedal feel and quiet operation. Brand new OEM and aftermarket rotors from a quality supplier typically have a surface finish that can vary from 15 to 80 microinches. Most brake experts say the best finish is 50 microinches or less, though a finish in the 60 to 80-microinch range is acceptable.
When a rotor is turned on a brake lathe with sharp bits (we emphasize the word “sharp” because it’s absolutely essential for a quality rotor finish), and a feed rate that is not too fast, the rotors will have a finish that meets these recommendations.
Lathe bits get dull with use, especially if they’re cutting rust. Some experts recommend rotating the lathe bits every seventh brake job (every 14 rotors) to maintain the best surface finish.
The type of tool bits used in a brake lathe also affect the surface finish. Round carbide bits generally produce a smoother finish than angular bits and allow a faster crossfeed rate to save time. Titanium bits with parallel, peripheral-ground edges are considered premium bits for this type of work.
On a bench lathe with a spindle speed of 100 to 150 rpm, a crossfeed rate of 0.002 in. to 0.005 in. per revolution should produce a relatively smooth, high-quality finish. On bench lathes with adjustable spindle speeds, the spindle speed should be slowed down for larger rotors. One manufacturer suggests the following speeds: for 10-inch and smaller rotors, use 170 rpm; for 11- to 16-inch rotors, use 100 rpm; for 17-inch or larger rotors, use 60 rpm.
The depth of cut is also important. Take off as little metal as is necessary to clean up the surface, and keep the depth of the final cut to 0.002 to 0.008 inches. If a rotor is in really bad shape, multiple cuts should be used: one or more rough cuts followed by a shallow final cut.
When turning composite rotors, be sure to support the rotor properly with large bell clamps or adapters to prevent flexing and chatter. Make sure the brake arbors are clean and there is minimal play and runout in the lathe (when was the last time somebody actually calibrated your lathe?). And if you’re a real stickler for details, use a dial indicator when you mount the rotor on the lathe arbor to keep runout to 0.002 inches or less.
THE FINAL STEP THAT EVERYBODY FORGETS
In a perfect world, if you turn your rotors with sharp bits, and use the proper feed rate and depth of cut, there’s probably no need to apply a nondirectional finish as a final step. The rotors should be ready to install when they come off the lathe — provided you clean them first. That’s the final step that most technicians forget.
Not washing the rotors after they’ve been turned can leave a lot of residue on the surface that can embed itself in the pads and possibly cause braking and noise issues when the rotors are installed. Spraying the rotors with some aerosol brake cleaner and then wiping them off is better than nothing, but it really doesn’t do a very good job of removing surface debris. What you need is warm, soapy water, a good stiff brush and a little elbow grease.
WHAT ABOUT NEW ROTORS?
New rotors, either OE or aftermarket, are supposed to be finished to specifications and ready to install out of the box. There should be no reason to give them a “clean up” cut. If they do, you need to find a different rotor supplier.
A recent Babcox survey found that 35% of our readers are still machining brand new rotors before they install the rotors on their customers’ vehicles. Every rotor manufacturer we’ve ever spoken to says this practice is not necessary, and is counterproductive because it shortens rotor life, it may leave a rougher finish on the rotors than the factory finish and it may cut runout into the rotors.
The manufacturing tolerances for rotor runout on most new rotors average about 0.002 inches or less, with a maximum upper limit of 0.004 inches. Some cars are unusually sensitive to rotor runout. As little as 0.0015 inches of runout on these cars may produce noticeable pedal pulsations. So if a brand new rotor has 0.004 or more inches of runout out of the box, and your brake lathe is so accurate it can cut rotors with less than 0.002 inches of runout, do it if you think it’s necessary. Otherwise, don’t cut new rotors — but do wash them before you install them.
NONDIRECTIONAL FINISH
If you’re refinishing the rotors, it’s a good idea to apply a nondirectional finish to the rotor. The engineering behind a nondirectional finish is that the scratches on the surface go in various directions, so there’s less of a chance of pad vibration and noise. The nondirectional finish doesn’t last forever (maybe a few hundred to a few thousand miles of driving, de-pending on brake usage), but it lasts long enough for the new pads to seat and to keep the customer from noticing any noise from the newly installed pads.
A nondirectional rotor finish can be applied a number of ways. It can be applied with an abrasive disc in a drill or a special rotor refinishing brush. These abrasive tools knock off the sharp peaks on the surface of the rotor. Some of these tools are manufactured by companies that produce surface-finishing tools for engine builders.
The rotor should be mounted on a brake lathe and rotated between 125 and 210 rpm. The hone tool should be securely chucked in a variable-speed electric drill motor or low-speed air drill, and should rotate at 300-600 rpm. Bring the tool into contact with the rotating rotor at a slight angle and work in toward the center and out to the edge of the rotor face. Light, uniform pressure should be used. When the tool is used dry, it should be worked for 15 to 20 seconds at a time. Do not overheat it by dwelling for longer periods of time — 10-15 seconds clockwise and 5-10 seconds counterclockwise should produce the desired finish. And don’t forget to wash off the rotors when you’re done.
WHAT REALLY CAUSES BRAKE NOISE?
A nondirectional finish can reduce initial break-in noise, and help suppress noise for a while. However, brake noise can still occur if there are vibrations between the pads and rotors, or if the pads are inherently noisy (which is usually more of an issue with semi-metallic pads than with nonasbestos organic or ceramic pads).
Undampened high-frequency vibrations cause brake squeal. When the brakes are applied and the pads contact the rotors, tiny surface irregularities in the rotors act like speed bumps, causing the pads to jump and skip as they rub against the rotors. If the pads are not dampened by shims (external or internal) or are loose in the caliper mounts, they shake and vibrate and may produce an annoying high-pitched squeal.
The vibration of the pads against the rotors can also create harmonic vibrations in the rotors that cause them to ring like a cymbal. Depending on the metallurgy of the rotors and the design of the cooling fins, some rotors may ring louder than others — regardless of what kind of surface finish they have.
Consequently, you can do everything right when refinishing a set of rotors, and even apply a nondirectional finish, and still end up with a noise problem if the pads or rotors themselves are inherently noisy. Switching to a different brand of brake pads also may be necessary to get rid of the noise.
A tip for reducing noise-producing vibrations is to apply a high-temperature brake lubricant to the backs of the pads, and the points where the pads contact the caliper. Lubricating the caliper mounts, shims and bushings is also recommended to dampen vibrations here. The lubricant acts as a cushion to dampen vibrations. It also helps the parts slide smoothly so the pads wear evenly (uneven pad wear is a classic symptom of a floating caliper that is sticking and not centering itself over the rotor).
The type of rotors on the vehicle can also affect noise. Some grades of cast iron are quieter than others. That’s one of the reasons why composite rotors have been used on various vehicles over the years. Besides being lighter, composite rotors can also be quieter when the right grade of cast iron is used for the rotor disc. Replacing a composite rotor with a solid cast rotor changes the harmonics and frequency of the brake system, and may increase the risk of brake noise on some vehicles. Also some low-priced rotors may use a lower grade of cast iron that is noisier than the OE rotors they replace.