 This month, we’re going to have some Nissans on the lift addressing suspension noises and brake complaints. At first, you may not think these systems are closely related, but when it comes to noise and vibration complaints, you don’t want to be looking at one without considering the other. Before we get too deep into the nuts and bolts, we have to start at the beginning. And that’s at the service desk.
While we all enjoy the sounds that our customers make while trying to emulate the abnormal noises being emitted from their vehicle, the best way to find the problem is to go on a road test with the customer. Many times, things like a wheel bearing noise, long brake pedal travel and struts that can no longer dampen the spring happen gradually and the driver will become used to hearing the noise or the way the brakes or struts feel. Often, just pointing out the problem will be the first step to some profitable work. This isn’t upselling the job; our clients expect and appreciate that we recommend needed maintenance — it’s part of providing quality service.
The modern Nissan, like so many cars today, uses a simple suspension system that shouldn’t present much of a challenge. But there are some issues that will give even experienced techs some problems. Having driven the car with or without the client, the tech should have a good idea of where the problem is located. We’ll often have cars dropped off with a note saying, “struts are making noise.” Don’t let any uninformed comment send you down the wrong path.
Common Problems
The most frequent suspension and steering system-related problems are noise-related, with knocking and squeaking at the top of the list. Other complaints include poor handling; tire wear, drifting or pulling; and vibration issues.
As an example, we’ll look at a Sentra with 120,000 miles that was brought in with a customer complaining of squeaking and knocking noises. We were lucky with this one: A push and lift on the left-front wheel well revealed the distinctive up and down “bed spring” squeak. And, a quick drive on a road in poor condition revealed the knock. But, after many years of using the push-and-lift method to help determine suspension noises, we are now using a rocking method that seems better at picking up the noises that result when the suspension becomes unloaded on the road.
On the Sentra, our experience told us that this type of squeak is often the result of a ball joint or tie rod end that has a damaged boot, which allows the lubricant to escape, and dirt and moisture to get in. The resulting rust tightens up the joint and results in the noise.
The knocking noise sounded like the familiar problem of loose sway bar links or bushings that mount the sway bar to the chassis. This problem is often misdiagnosed; it takes only the slightest amount of play in these components to result in big noises. This is one of those items that is often overlooked and can result in a bad situation where struts have been replaced but the noise persists. Needless to say, the customer isn’t pleased to be presented with a sizeable bill, only to hear what he believes to be the same noise on the drive home.
If you don’t have a drive-on lift, you’ll be forced to use the creeper to confirm the diagnosis. Using a mechanic’s stethoscope, have an assistant push and lift on the fender or rock the vehicle side to side as you confirm the source of the noise. If you suspect the tie rod end, a twist of the rod should result in the same noise. With our Sentra, we could duplicate the noise, but couldn’t really pinpoint the source.
After hearing it on the road test, I was surprised we couldn’t duplicate this noise in the shop using the same technique that revealed the squeak. We looked closely for any free movement in the suspension, paying particular attention to the sway bar mounts and the links. We didn’t see any, so our search for the knock continued back on the frame contact lift. Using pry bars, we again tried to move the sway bar and its links, as well as the lower control arm bushings, but still couldn’t find any movement.
We looked at the bolts that mount the sub-frame to the unibody, keeping an eye out for rust around the bolts, since it’s a dead giveaway that movement is taking place. But, we didn’t find anything there either.
At this point, we began to replace the suspected lower ball joint, planning to confirm the problem as the job progressed. With the joint separated from the knuckle, it moved freely and quietly. But, any movement of the control arm confirmed the noise was coming from the bushing.
In this case, the outside of the bushing was loose in the control arm, resulting in metal-to-metal contact and the squeaking noise. Side movement on the now-unloaded arm revealed a small amount of play at the outside of the same bushing, which was causing the knocking noise. As the arm was removed, the problem was obvious. The bushing had separated and was moving in the bracket. While this is not a common Nissan problem, you can be sure we’ll look more closely at the bushings in the future.
The more common cause of knocking noise is the sway bar attachment points and links. As I stated earlier, any movement in these components will result in a substantial noise inside the car. Many times, you’ll pick up these noises as the car is driven in the parking lot at slow speeds; they will usually be easily duplicated in the shop by rocking the car. A good way to isolate the noise is to simply put your hand on the link as the car is moved — the play will be obvious.
If the noise is more of a rattle than a knock, I’d be looking at the brake pads to be sure all the anti-rattle hardware is in place and doing its job. Lightly applying the brakes should confirm that pad movement is causing the noise.
Another common customer-missed cue will have them complaining of a suspension noise when the real issue is a bad CV joint that’s clicking when turned; another case where the customer comments can get you in trouble without an initial road test.
Drifting or Pulling Culprit
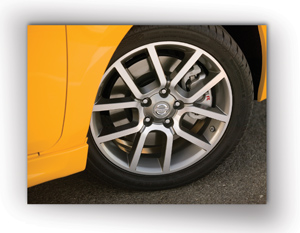 Not all your suspension complaints will be noise-related. If you’re faced with a drifting or pulling complaint, look first to the tires for the cause. It doesn’t take much stagger (difference in circumference) to cause a pull. We use a narrow 10-foot tape that conforms nicely around the tire. In minutes, all four properly inflated tires can be measured, letting you make an educated decision on where to mount them on the car. At the same time, take a look at the tire wear for any alignment issues.
The same goes for vibration complaints. The most important thing we need to establish is when the vibration occurs, and if it’s a noise or something the customer is feeling. We’ve had many customers complain of a vibration, when they’re actually talking about an exhaust shield rattle or the growling noise caused by a bad wheel bearing or cupped tire.
We’re all experienced with tracking down steering vibrations and should have no trouble with Nissans. Tire condition has to be considered, especially if rotation service has been ignored; it’s not unusual for cupping to take place on the rear tires. Such uneven wear will often mimic a bad bearing, and will certainly cause a noticeable vibration through the seat.
This cupping is often thought to be the result of weak rear struts, but I would hesitate to recommend strut replacement if cupping is the only symptom experienced. A better solution is regular tire rotation. If the struts are showing signs of leakage, or fail the time-honored push test, they should be replaced. But, still recommend regular rotation service.
While we’re talking about vibrations, we have to consider the front-drive axles, CV joints and brakes. If the shake changes under load, it’s a safe bet there is a worn inner CV joint. The challenge is determining which side is the offender; it could be both. Since we see this only on high-mileage vehicles, we recommend replacing both axles with quality, rebuilt units.
If the customer reports an intermittent vibration that can’t be pinned down, look for evidence of a sticking brake caliper and the overheating it causes. You would think the driver would smell the overheating brakes, but that isn’t always the case. The vibration, however, will get the attention of anyone. We also have to consider the vibration caused by warped rotors.
Brake Problems
That brings us to the brake portion of this article. Brake problems will present themselves in a couple of ways. Like the suspension system, the most common complaints are noise-related. Nissan, like many other manufacturers, makes use of the simple and effective tab-type sensor that will contact the rotor when the pads need to be replaced. The resulting, high-pitched squeaking noise has proven to be very effective in getting the driver’s attention. That’s not to say that people won’t ignore it and drive until the brakes are making that distinctive grinding noise that indicates the friction material is gone and metal-to-metal contact is taking place.
Many of the occasional, annoying noises that disc brakes make are a small trade-off for the braking performance delivered by the system. Often, just explaining that to a customer goes a long way toward settling their concerns that something is wrong with their brakes.
But, any persistent noise should be investigated. Some noise will be the result of rust on the rotors, calipers, hardware or even the brake pads themselves. Use only the best parts, replace questionable units and make sure that the brake hardware is in good condition or new. Also, make sure that all the metal-to-metal contact areas are being lubed with the proper grease that’s designed to do this tough job in a harsh environment.
The rotors come into play again if you’re faced with a brake-related vibration. The most common is a vibration while braking that’s caused by warped rotors. Ask your customer a couple of questions that could help ensure a quality job: When did you notice the problem, and what happened to cause the problem? Did you have any tire work done lately? If so, it’s likely you’ll find that the lug nuts are unevenly tightened. To confirm this condition, loosen the lug nuts by hand. More often than not, the over-tightened nuts will be obvious.
The biggest enemy of the rotor is heat, so take a good look at the rotors as they’re removed for signs of overheating. It makes little sense to install fresh parts only to subject them to the same conditions. It could be that the last tech who did the brakes missed one of the steps we just talked about, or, more likely, the increased mileage has caused a problem. Either way, if it’s not corrected, your new rotors will soon be in the same shape as the ones you just took off.
With high-mileage vehicles, you could be faced with a “brake pedal sometimes fades to the floor” complaint. Although it’s not a common complaint on Nissans, a little detective work is required in such cases. If the pedal fades as the vehicle comes to a stop, often in a situation where the pedal is being partially applied in anticipation of coming to a full stop, it’s a safe bet the master cylinder is the culprit.
If, on the other hand, the condition results from a long ride at highway speeds, it’s likely that excessive drag is causing the fluid in the calipers to overheat, resulting in brake fade. When the brakes cool, the pedal often will return to what feels like normal to the customer. Many times, the customer will report a burning smell and the worst cases will cause a severe vibration. It takes a stuck caliper to generate the degree of heat needed to cause these problems, and they certainly should be closely checked.
You should be able to find the problem wheels by inspecting the rotors. If that much heat was generated, the rotors will show the signs. If you can duplicate the tight wheel, don’t be too quick to condemn the caliper without cracking open the bleeder to be sure there’s no pressure in the line. If pressure exists, backtrack through the hydraulic system until the restriction is found.
Nissan uses an emergency brake that is incorporated into the rear caliper. We know that most hand-brakes are not used on a regular basis, and we also know that a mechanical device doesn’t like to sit around, only to suddenly be forced into service. The same thing can be said for the cables. If the hand-brake levers aren’t returning on the caliper, be sure that the cables aren’t binding. The complexity of the hand-brake does make the rear calipers a little pricier, but I still like to replace them in pairs to maintain the balance of the brake system.
Drum Brakes
We’ve been talking about disc brakes, but many Nissans you’ll encounter will be equipped with rear drum brakes. More than adequate to perform the job, they’ll give many miles of service, requiring little attention other than periodic cleaning to remove the dust, and shoe replacement.
The same good brake service habits apply here. Clean, inspect and lube all components, check the hardware and replace what’s necessary with high-quality parts. Be sure that the self-adjusting hardware is working properly, and that the hand-brake cables and associated parts are operating smoothly and are well lubricated.
Don’t overlook the wheel cylinders. Be sure that the pistons are free with no sign of leakage. Be careful not to over-adjust the rear brakes. On the Quest minivan, for example, there is a service bulletin advising that the rear brakes not be adjusted at all. In such cases, let the self-adjusting system handle the task. If they are manually adjusted, they’ll be too tight, causing drag and overheating, and producing all the negative results we’ve been talking about.
ABS Issues
Nissan has done such a good job with its anti-lock brake systems that problems could be considered rare. I’m sure we’re all familiar with ABS operation, and Nissan doesn’t do it any differently. Wheel speed sensors send an AC voltage signal to the underdash ABS control unit, while the brake light signal tells the unit the brakes are applied. If the wheel speed sensor signals brake lockup, the control unit activates solenoid valves in the underhood ABS actuator, controlling the pressure to the locking wheel, preventing a loss of traction and keeping the driver in control. Since the system spends most of its time waiting to be called into service, we want to be sure it’s ready when the driver needs it. It monitors itself for faults and will keep the on-dash ABS lamp illuminated if any problems are found.
If you’re faced with an illuminated ABS lamp, no special tools are required to access codes in Nissans built before 2006. But a scanner with ABS capabilities will certainly make it easier and more efficient. Before retrieving codes, drive the car over 20 mph for at least a minute. I’d even suggest a slightly longer ride that will let you assess overall brake operation.
To retrieve codes on 2000-’06 cars, ground terminal nine in the OBD II diagnostic connector. On earlier models, ground terminal 4 in the Nissan diagnostic connector that’s located next to the fuse box. Codes are counted out on the ABS lamp: They’re two-digit codes with long flashes being tens, followed by short flashes for the ones. For example, one long flash followed by two shorts is 12. When you access the system, the first code you’ll get will be a 12, followed by fault codes if they are stored. Up to three codes will be saved, with the most recent fault being the first displayed. A code 12 will follow the faults. If only a code 12 is found, the system sees no faults. On later model Nissans, an enhanced scanner is required to access ABS and traction control codes and data. The good news is there are plenty of options available at almost any price point that will give you the capabilities required.
The earliest versions have no memory and will only display a code while the ABS lamp is lit. In this case, after the car is driven, don’t turn the key off until the code is retrieved. Using your service information, locate the ABS control unit. Count out the code from the LED in the control unit. This system will save only one code. Deal with the code displayed and road test the car to check for others. There are too many code definitions to list here, so it will be necessary for you to consult your service information system. As always, the code will send you in the right direction, but it’s up to you to perform the final diagnostic steps to confirm whether the problem is a bad part or a circuit-related issue.
On early cars, the codes are self-clearing, so no ABS lamp means no codes. Later models require that the codes be cleared. To do this, turn on the key and use the jumper wire we grounded to get the codes. Ground the jumper for one second and disconnect it, then repeat the process twice more in a 12-second period, grounding the jumper for at least one second each time. The ABS lamp will be illuminated during the process, but should go out when completed. Confirm that the codes have been cleared by checking for codes but getting only the system’s normal code 12.
I’ve mentioned a couple of times that ABS has changed the way we service brake systems. The most important change is that the quality of the fluid in the system is critical. It’s no longer acceptable to pull fluid out of the reservoir and simply push in the caliper pistons, moving all that dirty fluid back though the ABS actuator.
We also talked earlier about the brakes dragging as result of pressure buildup in the system. With the small orifices in the ABS unit, it doesn’t take much debris to cause a restriction in the valves that would prevent fluid from returning to the master cylinder when the brakes are released. As the temperature of the fluid increases, the pressure will increase while applying the brake, causing the problems we talked about.
I’ve never heard of anyone who has had any success flushing an ABS unit that has been contaminated. Replacement of this expensive unit is the only alternative. It’s an unfortunate situation for the customer, and an even worse one for the shop that did the job. The way to avoid this problem is to always open the bleeders while the pistons are retracted, using a bleeder bottle to catch the fluid. There’s no reason not to get into this habit.
At this point, I wouldn’t think you would consider a brake job complete without bleeding and flushing the system. Although brake fluid changes have always been a recommended service that was often overlooked, it shouldn’t have been. With the widespread use of ABS and the longevity that these vehicles enjoy, it’s foolish not to at least flush the system when brake service is performed.
For some of you, this article covered things that are second nature, but I believe it’s the basics that set the tone for a shop. Good work habits that start with handling the customer at the service desk, to making sure every car gets a basic safety check, are the things that will set your shop apart from the guy down the street.

