 When Onboard Diagnostics II (OBD II) was added to all 1996 and newer vehicles over a decade ago, it included nine different operating modes that could be accessed to diagnose and repair vehicles. Most technicians are familiar with the more common modes such as reading codes, looking at scan tool PID data, retrieving freeze-frame data that was stored when a code was set, checking the status of the various onboard test monitors, and running various onboard self-tests if their scan tool has bidirectional capability and the right software to access and initiate the tests.
But there’s another mode that has long been overlooked. It is called Mode $06.
The Missing Mode
Mode $06 has sometimes been called the “missing” mode because it has been hard to find on most scan tools. And even if you did find it, it didn’t make any sense because it was all hexadecimal gibberish. The information that is displayed in Mode $06 is not in plain English (or Spanish or any other language that is decipherable to most human beings except computer geeks or math professors). It is in hexadecimal code, which is a base 16 numbering system that uses the numerals 0 through 9, and the letters A through F.
To make matters worse, all the values displayed are not labeled as to what they represent. Until recently, most scan tools simply displayed three columns of information. The first was labeled TIS$01, the second was labeled CID$01, and the third read either PASS or FAIL. Not much to go on.
So what exactly is this Mode $06 information and how can it be used?
Mode $06 is an advanced diagnostic mode that displays the actual test results for all the noncontinuous monitors (things like the catalyst monitor, EVAP system monitor, heated O2 sensor monitor, EGR flow, secondary air monitor and thermostat monitor). On the newer vehicles with Controller Area Networks (CAN), Mode $06 is also used to monitor misfires.
Mode $06 shows the actual self-test data the OBD II system generates and uses to detect faults and set trouble codes. Think of it as the pending code information that may eventually set an actual trouble code and turn on the check engine light (malfunction indicator lamp or MIL).
This is valuable information to look at because (1) you can often see problems developing before they set a code, (2) you can find problems that are causing driveability problems but have not set a code, and (3) you can use the Mode $06 test results to verify the repairs you made actually fixed the fault.
As smart as OBD II is at detecting faults, one of its limitations is that it typically disables certain monitors once a fault has been found and a code has been set. Because of this, you have to fix the initial problem before the OBD II monitors will reset and run again. So if there are additional problems, they won’t show up until after the first repair has been made.
The Check Engine Light comes on again, and you look bad because your customer thinks you failed to fix their problem the first time. The truth, of course, is that the OBD II system just detected another fault that it couldn’t detect before because all of the monitors had not run.
Mode $06 Reduces Comebacks
Nobody wants comebacks, but given the limitations of OBD II they would seem unavoidable in some cases. Or are they?
The common three-step approach to fixing cars today goes something like this:
1. Hook up a scan tool and read out any trouble code(s).
2. Maybe do some voltage, resistance or other checks if absolutely necessary to isolate a fault, otherwise just replace the part implicated by the code.
3. Erase the code(s) from the computer’s memory, and send the customer on their way (then repeat steps 1 through 3 as many times as necessary if the check engine light keeps coming back on).
This is the only approach many technicians know how to use. And if no codes are found when they plug in their scan tool, they don’t have a clue as to what to do next. They start throwing parts at the problem, and if one part doesn’t fix it, they replace something else, and something else, and something else, and so on until either they eventually fix it or the customer stops coming back (which often means the customer has taken their vehicle to another shop where the process begins all over again).
The nice thing about Mode $06 is that it can eliminate a lot of guesswork when a driveability or emissions problem involves components or systems that are part of the OBD II noncontinuous monitors, especially if no codes have been set or the check engine light keeps coming back on.
The Mode $06 self-checks will start to update almost immediately when a vehicle is driven. This means a short test drive may be all that’s necessary to get a PASS or a FAIL on a monitored system or component. You don’t have to put the vehicle through a long and complicated drive cycle to meet all of the enabling criteria so all of the monitors will run (a process that may take several days, or even weeks depending on the weather and how the vehicle is driven).
Consequently, if all of the Mode $06 values pass, you don’t have to worry about the check engine light coming back on or repeated comebacks that might cause a good customer to go elsewhere.
How To Find Mode $06 Data
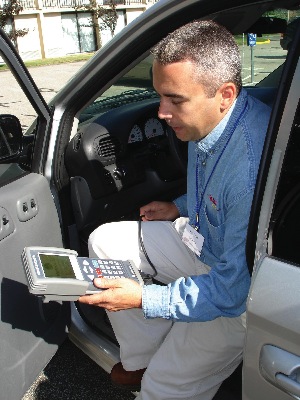
Mode $06 data can be accessed on most newer scan tools that cost $200 or more, as well as most professional-grade scan tools. The exact procedure for finding the Mode $06 data will vary from one scan tool to another, and some (such as GM’s Tech 2) can’t access it at all.
Scan tools that can display Mode $06 test information currently include Snap-on (MT2500, Solus and MODIS), OTC Genisys and Nemisys, MasterTech, Ford NGS, Chrysler DRB III, various scan tool models manufactured by Actron, AutoXray, Interro, Equus/Innova, Kal Equip and others).
On an older Snap-on MT2500 scanner, Mode $06 can only be found by selecting generic or global OBD, and not choosing a specific year/make/model of vehicle.
On a Vetronix MasterTech scan tool, choose F1, then go to the Global OBD II menu. Select “Other Tests” (Mode 5, 6 and 7), and scroll to Mode 6. The next screen should display the TIDs/CIDs for the vehicle. On the newest Vetronix MasterTech model, there is a special Mode $06 button to make access even easier.
You can also buy software that will allow a PC, laptop or notebook computer, Palm Pilot or Pocket PC to function as a scan tool. Many of these programs will also display Mode $06 data. One of the best software packages we’ve seen is called “AE Pro Plus,” which displays Mode $06 TIDs and CIDs in easy-to-read plain English with their values converted into amps, volts, ohms, temperature, pressure, etc. This software is available from www.aatecusa.com.
How To Read Mode $06 Data
Because Mode $06 data is displayed in hexadecimal code, you need a scan tool or scanner software that can translate the data for you. Most older scan tools only display hex code, but newer products are now translating the code and displaying it in more familiar terms. Or, you need to refer to the vehicle manufacturer’s Mode $06 data charts to figure out what the data means.
Mode $06 reference information can be found on many vehicle manufacturer technical websites (go to www.nastf.org for a complete list of these websites), on the International Automotive Technician Network’s website (www.iatn.net), or at John Forro’s Mode $06 website (www.mode06.com).
Some of this Mode $06 information is available at no charge on the iATN website and some OEM websites (Ford, GM and Honda), but you must pay for access on other OEM websites (Chrysler and most of the other imports), and the www.mode06.com website (which includes the most extensive listing of Mode $06 data in one location, plus minimum/maximum acceptable test values for many of the individual components). These costs can and should be passed along to your customers as an information access charge on their repair bill.
The first column of Mode $06 data is the Test Identification (TID) information. This is hex code for each individual test that OBD II performs (catalyst monitor, EVAP vacuum monitor, etc.). If your scanner software does not translate the TID for you, a Mode $06 reference chart will be necessary to figure out what each test is, and this will vary depending on the year, make and model of the vehicle.
A TID $01 on one vehicle may be the catalyst monitor, while on another it might mean something else like an oxygen sensor. On the newer CAN cars, the Mode $06 information has been standardized (same hex code for all makes and models), and TIDs are now called MIDs (Monitor Identification), and CIDs are now called TIDs (Test Identification). All of the protocols are spelled out in a document published by the Society of Automotive Engineers called SAE HS3000.
The next column, which is labeled Component Identification (CID), lists the actual test value for that component. This is always a numeric value with a minimum/maximum range. Again, the hex code is gibberish unless you have software or a reference chart to make sense out of it. The OBD II system itself doesn’t assign units of measure or other familiar labels to CID values. It only looks at the number and compares it to the acceptable minimum or maximum limit that is programmed into its memory for that particular item. If the number is within the range, it gets a PASS. If it is outside the range, it gets a FAIL.
For example, if the TID happens to be the catalytic converter, and the CID test value reads 200, you can’t tell if the reading is good or bad. If the maximum limit happens to be 128 on this vehicle, the third column will show FAIL because it is out of range. If the reading is less than 128, it will show PASS because it is within the acceptable range. Either way you really don’t need to understand what the number actually means because Mode $06 just told you if it is good (PASS) or bad (FAIL).
What do you do with this information? You can scroll down the list of Mode $06 monitors and check for anything that shows FAIL. If something is failing, it needs to be fixed. Likewise, if everything shows PASS, then you can safely assume everything is functioning within normal parameters and there won’t be any surprises down the road (like codes being set and the check engine light coming on).
On some vehicles (Ford mostly), all the Mode $06 data is erased and reset to zero when the ignition is turned off. On others, it simply picks up where it left off when the engine starts.
In conclusion, if you have not been using Mode $06 data because you didn’t know what it was or how to find it, maybe now you’ll see the value in using Mode $06 to diagnose and repair vehicles.

