One thing on your customers’ minds during the summer driving months is air conditioning — as in, will it work when they need it. Driving around in the hot summer heat can take a toll on the A/C system, so, chances are, you’ll be doing a lot of HVAC repairs from now until the end of September.
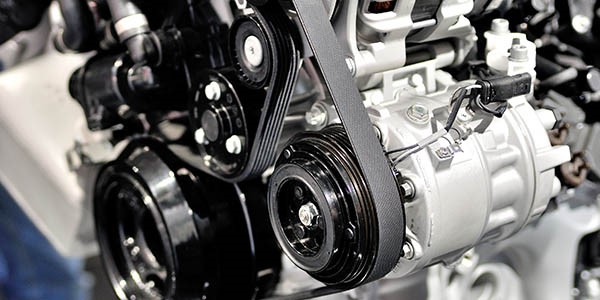
The A/C compressor is a complex component in today’s vehicles. It not only compresses the refrigerant that is circulated through the system, but it is basically the heart of the A/C system and can be affected by other components not doing their jobs. During an A/C cycle, the compressor changes the refrigerant from a gas, to liquid state as it flows through the different parts of the system, as well as through the high and low-pressure sides.
Replacing an A/C compressor is a costly endeavor for the consumer, and a laborious job for the shop that performs the repair. Before you replace the compressor, however, be sure that it’s necessary, and no other underlying issues are causing the problem.
Talk to the customer before starting the repair process and get a good description of what the problem is from their perspective. If, for example, your customer says that his or her A/C is blowing only cool air but not cold air, there could be several causes including a clogged filter, a leaking hose or fitting, or bent fins on a condenser.
A/C problems can typically be traced to leaks or compressor failure, so it’s best to go through all the steps to ensure your customer gets back on the road, cool and trouble-free, and won’t be making a return visit for a recurring issue.

GETTING STARTED
Give the A/C system a complete visual inspection before performing any tests or
repairs. You may find something obvious that will save time and eliminate the
need for more diagnostics. Other issues that should be investigated before
replacing a compressor include checking for leaks using an electronic leak
detector or leak detection dye. Scan the car for any codes and see what type of
refrigerant oil the compressor uses. Do not top off a system that you already
know has a leak, as it will just vent into the atmosphere.
Turn on the engine and set the A/C on max cool and the fans on high to check that the clutch is engaging on the compressor. The refrigerant may be low if the clutch is engaging and rapidly disengaging. With a voltage meter, check that voltage is getting to the compressor. If there is voltage, and it is not engaging at all, the clutch may be toast.
Next, you will need to draw a deep vacuum on an A/C system to slowly raise the pressure and boil off the moisture in the system. The vacuum reading should be 700 microns or less for at least three minutes. You can reduce this time by preconditioning the evaporator before hooking up the vacuum pump, which raises the temperature so the moisture will boil off sooner.
You can do this by running the engine with the heater on full blast and in “recirc” mode, and also turning the blower on high, to bring the engine up to operating temperature. This method quickly preheats the evaporator so it is ready to evacuate.
CHECKING FOR LEAKS, DEBRIS
Leak testing should be done before evacuating the system because it is not the
most reliable way to locate or even identify a small leak in the system. Parts
that leak under pressure may not leak during an evacuation.
You should always fully flush the A/C system following a compressor or condenser failure. Compressors often fail because of debris in the system such as metal shavings or other contamination. Unfortunately, replacing the condenser is the only way to get rid of 100 percent of the contaminants. Newer condensers can be too difficult to clean because of extremely small, extruded tubes. For these types of applications, the condenser should be replaced.
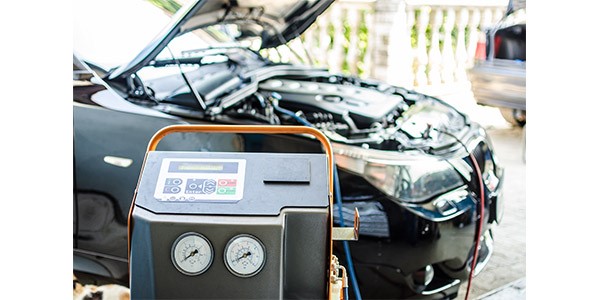
Recover the refrigerant with a recovery/recycling/charging station. Remove the nuts from the compressor, and then disconnect the suction line and the discharge line. Plug or cap the lines right after removing them to keep moisture and dust from contaminating the system. If you’re installing a new A/C compressor, you must calculate the amount of refrigerant oil to be removed from it.
When installing a new compressor, be sure to replace all of the O-rings and apply a thin coat of oil to them first. Also, make sure to use O-rings that are compatible with R-134a to avoid unnecessary leaks down the road. Use the recommended refrigerant oil, and never mix two different types of oil together. If you spill any oil on the vehicle, wash it off immediately as it might damage the paint.
Next, recharge the system with the recommended amount and type of oil and refrigerant. Do not overcharge and do not add too much oil or it may cause damage. When adding oil, rotate the pulley for 10-12 revolutions to evenly distribute it inside the compressor. Verify that it is working correctly by running the A/C system for a few cycles. Give yourself a pat on the back and get ready for the next A/C job. Welcome to summer!
This article was brought to you by Valeo. For more information, please visit www.valeoservice.us