A blown head gasket is bad news for any motorist. It means the cylinder head has to be removed, and possibly resurfaced, to replace the head gasket. If coolant has entered the cylinders and/or crankcase, additional repairs or a whole new engine may be needed depending on the extent of the damage. Anyway you look at it, replacing a head gasket is a labor-intensive job that may end up costing your customer upward of $1,500 or more.
One of the first questions many customers ask when they’re told their engine has a blown head gasket is, “Why did the gasket fail?” The answer to that question depends on the vehicle, its history and any contributing factors you may have uncovered during your diagnosis.
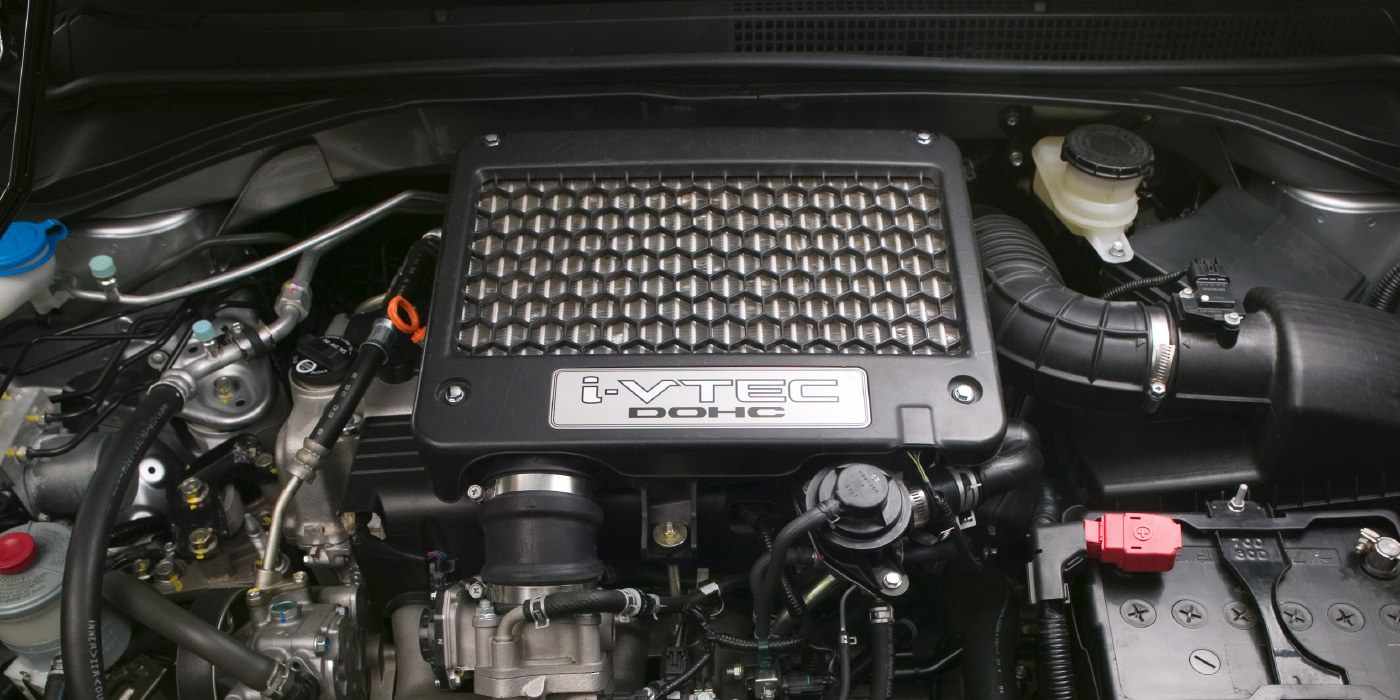
Some engines just have a history of blowing head gaskets. Head gasket failures on older Honda Civic 1.3L and 1.5L engines are fairly common because of a “hot spot” between the two center cylinders in the cylinder head. The location of the exhaust valves, combined with restricted coolant flow in the head, creates a hot spot that causes the head to swell. When this occurs, it crushes the head gasket, leaving a path for combustion gases to burn through the gasket. Replacing the original gasket with another OEM gasket temporarily solves the problem, but sooner or later the problem returns because the OEM gasket crushes and fails again.
The cure here is to install an aftermarket head gasket that has been re-engineered to handle the hot spot. The aftermarket gasket has a 0.005-inch “Y-shaped” aluminum shim pressed into the face of the gasket under the hot spot between the two center cylinders. The combustion armors around all four cylinders are also connected to add additional strength and reinforcement. This prevents the gasket from being crushed and saves you a comeback.
Some head gasket failures can be blamed on a hard-to-seal cylinder head. The 1987-’96 Mitsubishi 3.0L V6, 1988-’95 Toyota 3VZE 3.0L V6 light truck engine, and 1995-’98 Toyota 5VZFE 3.4L V6 in T100s, Tacomas and 4Runners are all examples of engines with hard-to-seal heads and frequent head gasket failures.
In the case of the Mitsubishi 3.0L V6, the armor around the combustion chambers on the OEM gasket has a tendency to crack. The cracking occurs as a result of metal fatigue caused by the head scrubbing back and forth on the block.
This engine uses aluminum heads and a cast-iron cylinder block. Aluminum expands at a much higher rate than cast iron, which causes the head to swell and move around as the engine heats up and cools down. Over time, this leads to the cracking problem that causes the head gasket to fail. The cure for this engine is to install redesigned aftermarket head gaskets with stronger combustion armor and a special anti-friction coating that eliminates the main reasons for gasket failure.
On the Toyota 3.0L engine, excessive head motion is also a lead cause of gasket failure. Like the Mitsubishi example, installing a redesigned aftermarket gasket with improved combustion armor and an anti-stick coating should provide a long-lasting fix.
In the case of the Toyota 3.4L engine, the OEM gasket is a graphite head gasket. Graphite is a good high-temperature material but, in some applications, it is too weak to withstand a lot of head motion.
To address this engine’s motion problems, one aftermarket gasket manufacturer has come out with a “Multi-Layer Steel” (MLS) replacement head gasket. MLS head gaskets are made of several layers of embossed stainless steel. A thin coating (0.001- to 0.0015-inch) of nitrile rubber or Viton is used on the external surfaces as well as between the layers to provide maximum sealing. MLS gaskets are almost bullet-proof – but also more expensive than conventional soft-faced gaskets. Even so, if you want to fix the problem once and for all, MLS is the way to go in this application.
Overheating
Overheating is also a very common cause of head gasket failures. If the engine gets too hot, the cylinder head can swell to the point where it crushes the head gasket (usually between the cylinders because this is the thinnest point). The extruded material and/or cracked combustion armor then provides a leak path for coolant and/or combustion gases.
Replacing the head gasket will cure the leak, but the underlying cause that made the engine overheat in the first place also needs to be diagnosed and repaired – otherwise, the newly installed gasket will suffer the same fate the next time the engine overheats.
The cooling system on many late-model vehicles is just barely adequate (to reduce weight and cost), so it doesn’t take much to make some of today’s engines run hot and overheat. A low coolant level, a dirty cooling system, a cooling fan that isn’t working correctly, or overloading or overworking the vehicle can all be contributing factors.
As little as 1/8-inch of calcium deposit buildup inside a radiator can reduce cooling efficiency by 40 percent – which can make the engine run hot and overheat.
If a head gasket has failed because of overheating, be sure to check the coolant level and condition, the concentration of antifreeze in the coolant (too much antifreeze in relation to water reduces the ability to transfer heat), the radiator (obstructions, leaks, etc.), hoses, thermostat, water pump, cooling fan, EGR system, belts and the exhaust system to determine why the engine overheated. In some cases, an exhaust restriction (clogged converter) can make the engine run hot.
A head gasket that failed because of overheating or a hot spot will be crushed and measurably thinner in the damaged area when checked with a micrometer. By comparison, a gasket that has failed due to detonation or pre-ignition will usually have cracked armor around the combustion chamber, which leads to burn-through.
Detonation & Pre-Ignition
Another common cause of head gasket failure is excessive pressure in the combustion chamber. This can be the result of detonation and/or pre-ignition.
 Detonation is an erratic type of combustion that occurs when there’s too much compression and not enough octane. Compression can increase over time as carbon deposits accumulate on top of the pistons and inside the combustion chambers. Many late-model import engines run fairly high compression ratios, and some require premium octane fuel. If compression reaches a point where the fuel ignites spontaneously before the spark can set it off, the engine will knock and ping under load.
The sharp hammer-like blows that produce the noise also hammer the head gasket, pistons, rings and rod bearings. Heavy-detonation can be very damaging and will eventually break something. Contributing factors include an inoperative EGR system (which helps cool combustion temperatures under load), over-advanced ignition timing and a lean air/fuel mixture (dirty fuel injectors or low fuel pressure).
Pre-ignition occurs when a surface inside the combustion chamber gets too hot and becomes a source of ignition instead of the spark. The hot spot might be the exhaust valve, spark plug or a sharp edge in the combustion chamber. Pre-ignition causes the air/fuel mixture to ignite too soon. The result is pressure that peaks too early on the compression stroke, which often causes detonation to occur at the same time. Underlying causes of pre-ignition include cooling problems, exhaust restrictions and lean air/fuel mixtures.
Installation Errors
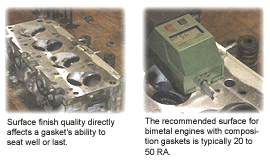
You’ve never made an installation mistake, right? Trouble is, some technicians don’t realize they’ve made a mistake that dooms a head gasket to premature failure because they’re not aware of the gasket’s requirements. They may carefully clean both mating surfaces and torque the fasteners correctly, but if they’ve paid little attention to the quality of the surface finish the gasket may not seal well or last.
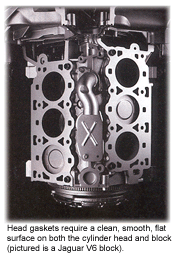
Head gaskets obviously require a clean, smooth, flat surface on both the cylinder head and block. If the surface finish on a bimetal engine head and block is too rough and digs into the gasket too deeply, it can literally tear the gasket apart over time – even a gasket with a non-stick coating. That’s why surface finish is so important on today’s engines.
For bimetal engines with composition gaskets, the recommended surface finish is typically 20 to 50 RA. This compares to 60 to 120 RA for cast-iron engines with the same type of gaskets. If the engine uses an MLS head gasket, the recommended surface finish may be 20 RA or less (a mirror finish). Extremely smooth finishes require high-quality resurfacing equipment (typically a milling machine) to achieve the low numbers.
If the head and/or block are not perfect and are not resurfaced (or can’t be resurfaced because they are too thin) on engines that require an MLS gasket, one alternative is to install an aftermarket MLS gasket that has a thicker rubber coating. Some of these gaskets can handle surfaces as rough as 50 to 60 RA, which is more like that of a traditional gasket on a cast-iron engine. When cleaning the head and block, don’t use an abrasive pad in a drill to grind off any old gasket residue. Use a scraper and gasket remover. Grinding can leave shallow depressions in the surface that can cause sealing problems later.
 While the head is off the engine, check the flatness of both the head and block. Use a straight edge and feeler gauges to check all critical areas, especially those between the cylinders. Flatness specifications vary depending on the application, but on most pushrod engines with cast iron heads, up to 0.003 in. (0.076 mm) out-of-flat lengthwise in V6 heads, 0.004 in. (0.102 mm) in four-cylinder or V8 heads, and 0.006 in. (0.152 mm) in straight six-cylinder heads is considered acceptable. Aluminum heads, on the other hand, should have no more than 0.002 in. (0.05 mm) out-of-flat in any direction.
Watch The Head Bolts
No head gasket can seal properly if the wrong procedure is used to tighten the head bolts. There are a lot of people who use the same old torque specs year after year because that’s the way they’ve always done it. But many tightening procedures and torque specifications have been revised, some several times. So don’t use an old manual that’s been sitting on the shelf for the past 10 years. Look up the latest procedures and specifications to make sure the procedure you’re using is up-to-date.
Head bolts must also be in good condition, free from nicks or corrosion and unstretched. Torque-to-yield (TTY) head bolts should not be reused. Also, bolt threads should be clean and properly lubricated.
Many people never check the accuracy of their torque wrenches. Beam and gauge-type wrenches are less likely to get out of calibration than the adjustable-dial type, but all torque wrenches should be checked for accuracy every year or two. Sending a wrench in to a tool supplier or lab to check its calibration may cost $25 to $35, but it’s a wise investment considering what it will cost you if a head gasket fails because the head bolts weren’t torqued accurately.
Some more suggestions for head bolts include:
Inspect all head bolts to make sure they are in perfect condition with clean, undamaged threads. Dirty or damaged threads can give false torque readings as well as decrease a bolt’s clamping force by as much as 50 percent! Bolt threads should be wire brushed, then inspected. Replace any that are nicked, deformed or worn.
Dirty or deformed hole threads in the engine block can reduce clamping force the same as dirty or damaged threads on the bolts. Run a bottoming tap down each bolt hole in the block. The tops of the holes should be chamfered so the uppermost threads won’t pull above the deck surface when the bolts are tightened. Clean all holes to remove any debris.
Check bolt lengths. Make sure bolt lengths are correct for each hole location (some holes require longer or shorter bolts than others). Bolts should also be measured or compared to one another to check for stretch. Any bolt that’s visibly longer than its companions should be replaced.
Use hardened steel washers under head bolts in aluminum heads to prevent galling and help distribute the load. Position the washers so their rounded or chamfered side faces up.
If the head has been resurfaced, check bolt lengths to make sure they don’t bottom out in blind holes. A bolt that bottoms out will apply little or no clamping force on the head, which may allow the gasket to leak. To compensate for resurfacing, you may have to install hardened steel washers under the bolts to raise them up, or use a head gasket shim to restore proper head height.
Lubricate bolt threads as well as the underside of the bolt head with 30-weight engine oil (not assembly lube or grease) when the engine is assembled. Use a flexible sealer on any bolt threads that extend into a cooling jacket.
If a gasket requires retorquing after initial installation, run the engine until it reaches normal operating temperature (usually 10 to 15 minutes), then shut it off. Retighten each head bolt in the same sequence as before while the engine is still warm. If the engine has an aluminum cylinder head or block, however, don’t retorque the head bolts until the engine has cooled back down to room temperature.
On some applications with retorque-style head gaskets, it may be necessary to retorque the head a third time after a specified time or mileage interval due to the design of the engine. When in doubt, always follow the vehicle manufacturer’s recommendations.