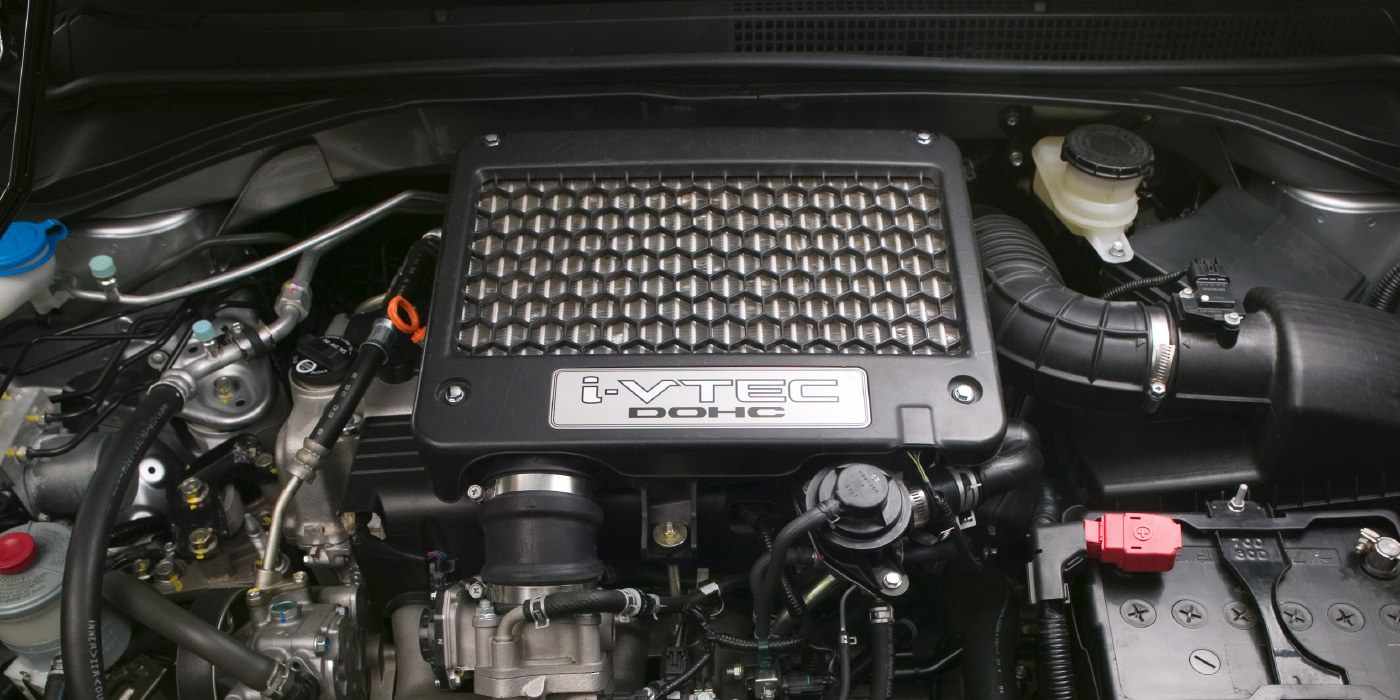
This month, we’ll be taking a look at a 2003 four-cylinder Accord that came in with a check engine light complaint, but no reports of driveability issues. It was due for a New York state inspection, so it had to be repaired. The code was persistent, setting itself consistently on the second startup.
Checking the code, we had a P0341 for cam and crank sensor phasing. As we road-tested the car, although it was slightly down on power, it ran fairly well considering it had 195,000 miles on the clock. When discussing phasing, we’re referring to the relationship between the crankshaft and camshaft sensors. What this really tells us is when the cam and crank timing are off. Don’t be tricked into thinking there is a problem with the sensors; there are other codes related to sensor problems. If you think about it, the sensors have to report back to the ECU for it to know the phasing (timing) is incorrect.
In our case, the tech reported what he found and wanted to go into the engine to check cam timing. As we talked, I asked him what else he thought could affect the timing on the engine. It didn’t take him long to say, “I guess it could have a problem with the variable cam timing system.” I agreed and then asked him what he thought could be wrong to cause the problem.
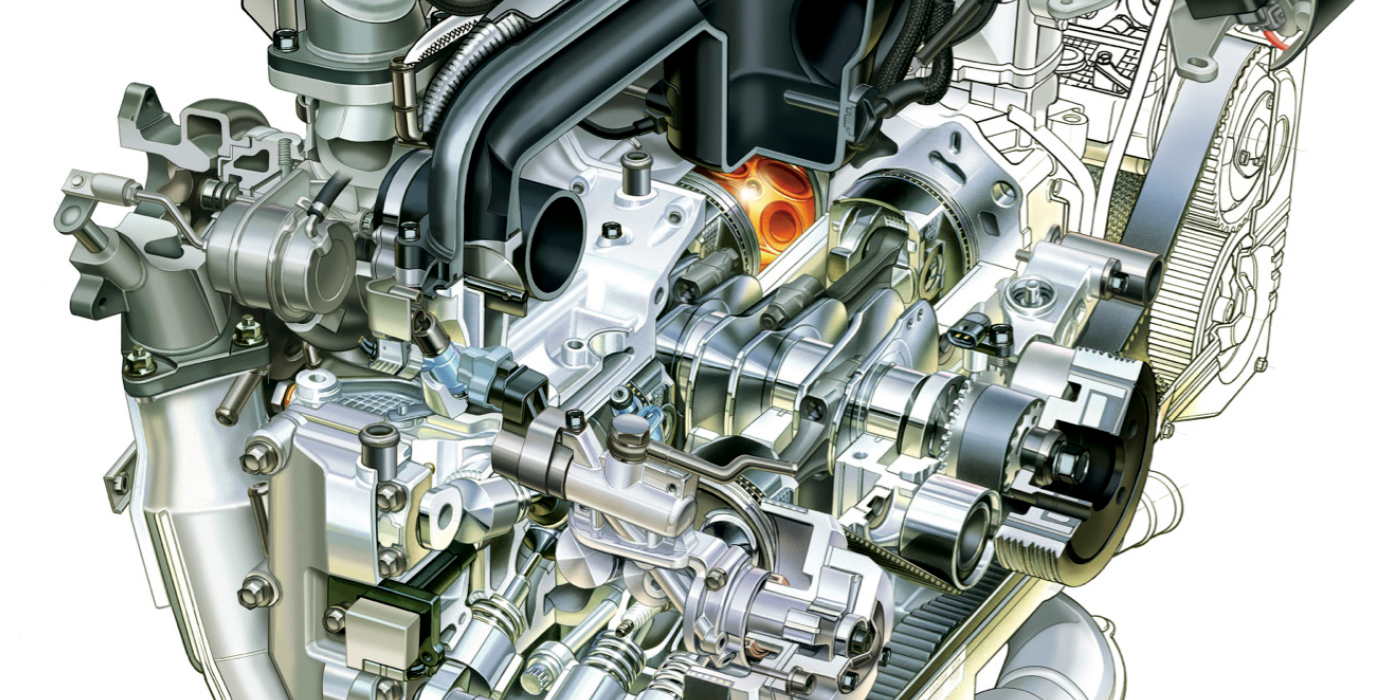
What we knew was the code would “hard reset” during the second start at idle. The car ran OK, but was a bit down on power and, as mentioned earlier, the customer didn’t notice it. Talking it over with the tech, we decided the only other system that could be responsible for such a code on this era Accord would be the variable cam timing system, also known as i-VTEC or Intelligent Variable Valve Timing and Electronic Lift Control. If the VTEC oil control solenoid is stuck open, or if the cam gear failed and is not locked, it would certainly provide different results than expected at idle and could be the culprit responsible for this code.
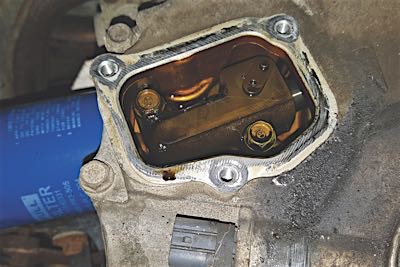
With a little research, the young tech was ready to confirm the problem on the Accord. The first step was to remove the VTEC oil control solenoid from the timing chain cover to confirm it would open and close smoothly. This was easily accomplished using our power probe to provide the power and ground. Once the operation was confirmed, it was set aside as we got ready to remove the valve cover and continue our testing.
At this point, we contacted the customer to explain the situation and get approval for the timing chain job, should our findings come down to that. Your shop may have a different policy than we do on things like this, but we don’t like to spend hours on diagnostics that help bring us closer to getting the job done, only to have the customer decide they don’t want to or can’t afford to continue with the repair. I don’t like having to charge hours for diagnostic time and not be able to deliver a repair, so we always get approval first.
In this case, the customer was willing to make the investment in the vehicle, so we moved to the next step and started the repair.
REPAIR PROCEDURES
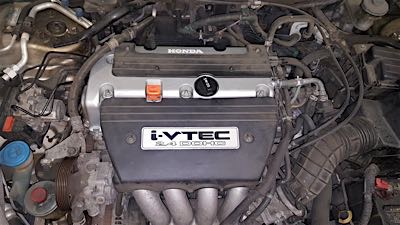
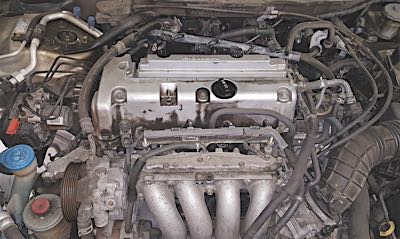
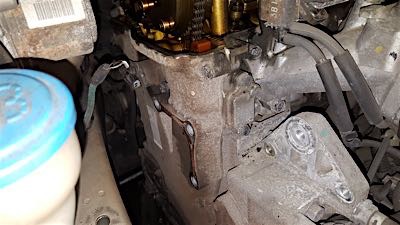
- To remove the valve cover, pull the plastic covers, coils and dipstick along with the crankcase vent hose. Note: Don’t forget the power steering hose bracket. To gain more access, you may want to remove the power steering pump and put it to the side, getting the pressure hose out of the way.
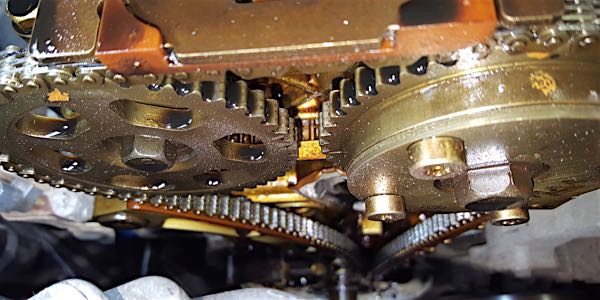
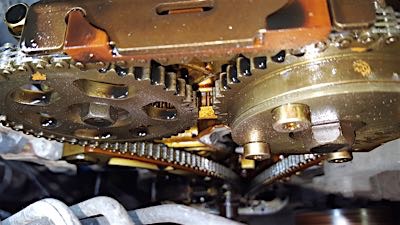
Accessories and harnesses are removed to gain access. - With the valve cover removed, the remaining tests are straightforward. The first test is to confirm that the VTEC actuator (cam gear) is in the locked position. Using an open-end wrench on the hex-shaped section of the cam, it will be easy to confirm the cam is locked to the gear. If the lock pin is in place as it should be, the cam won’t move without the gear.
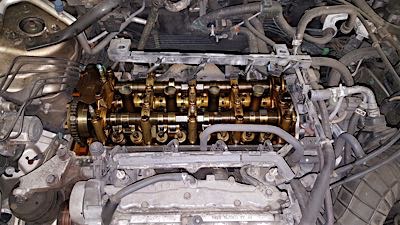
Don’t miss the opportunity to adjust the valves while the cover is off. A lack of sludge tells us the engine has enjoyed regular maintenance. - Next, check the cam timing. Turn the crankshaft in a clockwise direction. Note: Remember to always turn these engines in the proper direction of rotation to prevent the timing chain from jumping.
- Turn the engine to align the TDC mark on the pulley (second notch when turning clockwise) with the pointer on the front cover.
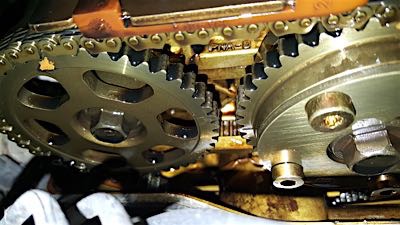
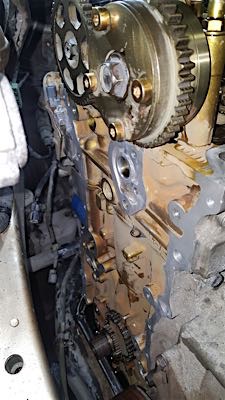
Timing marks on the gears should be aligned. The gears look good, so they will be reused. - With the crank in the proper position, check that the camshaft marks are properly aligned. You will find marks that should be aligned on the gears facing each other. If the Accord’s marks are off, it indicates the need to replace the chain. You’ll note the marks at the top of the gears that will be used to install the new chain.
- From here, it is pretty much nuts and bolts to remove the cover, but be sure to look at your service information. Use a floor jack and a piece of wood to support the engine. Note: You can use a piece of wood between the pan and subframe to support the engine with the right-side motor mount and bracket removed.
Access to the engine is fairly good with the motor mount removed. - When you are ordering parts, be sure to get all the chain guides, gaskets and seals, and the tensioner to be able to perform a complete job. There is nothing worse than having a $20 part holding up a $1,000 job.
- Before removing the tensioner, measure how far the piston has extended from the body. If it is out more than a half inch, the chain has stretched and is likely causing the problem.
Access the plate on the front cover to get to the tensioner. Before removal, turn the crankshaft counterclockwise to compress the tensioner. Move the lever to align the holes and insert the locking pin. - To remove the sensor, push the piston in, align the holes in the lock lever and tensioner and insert a pin to hold it. Now, it can be removed without coming apart.
- When installing the new chain, line up the marks with the colored links on the chain. The single-colored link should line up with the mark on the crank gear, while the colored links will end up with cam gear marks in the middle of them. Note: Be extra careful when applying the sealer and installing the front cover, making sure to reference your service information. It can be extremely frustrating having to pull a successful job back down to repair an avoidable leak. Don’t forget a new front crank seal, and a put little thread lock and seal on the crank bolt.
Front of engine with chain and guides removed. - Last, but certainly not least, be sure to check the valve lash and adjust it as needed. These days we don’t adjust valves as much as we use to, but it is foolish not to take care of this while the cover is off. One last word of warning: When you’re looking up the valve-clearance specification, make sure that you are looking at the inch spec and not the metric listing.