GM Tech Tip: Rear Independent Suspension for AWD Vehicles Out of Alignment – UnderhoodService

GM Tech Tip: Rear Independent Suspension for AWD Vehicles Out of Alignment

Drivers of some General Motors vehicles with independent rear suspensions and All-Wheel-Drive (AWD) may complain of excessive rear tire wear, clunking noises and possible instability. Technicians may also notice excessive negative camber of more than 3.5 degrees and toe-out conditions that cannot be corrected with normal adjustments.

Cause
The most common cause of these problems is the bushings that connect the upper control arms to the knuckle. The internal components of the joint can degrade in as little as 40,000 miles. The problem can be corrected with SuspensionMAXX’s SSmodule (Part Number SMX-SM850).  Prior to the SMX-SM850, complete knuckle replacement was the only option, which required major disassembly of the suspension.

Vehicles
2002-2006 Buick Rendezvous
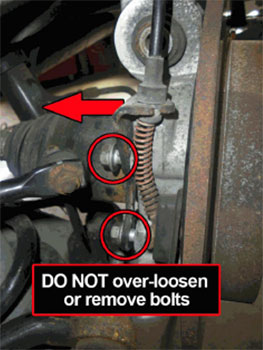
2005-2006 Buick Terraza
2001-2004 Chevrolet Venture (AWD)
2005-2006 Chevrolet Uplander (AWD)
2001-2004 Oldsmobile Silhouette (AWD)
2001-2004 Pontiac Montana (AWD)
2001-2005 Pontiac Aztek (AWD)
2005-2006 Pontiac Montana SV6 (AWD)
2005-2006 Saturn Relay (AWD)  

Parts and Tools
SSMod Tool (SMX-MDT)
SSModule  SMX-SM850 (#l8060685 fits the right and #I8060684 the left)

Disassembly Procedure:

Note: Apply all steps to both sides of vehicle (modules to be replaced in pairs).
1. Lift the vehicle and remove the rear wheels.
2. Support lower control arms
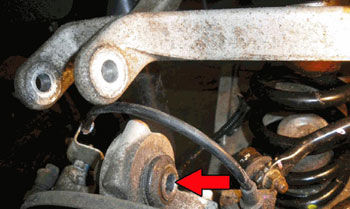
3. Carefully loosen parking brake bracket allow inward movement creating cable clearance for upper bolt (Figure 1).  

CAUTION: Do not over-loosen or remove bolts. Brake parts may become dislodged inside parking brake’s drum.

4. Remove upper thru bolt. Be sure to note bolt direction (nut forward) (Figure 2).
5. Temporarily place the parking cable below control arm.
6. Press the old module forward with SSMod-Tool (SMX-MDT) . Do not deform the knuckle (Figure 3).
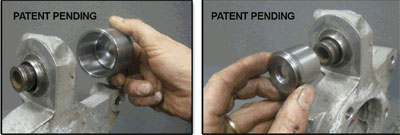
7. Thoroughly clean cylinder of all debris. Inspect for nicks or obstructions. CAUTION: Do not oversize the diameter. Clean and inspect backside for snap ring clearance — the surface must be flat.

Assembly Procedure
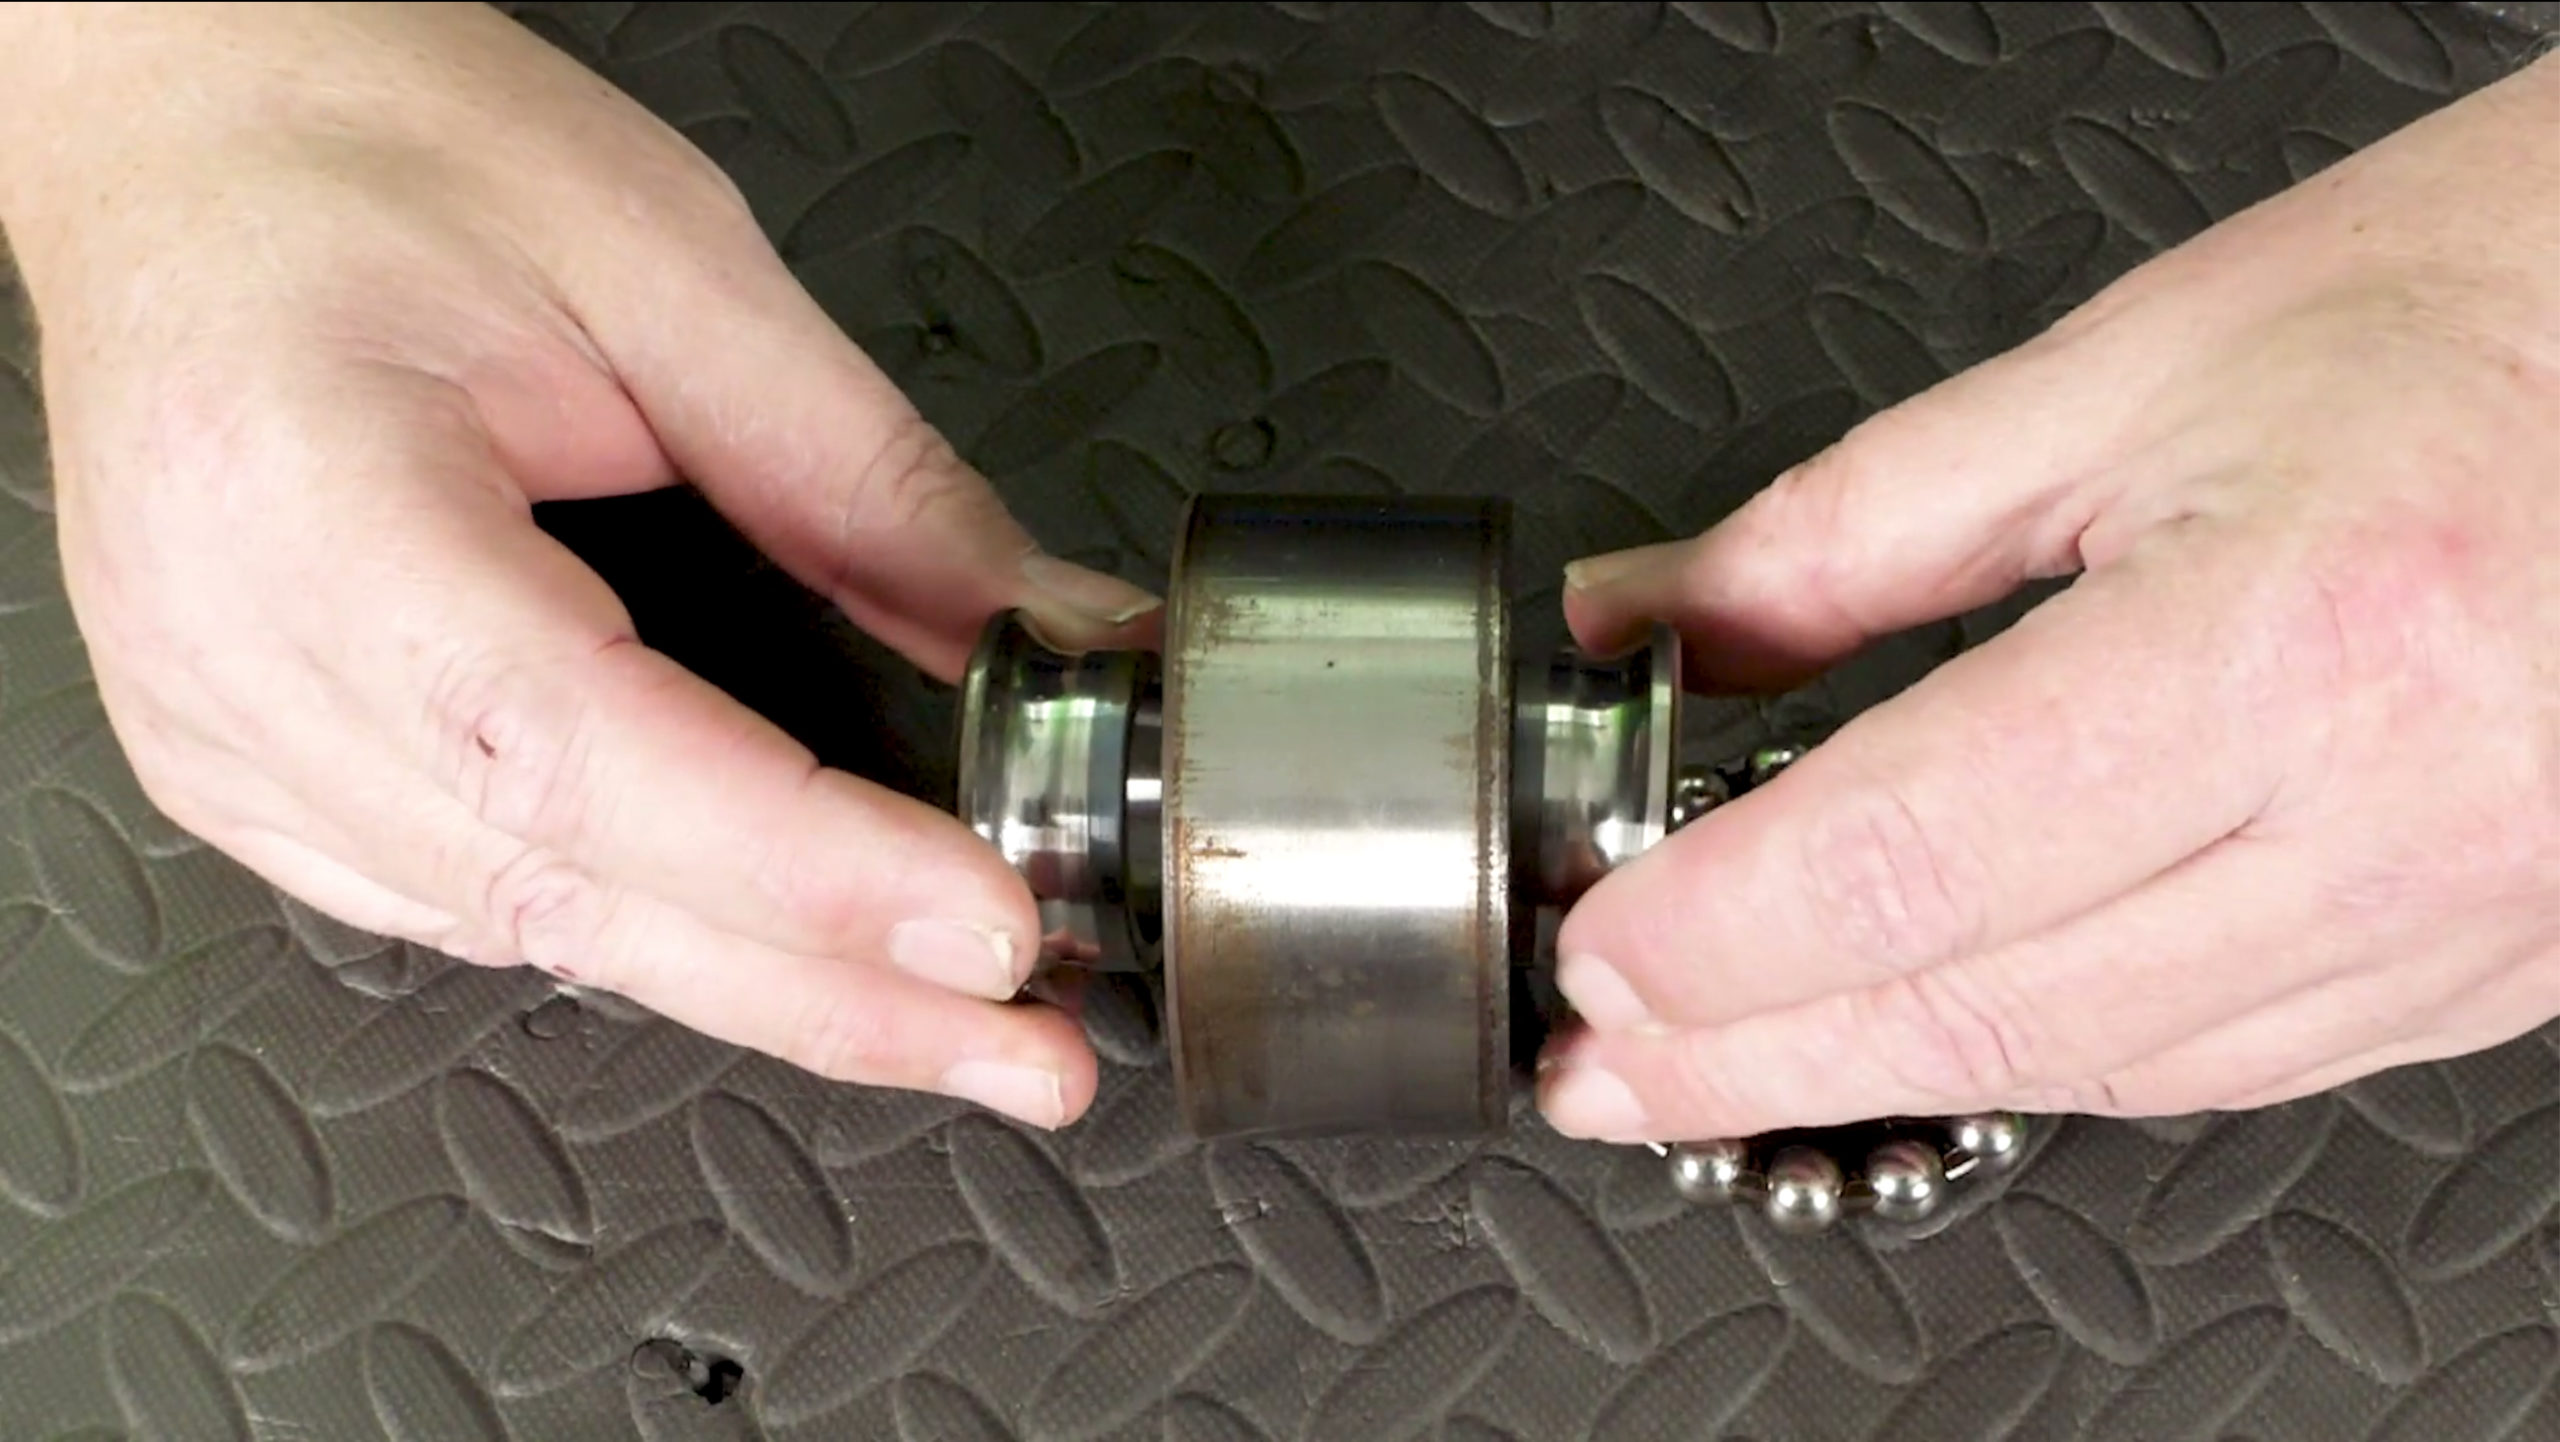
1. Lubricate the bore with anti-seize. Press new SSMODULE (SMX-SM850) with the SSmod-Tool (SMX-MDT) squarely into knuckle.
2. Install  snap ring (Figure 4).
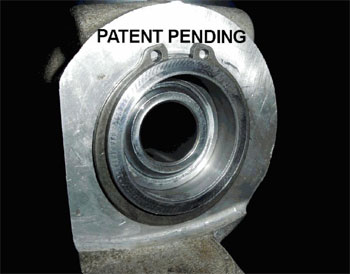
3. Clean control arm mount location using care not to remove base material. CAUTION: Inspect A-Arm mounting location for grooving or wear. If there are signs of contact from the knuckle, a replacement A-arm will be required.
4. Lubricate the SSMODULE liberally with automotive-based grease.
5. Install module extension tubes/seals, seating squarely with swivel ball. Note: Place brake cable above control arm.
6. Inspect thru bolt for rust damage, replace if needed. Re-install thru bolt as removed (nut forward). Torque to manufacture’s spec (63 ft. lbs.).
7. Tighten parking brake cable bracket to torque specifications for the vehicle.
8. Install wheel (torque to spec).
9. Perform wheel alignment.

Tip Courtesy of SuspensionMAXX. For more information go to ssmodule.com

You May Also Like

HVAC Sensors: More Than Just Temperature

When a driver sets a temperature in the control head of an HVAC system, what does it mean to the vehicle? Seventy-two degrees could mean many different settings depending on the outside temperature, humidity and even the position of the sun.

When a driver sets a temperature in the control head of an HVAC system, what does it mean to the vehicle? Seventy-two degrees could mean many different settings depending on the outside temperature, humidity and even the position of the sun.

When a passenger decides that 70 degrees is a better temperature for their zone, things get even more complicated. Automatic Temperature Control (ATC) systems require a complex array of internal and external sensors that include ambient air temperature sensors, interior temperature sensors, outlet duct and evaporator temperature sensors, pressure sensors, humidity sensors, blend door position sensors and sunload sensors.

Nearly 5,000 To Participate In Auto Value, Bumper To Bumper ‘Festive Walk’ To AAPEX 2018

On Thursday, Nov. 1, nearly 5,000 Auto Value and Bumper to Bumper automotive professionals wearing matching yellow shirts will begin their “festive walk” from the Mirage hotel to AAPEX 2018 at the Sands Expo, temporarily shutting down the busy Las Vegas Boulevard along the way.

Drive Belt Checklist: What Are You Missing?

You might have only one chance to sell a customer a new serpentine belt. With belts lasting roughly 90,000 miles, proper inspection at the time of failure is critical not only for selling the belt, but also for ensuring add-on sales and better customer satisfaction.

VIDEO: Using Airflow To Sell Cabin Air Filters

Andrew Markel introduces an inexpensive tool that can assist in selling cabin air filter replacements. Sponsored by Auto Value and Bumper to Bumper.

airflow-selling-cabin-air-filter-video-featured
Air Conditioning Odor Causes

Air conditioning odors typically result from the uncontrolled growth of bacteria and other microorganisms in the evaporator. Research by independent laboratories has found fungi such as Aspergillus, Cladesporium, Penicillium and others growing on cooling coils and other A/C system areas.

ac air conditioning smells featured

Other Posts

Climate Control Modules

HVAC control modules may fail when the contacts and switches become inoperable. Sponsored by The Group Training Academy.

Dorman Launches 300+ New Products In November

Among the new products is an OE FIX climate control module designed to fit 1.7M Chevrolet Express & GMC Savana vehicles.

Curing Springtime Air Conditioning Smells

Air conditioning scents can come from a host of things.

VIDEO: Wheel Bearing Preload And Load Paths

If you’re replacing a wheel bearing, you should also check the alignment. This video sponsored by GMB.