The owner of this GM Duramax was headed to Montana on vacation with his family and camper trailer in tow. After stopping for lunch, the owner was dismayed to find that his Duramax immediately went into “limp mode” as the engine started. A shop in a nearby town recommended replacing four fuel injectors. A red flag went up in the owner’s mind because the GMC had been bought from a private owner who claimed that all eight injectors had been replaced prior to the sale. The current owner called a mutual friend of ours who works as a heavy-duty mechanic for a local construction company. This friend then called me to see if I could diagnose the problem causing the limp-mode operation. I consented. This set me on my path of wandering through a weed patch of expensive repairs and less-than-precise service information.
Modern technology is overwhelming the modern automotive technician, and I’m no exception. That being said, I’ll warn you in advance that this story is going to be as much about the current state of our diagnostic trade as it is about General Motors Duramax diagnostics. To begin my “weed patch” story, you should know the local shops in my area were overwhelmed this summer with tourists and summertime residents. Most shops were booked out two or three weeks, which is why I was called to diagnose a 2003 GMC Sierra 3500 equipped with the Duramax diesel.
Not that I’m a diesel specialist, but I did teach diesel maintenance during my final year as an auto mechanics instructor during the 1970s. One of the basics I taught regarding mechanical diesel fuel injection was the T.A.M.P. principle (Timing, Atomization, Metering and Pressure). These are the four variables required to be in sync for a direct-injection fuel system to properly perform on a compression ignition engine. Eliminate, or alter, any of those four functions, and the engine will either fail to start or not perform as designed. While these four principles are as valid today as they were 40 years ago, the technology driving each has changed dramatically.
DTCs U1800 and P2149
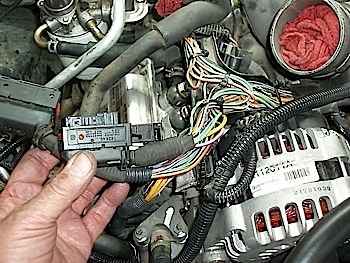
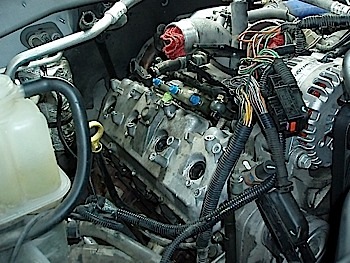
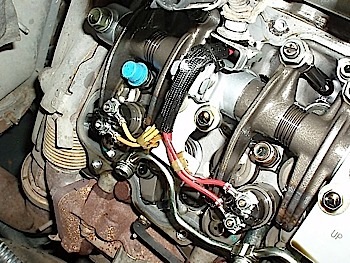
Since the owner had also reported a fuel gauge malfunction, I successfully completed a gauge sweep and checked for powertrain “P” codes, body control “B” codes and communication “U-codes.” I found codes U1800 and P2149. An underhood inspection revealed that the previous shop that had worked on the car disconnected several wiring harnesses and had broken open the plastic loom cover to the Fuel Injection Control Module (FICM), which is bolted to the passenger-side valve cover.
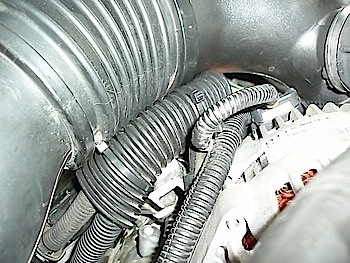
General Motors details a chafing problem in the FICM wiring harness (TSB #09-06-04-034) as it passes behind the alternator mounted on the front passenger side of the engine. This problem is caused by a poorly designed metal mount for the harness and requires a thorough inspection of the FICM harness where it passes behind the alternator. The previous shop had obviously been aware of this TSB and had taken the harness apart for inspection.
In brief, the U1800DTC is related to communication issues with the FICM. Due to several harnesses having been disconnected from the engine, I ignored the U1800 DTC for the moment. That said, the enabling criteria for P2149 indicated that P2149 would not run in the presence of U1800. That was a little confusing, but P2149 proved to be the more problematic of the two codes.
DTC P2149
The FICM separates the high-voltage injector circuits into two groups: cylinders #2, #3, #5 and #8 and cylinders #1, #4, #6 and #7. The firing order is 1-2-7-8-4-5-6-3 with the odd-numbered cylinders located on the passenger side of the engine and the even-numbered cylinders located on the driver’s side. DTC P2149 sets when the FICM detects a fault in the high-voltage circuits of fuel injectors #2, #3, #5 and #8. According to the circuit description, DTCs P0202, P0203, P0205and P0208 should also set. DTC P2146 will set if similar high-voltage circuit problems are detected in fuel injectors #1, #4, #6 and #7. Keep in mind that a P0200 references an electrical circuit problem, while a P0300 references a minor change in crankshaft speed due to a mechanical fuel injection or cylinder compression issue.
The P2149 Dilemma
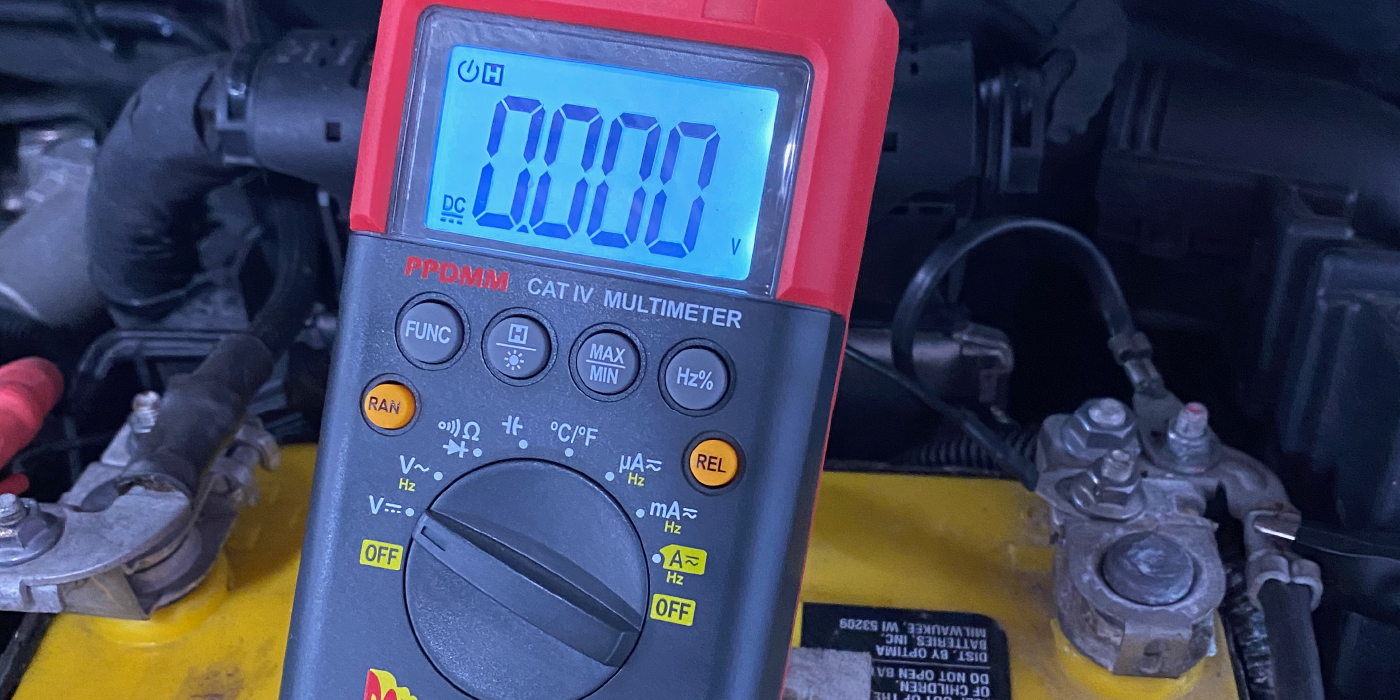
Since the FICM disables the electrical circuits of all four injectors in each group, testing the injector circuits with a lab scope is a waste of time. According to service information, the correct diagnostic procedure is to use a professional volt/ohmmeter to measure the resistance of each fuel injector circuit. The specified resistance at room temperature is between 0.3 to 0.4 ohms.
Before measuring the resistance of any circuit, remove the negative cable on each battery. Since .3 ohms is a very small resistance, the ohmmeter leads must be clean and the meter must be perfectly “zeroed” by crossing the leads and pushing the “relative” button. If the ohmmeter doesn’t have the “rel” feature, jot down the leads’ resistance and subtract that from the total reading when measuring circuit resistance. Last, connect the negative ohmmeter lead to a clean engine ground. Since we’re measuring through the connector side of the harness, I used a needle-point probe to avoid deforming the female connector pins.
The injector circuit resistance is measured between the B+ source in the FICM C1 and C2 connectors and their injector “command” circuits. The command circuit pulls the injector to ground through the FICM, while the control circuit reports injector activity to the PCM. With the FICM connectors removed, the control circuit should measure infinity. In the case of our 2003 Sierra, each injector measured a perfect 0.3 ohms, which became this month’s Diagnostic Dilemma.
Dollars and Cents
It was at this point that I understood why the previous shop had recommended replacing all four injectors. Sure, it’s easy to talk about pinpoint diagnostics, but with the fourth pin-out on the FICM C1 and C2 connectors yielding the same results, I really didn’t have any place to go with the diagnostics except to replace the FICM as recommended by service information.
The recommended resale from my supplier on these remanufactured injectors is about $1,600 for the set of four. Replacing all four injectors required removing both right- and left-bank rocker arm covers and the overlay of wiring harnesses and ducting covering of each. Quoting from one source, the labor time for removing and replacing both covers is about 9.2 hours for “severe service” cases. While the math varies according to parts sourcing and local labor rates, my estimated price came out at about $3,000 for replacing all four injectors. Of course, the owner had assumed that all eight injectors had been recently replaced, and I had no way of verifying that claim other than the engine appeared very clean for 138,000 miles of use. If we replaced all eight injectors, my estimated price would approach $5,000. Due to warranty issues and the labor times involved, it’s understandable why some shops would replace at least four, if not all eight, injectors. Fair or not, these are the economic realities of dealing with modern technology.
Into the Weed Patch
Since all eight injectors measured within OE specification, the diagnostic flowchart indicated that the FICM module should be replaced. After 30 years of reading factory flowcharts, a technician develops an intuitive sense when a diagnosis is headed into the weed patch. My aftermarket case study information indicated that the odds of finding a bad fuel injector or a bad FICM module causing the P1249 DTC were about even. Here again, I had no place to go with the diagnosis except to follow service information. The dealership price for a reman FICM edged into four digits. My aftermarket supplier supplied a similar reman for half that much. I hedged my bet by choosing the less expensive aftermarket FICM to limit my losses if the diagnosis proved wrong, which of course, it did.
Uncharacteristically, I kept the GMC Sierra for over a month, primarily because we didn’t have time or space to replace the fuel injectors and also because I didn’t want to replace thousands of dollars in unnecessary parts for a young guy with a young family. With all other options exhausted, we finally decided to replace all four fuel injectors. Not one to give up, I decided that I would once again go through the diagnostic and pin-out procedure. I cleared the P1249 DTC, turned on the switch and cranked the engine a few turns.
Low and behold, the P1249 had returned as it had numerous times before. But the only code displayed was a P0205, which indicated a circuit fault on #5 fuel injector. Working quickly before the cylinder heads warmed up, we removed the FICM connectors and repeated the pin test. Sure enough, #5 fuel injector measured well under specification at 0.2 ohms while the remaining seven injectors measured their normal 0.3 ohms. Evidently, the extra-cold morning had tipped the scales in our favor by revealing a shorted injector circuit on #5 fuel injector. With the new injector and the original FICM in place, the engine ran perfectly. End of story? Not so fast!
Modern Technology and Training Issues
When I worked at a dealership in the 1970s, General Motors maintained an excellent training center for our mountain-area states. I received a great deal of my early technical training at that facility. However, the last time I saw it, its parking lot was overcome by weeds — an image that perfectly symbolizes the state of modern technical training. As I understand it, the majority of dealership training is now delivered via the Internet or DVD. The fact is, hands-on training provided by experienced instructors has, in many cases, become a thing of the past.
Currently, most of the training I receive is through trade shows and individual classes offered by parts manufacturers. Sadly, the attendance record for individual classes is dismal. A few years ago, I made a 275-mile round-trip journey to attend an eight-hour class on gasoline direct fuel injection that was offered by a major supplier. Including fuel and an overnight stay, my overall cost was about $500. The attendance at that class was fewer than 20 technicians. While the training was excellent, it was apparent that independent shops scattered throughout the mountain states had failed to support the class.
I contend that the diagnostic weed patch I detailed at the beginning of this story can be directly correlated to the physical weed patch surrounding our former General Motors training center. Times have changed, and training isn’t what it used to be.
I discovered in my experience with my Duramax Dilemma that having access to OE service information often isn’t enough to arrive at an accurate service recommendation. What I really needed was the advice of an experienced instructor to warn me of the pitfalls associated with diagnosing the infamous P2149 and P2146 DTCs. I also needed a far better understanding of system operating principles than those that were supplied by the service information. While blind luck ended up helping me successfully conclude this month’s Diagnostic Dilemma, I can only hope to be so lucky in the future.