Don’t
Add sealants to carrier gaskets.
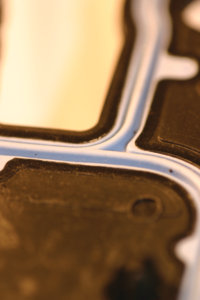
Most carrier gaskets are designed to be installed dry. They do not need extra help to create a seal. Silicone can get in the ridges and change the bead geometry and the gasket’s ability to seal.
 Do
DoReplace a plastic intake manifold if there are any signs of cracking or distortion.
An intake manifold is cheaper than any comeback. Constant cooling and heating cycles can distort and crack some plastic intake manifold and carrier gaskets. Often the straightness of the sealing surfaces is the first sign of trouble. Many OEM and aftermarket parts manufacturers are making replacement manifolds that have improvements over the originals.
Don’t
Add lubricants unless instructed.
In theory, adding lube to the lip of some carrier gaskets helps, and some manufacturers do recommend lube on some applications — but this is not a de facto rule for all gaskets.
For one, as stated, lubricants can change bead geometry. The main reason not to use lubricants, though, is the lubricant may not be compatible with the gasket material. Some lubricants have additives that cause soft gasket material to swell or even harden over time. If the gasket requires a lubricant, use only the lubricant included in the kit or the exact lubricant recommended in the instructions.
Note: Some gaskets have a Teflon coating that allows the gasket to move and compensate for dimensional changes in the two components it is sealing. Lubricants can remove this coating.
 Do
DoUse a torque wrench.
Most carrier gaskets have “torque stops” or “compression limiters” built into the carrier, but these do not control the torque and stretch for the fastener. You need a torque wrench to make sure the clamping loads are even. If the clamping loads are uneven, the gasket will leak.
Do
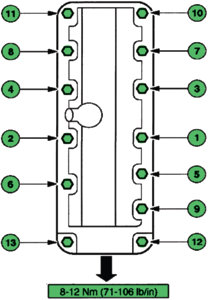
Look up the tightening sequence.
Tightening sequences are just as important to front covers and oil pans as they are to intake and exhaust manifolds. Torquing a component in the wrong order can cause uneven clamping loads, leaks and damage to the component.
 Do
DoDiagnose why a gasket failed the first time.
Gaskets fail for a variety of reasons, with age being the most common. But sometimes a malfunction elsewhere in the engine can cause a gasket to fail. A stuck PCV valve can increase pressures in the block and cause gaskets to fail. If the problem is not resolved, the new gasket is doomed.
 Don’t
Don’t Damage the sealing surface with metal tools.
The lip of a carrier gasket can only seal some surface imperfections. Gouges and scrapes made by a screwdriver or metal scraper can cause a gasket to leak. On older cast iron engines you can use metal gasket scrapers, but on aluminum and composite materials, only use a plastic gasket scraper.
Don’t
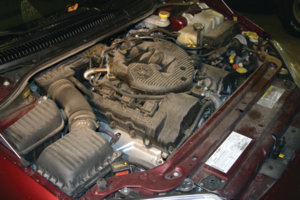
Assume an overheating engine only damaged the gasket.
A gasket is rarely the root cause of an engine overheating. Chances are a stuck thermostat, inoperative cooling fan or another failed part caused the gasket to fail due to increased system pressure. Before the vehicle leaves the shop, make sure the cooling system is performing properly.
Do
Flush the cooling system.
A lot of gasket failures are the result of a compromised or incorrect coolant in the cooling system. After the replacement of a gasket that comes in contact with coolant, flush the system and use a coolant that is compatible with the vehicle.
 Don’t
Don’t Assume the best gasket can compensate for damaged or warped surfaces.
The most expensive carrier gasket is only as good as the surfaces it is sealing. Cleaning and preparing the surface is key to making sure the new gasket will seal.
Do
Look for better gaskets.
Look for “problem solver” gaskets that can take into account higher mileage vehicles. Some gasket manufacturers take your problems seriously and want to develop gasket kits that solve problems like coolant pH issues, high pressures and uneven surfaces. These gaskets are better than OE. Even old applications like Flat-Head Ford V-8s and Chevy Small-Blocks are getting new gasket designs all the time as engineering and materials improve.