In case you haven’t noticed, the auto manufacturers are in a horsepower race. And as horsepower numbers go ever higher, the need for improved brakes increases. BMW has kept pace with the other manufacturers in both areas by systematically increasing brake component size while, at the same time, turning more control over to the various integrated ABS and traction control systems.
 The basics of brake maintenance and repair, however, have pretty much stayed the same – up to a point. The technician has to be particularly attentive to the procedures used to prevent deterioration of the factory improvements. More than ever before, making a mistake on a car with increased horsepower and speed capability can mean the difference between a safe and a dangerous repair.
In this article, I’ll discuss the proper steps necessary to produce a quality upgrade or repair, as well as some of the currently available brake component technology.
CHOOSING THE RIGHT PAD
Educating the customer on just what to expect from brake system service is the first step to making a life-long customer and keeping him/her happy. The first sign of a brake problem can send even a great customer down the trail of doubt regarding your expertise.
With the technology race in full swing, OE and aftermarket suppliers go to great lengths to produce components through testing that provide the very best stopping ability, noise reduction and consistency. We recently published an article that provided direction on choosing a replacement pad based on edge code information (see the article by Gene Markel in the April 2005 issue of ImportCar, pages 54-60).
The pads that come on new BMW models don’t make noise, stop great, don’t make a lot of dust and can haul the car down from well over the speed limit to a crawl, time after time. But, they can wear out before they should, according to some customers. With the newer models, even the brake pads are covered under warranty, so usually it’s the second time around when we see them.
There are so many different brake pad brands, compounds and materials available today, that I can’t begin to cover all of them in just one article. As good as a brake product can be, real life always trumps what would seem to be a cure-all. That said, there are some great products on the market, each with a specific component or composition that will fit the particular circumstances you’ll be facing. Listening to the customer when he tells you his most important brake concern is the best way to choose a replacement brake pad.
For most of our customers, that would be a desire to have the same operational characteristics as the originals, but that the brakes would last longer. Some other customers just want less brake dust. Noise will always bring them back with a concern or complaint.
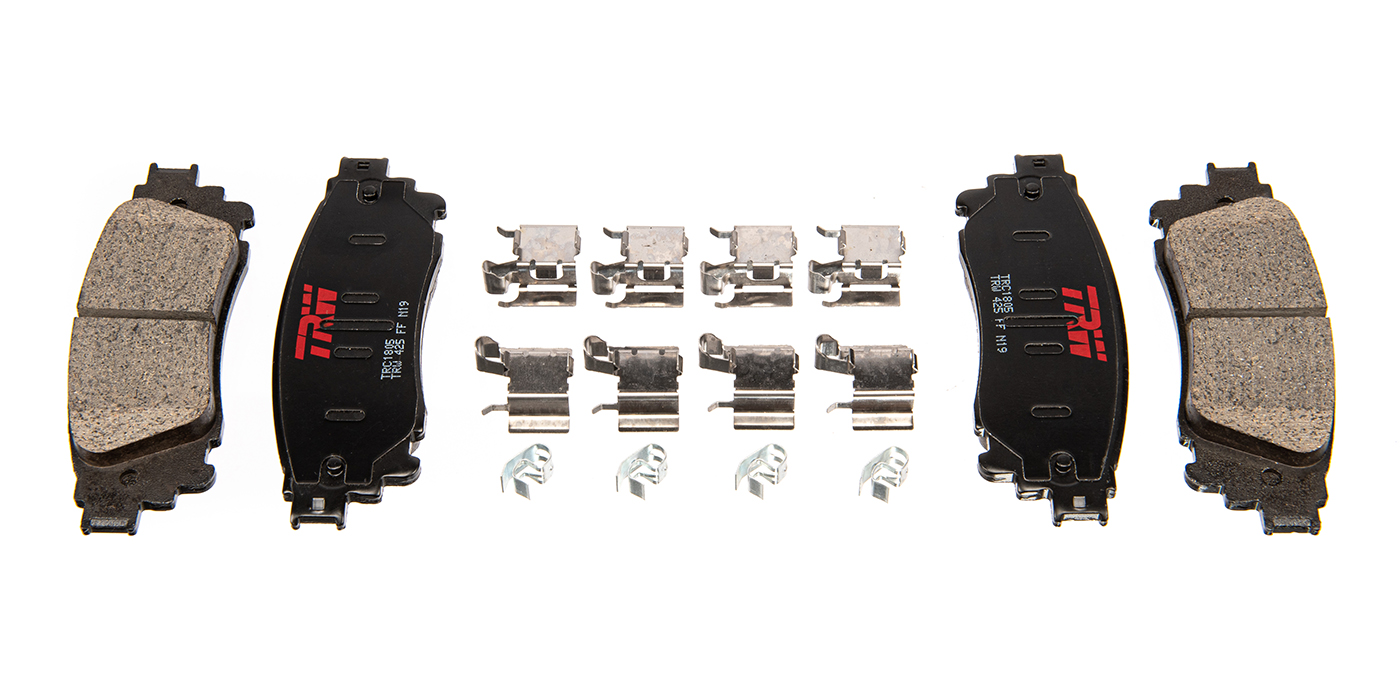
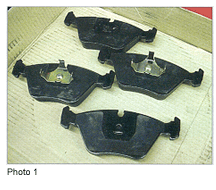 Differences between brake pad brands, especially manufacturing quality, or lack thereof, is very obvious (see Photo 1). Although the friction material is important, the surfaces of the backing material shouldn’t be the only indicator of the overall quality. Products that indicate ISO manufacturing compliance, and the various OEM testing standards and third-party certifications, are also good indicators of quality.
The clips, tension springs and any attached shims should be of plated material and shaped like the original. A lot of pads now come with various “coatings” on the back of the plate for noise reduction. Be careful though: If that coating is thick enough to also reduce lining thickness, you’ve just shortened the life of the job. A thick coating may also make installation a challenge, or soften the pedal feel. If attached shims are included, they may or may not replace factory-installed shims.
Although it’s contrary to what most technicians would do, if questions arise, look at the packaging or included literature for proper procedures. Aftermarket and OE manufacturers are often aware of factory bulletins or upgrades that may not be readily available to the public.
Friction material will fall into one of several types: organic, semi- or full-metallic, or ceramic. Depending on its ultimate use, be sure to discuss the pros and cons of the selected type of friction material with your customer before the installation actually occurs. For example, we all know that semi-metallic pads can be unresponsive when cold, but your customer may get a rude awakening on that first cool, damp morning when the car doesn’t quite stop at the bottom of the driveway.
Choose a pad that is engineered for the vehicle. That way, the compound will be a better match for the particular model, and you’ll know some R&D has been done to ensure compatibility with the application. Selecting a pad should also depend on your own local conditions. Here in Seattle, there are lots of hills, the mountains are less than an hour away and a lot of our customers are avid skiers. Having pads that are unlikely to be affected by water (i.e. rain) is particularly important. I recommend that you stay with a known manufacturer that has a track record for supplying the best parts.
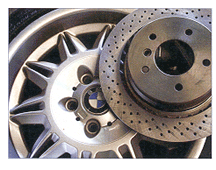
ROTOR SELECTION
A rotor has several jobs to do, but converting friction to stopping power requires that it be able to accept, store and transfer heat. Rotors also need to be precision-machined to fit the application, stay true and last at least as long as the pads that are always rubbing up against them. This is no easy task, and should not be left to bargain basement or imitation parts. Like the pads, there are many choices available today, depending on what a customer desires in appearance or performance.
So how do you choose a rotor for a particular application? Start by seeing what is available for the model. Oftentimes, OE or aftermarket suppliers have upgraded rotors available, although not all models have the same choices. As the models get older, the choices increase. If you have a number of rotor types available for the model you’re working on, then you’ll have to select one based on your customer’s preference and the car’s expected use.
The choices keep growing with cross-drilled, grooved and composite rotor types, as well as the several different coatings available, all designed to reduce complaints and comebacks. For performance applications, time spent in discussion with your customer is the best way to prevent misunderstandings. For those who are more concerned with appearance, the same applies. Just because a certain part “looks” good doesn’t mean that all the functional characteristics are there, or that it will last beyond the first hard use.
With wet conditions being one of our prime parameters in the decision-making process, we often suggest grooved rotors, which seem to work best. But they aren’t always available for all applications. Along with cross-drilled rotors, they can exhibit noise and harshness problems, especially during braking, so discuss that with the customer before installation.
Rotor surfacing can be an option as well. If you have been in this business long, you know that rotors can come out of the package with any number of different finishes: from shiny smooth to vinyl LP (you older guys know what I mean), to cross-hatch or swirl. Some rotors also come with an aluminum oxide coating, which should be left on!
Especially with aftermarket or upgrade parts, a quick look through the supplied literature will answer all of the questions you might have, like whether to clean off the coating that is on the part. If a rotor comes with little or no machine marks (cross-hatch), it’s probably advisable to scuff the surface slightly with an abrasive pad or disc to ensure adequate roughness for new pad break in. Obviously, a colored or anodized finish is intended to be left on.
CALIPERS
Unless you’re upgrading to a larger pad or rotor configuration, the calipers will most likely be left alone. Since we haven’t rebuilt calipers in-house for many years, if replacements are needed, we just call a supplier and get either new or rebuilt ones as needed. Most of the replacements, and those from good rebuilders, will have some kind of finish that looks better than rusty cast iron.
If caliper replacement is not necessary, use a non-chlorinated cleaner to remove dust and grease, scrape off any accumulated de-squeak compound, grease or dirt, and inspect them thoroughly for leaks, torn seals or obviously seized pistons. Inspect calipers for wear, especially in the pad carrier and the slide pins, replacing any part that shows excessive wear or abuse.
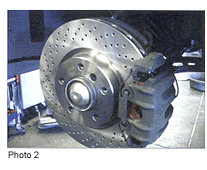 We have recently had requests for painted calipers. With the larger, more “open wheel” designs being installed these days (see Photo 2), brake components have suddenly become a fashion statement. There are several kits available on the market that allow you to thoroughly clean and color the calipers. Even I have to admit that they look better, especially with 20-inch-plus wheels and drilled rotors, as long as they are kept clean. One other point on this procedure: Get the car for at least two days, and schedule the job so the car can sit inside overnight to allow the paint to dry completely before reassembling. This job will not turn out well if it’s hurried.
HOSE UPGRADES
Upgrading to stainless brake hoses along with other improvements is a good idea. Just be sure to let the customer in on the change in pedal feel before he drives away. There most likely will be a noticeable improvement in brake feel, harshness and effectiveness that can’t be achieved with rubber hoses. Make sure the lines are installed with the original routing to avoid damage during turns, acceleration and deceleration, when they can contact the suspension, drivetrain or tires.
THE PROCESS
After doing routine brake jobs for many years, I’ve found that it’s easy to overlook obvious problems unless you develop a standard routine that governs how you do every job. Whatever the sequence you pick to complete brake repairs, doing it “by the book” each time, in the same order, will ensure a quality job every time. Here is my “routine” for consistent BMW brake jobs.
Remove all wheels, even if you are not doing the brakes on a particular wheel.
Use a cleaning machine, brake cleaner or water to remove dust to allow for a full inspection.
Check for any indication that parts were installed improperly or that any components are missing or damaged.
Remove the outer tension clip by prying against the hub toward the caliper.
Remove the slide pins, pad sensor and caliper housing, being careful not to stress the flex line.
Attach a bleed bottle to the bleeder, open the bleeder and depress the piston to expel the fluid. I don’t recommend pinching the flex line, as it can be damaged in the process. Note: Obviously, if the piston won’t retract, a caliper replacement is in order. In this part of the country, unless there is obvious seizing, leaking or excessive rust, we don’t usually replace calipers.
Remove the pads from the pad carrier or the caliper if there is a retaining clip. Again, clean the caliper piston and inner surface of the caliper and closely inspect the dust seals.
Remove the pad carrier and use whatever cleaning agent you prefer. Inspect for wear in any mounting or sliding surfaces, and clean the contact areas for the pads and mounting with an abrasive disc or wire wheel.
Clean and lubricate the slide pins and make sure the dust boots are intact.
Remove the rotor from the hub, and measure for machining or replacement. Always refer to the specs. If they’re not available, a new rotor will have the minimum standard stamped into it for reference.
Thoroughly clean the hub-mounting surface. I use an abrasive disc on a die grinder.
On rear brakes, inspect the parking brake shoes for wear and back off the adjuster. Clean and inspect them for all applicable hardware.
Mount the new or resurfaced rotor, making sure the rotor seats fully onto the hub. Install the retaining screw.
This is the best time to do the basic adjustment on the parking brake. Usually, tighten it until it locks and then back off six to seven clicks. Remount the pad carrier, then torque the retaining bolts to specs. Over-tightening can cause failure of these extremely important fasteners.
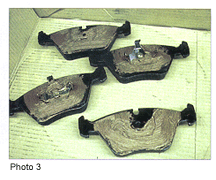
Lubricate the backs of the selected pads with a silicone or moly-based brake grease (see Photo 3) and install them into the carrier or caliper piston, depending on the design.
Install the caliper “claw” onto the carrier, and install and torque the slide pins or retaining bolts.
Install the tension clips on the outside of the caliper. This can be done by inserting the clip on one end, twisting in toward the hub and just pushing the other clip into the caliper hole while guiding the tip over the pad carrier. Practice makes this step easier with each job.
Install the brake pad sensor, making sure that the wires are secured the same as the originals and plugged into the harness correctly. Some dielectric grease on the connections can prevent failure of the sensor system, which can give a false indication on the instrument panel.
Do a final inspection, making sure the flex line is not twisted or positioned where it can contact the wheel or something else, especially when turning. Make sure all retaining and tension clips are in place.
Reinstall and torque the wheels after bleeding, if it was necessary.
Flush the fluid if it tests poor or is discolored, to prevent boiled fluid from ruining all of your good work.
Check the tire pressures and set to the specs on the VIN plate, usually on the driver’s-side “B” pillar.
Depress the brake pedal until the pedal height is normal. Road-test the vehicle and perform any necessary “break-in” procedure.
Recheck the fluid level. If the brake lining warning light stays on after the road test, cycle the key a few times and leave the key on for a few minutes to give the computer a chance to perform all of its memory-clearing functions. There are no other procedures needed to cancel the light.
 CONCLUSIONS
Upgrading the brakes is probably the first step in increasing the performance capability of a BMW. But performance upgrades should always be done in a methodical way to prevent the improvement from exceeding the margin of safety needed to stop or control the direction of the car. Your main job is to always keep the customer safe on the road.