e rear, some models use single piston floating calipers disc brakes with a ratcheting style parking brake. Low-end versions of the Accord use drums in the rear. Late model Acura TLs use a disc brake system with a drum-in-hat style parking brake.
ABS and Traction Control
Almost every seventh-generation Accord comes with ABS. All have standard Electronic Brake Distribution (EBD), so don’t look for a proportioning valve. Most 2006-’08 models have Brake Assist Systems that helps recognize emergency braking situations and momentarily applies extra brake force in a “panic stop” or until the driver releases the brakes. The system uses inputs from steering position and yaw and pitch to determine if Brake Assist will be used.
It has been reported if the steering position sensor is not calibrated, the misinformation from the sensor causes the ABS and stability control system to activate during some maneuvers and corners when it is not needed. Customers may report loss of speed and a changes in brake pedal level during braking and turning. The condition commonly happens on freeway exits. If a customer reports these symptoms, it may save you some time if you look at the output for the steering position sensor.
Parts
The seventh-generation Accord brake system comes in two flavors with two different rear brake systems. Systems are made by either Akebono or Nissin. When ordering pads, make sure you have a VIN and production date. Also, find out if the vehicle is equipped with ABS and/or TCS. Some brake part electronic catalogs might ask for the trim level. The smaller brake system came with 15-inch wheels and the larger system came with 16-inch or larger wheels. But, some special editions and later models violate these rules.
The DX model is the low-end of the range and is equiped with the smaller front brakes and rear drums. The LX version is the mid-range model and can have either brake system, depending on whether it is equipped with 4-cylinder or V6. Also, the level of ABS and stability control will determine if it is equipped with rear disc brakes. The next trim level is the EX. These models typically have the larger front and rear disc brakes.
 Don’t skimp on the brake pads. All the Accords of this generation are designed to work with ceramic friction formulations. It is critical that a similar friction materials goes back on the vehicle. If an aggressive semi-metallic friction material is used, more heat could be transferred to the caliper piston, making it possible to boil the brake fluid. The problem becomes even worse if you use an cheap brake pads set that does not include a set of shims.
Don’t skip on the shims. Both the 4-cylinder and V6 brake systems have a sophisticated shim sets that clip to backing plate rather than being glued or staked. This design creates a “boundary layer” preventing vibrations from being transmitted to the caliper and knuckle. All models use a two-piece shim on the front in-board pad as stock.
Honda engineers use this design to stop the vibrations so Honda can use a lighter caliper and knuckle to increase gas mileage and improve ride quality. If you think you can out engineer a bunch of Honda engineers with a cheap shim and tube of the brake lube, you may have a comeback in your future.
Hybrid System
In 2004, Honda introduced a hybrid version of the Accord featuring Honda’s IMA technology. The brake system uses the same conventional components used on non-hybrid models, but the regenerative braking and hybrid system will have to be disabled before performing most brake work. Consult the service information before attempting to work on the brakes.
Service Hints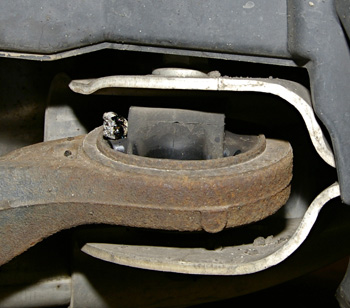
• The best piece of advice given by one Honda technician is to remove the bolt that holds the front brake hose bracket on the knuckle before you start a brake job. It makes it easy to hang the caliper out of the way and service the pads and caliper bracket.
• Inspect the bushings and ball joint on the upper control arm. If these components are worn, they will produce a clunking noise during initial braking.
• Make sure the notch in the rear caliper piston is lined up with the tab on the in-board read brake pad. Failure to do this could make it difficult the reassemble the rear brake assembly and cost you time and money.
Brake System Bleeding
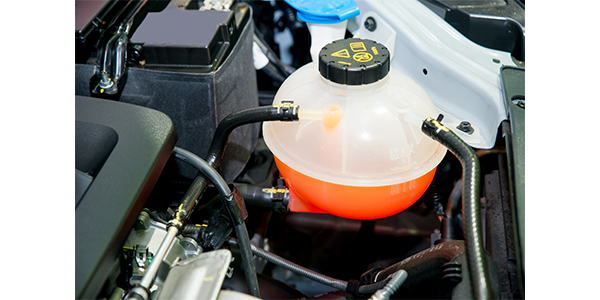
1. Make sure the brake fluid level in the reservoir is at the MAX (upper) level line.
2. Attach a length of clear drain tube to the bleed screw.
3. Have someone slowly pump the brake pedal several times, then apply steady pressure.
4. Starting at the left-front, loosen the brake bleeder screw and bleed out any air. Move the the right-front next followed by the right rear and left rear.
5. Repeat the procedure for each wheel in the sequence, until air bubbles no longer appear in the fluid.
6. Test drive the vehicle.
7. If the brake pedal is now spongy, there may be air trapped in the modulator and then induced into the normal brake system during modulation. Exercise the ABS and bleed the brake system again, starting with the front wheels.
Rotors
The rotors on the seventh-generation Accord have a good reputation with technicians. Most technicians report front rotors can be turned at least once before they are below service limits.
Honda issued a Technical Service Bulletin in 2007 advising technicians that 2003-’07 4-cyl Accords could develop a brake judder that could be felt by drivers in the steering wheel due to uneven rotor wear (thickness variation).
Honda’s corrective action was to replace the brake pads and refinish the rotors. Also, Honda tightened up the specs for runout and thickness variation during this time.
Runout: For the front or rear rotors, set up the dial gauge against the rotor, and measure the runout at 10 mm from the outer edge of the disc. The overall brake disc runout (front or rear) Can not exceed 0.10 mm. If the rotors are beyond the service limit, refinish the rotor.
Thickness/Parallelism: Using a micrometer, measure disc thickness at eight points, approximately 45° apart and 10 mm in from the outer edge of the disc.
Replace the brake disc if the smallest measurement is less than the max. refinish limit. 0.015 mm is the maximum allowable difference between the thickness measurements.
Front Brake Disc Specs:
15 inch brake type: 22.9-23.1 mm
Max. Refinishing Limit: 21.0 mm
16 inch brake type: 27.9-28.1 mm
Max. Refinishing Limit: 26.0 mm
Rear Brake Disc Specs
8.9-9.1 mm (0.35 – 0.36 inch)
Max. refinishing limit: 8.0 mm
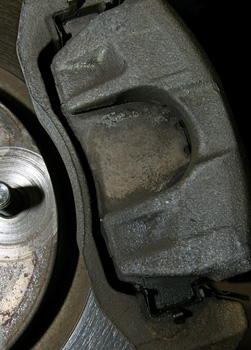
Front Brakes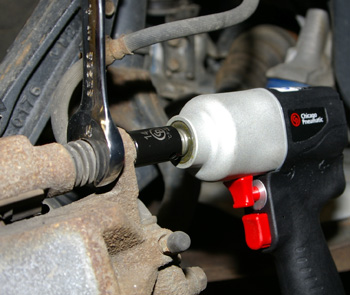
1. Remove the brake hose mounting bolt.
2. Remove the lower flange bolt while holding the flats behind the flange with a wrench. Do not spin the caliper pin in the bore. Damage can occur the the bore and pin boot.
3. You can rotate the caliper upward and secure it if you are just replacing the pads. If not, remove the upper flange bolts.
4. Remove the brake pads and pad shims. New pads should have a thickness of 10.5-11.5mm and the pads should be replaced once the friction material is worn below 1.6mm.
5. Check the hose and pin boots for damage and deterioration. Remove the pins and coat with a silicone-based caliper grease.
6. Remove the pad retainers/abutment clips, and check the caliper pins for free movement.
7. Clean the caliper and slides thoroughly. Remove any rust, and check for grooves and cracks.
8. Clean and install the brake pad retainers.
9. Apply a light coat of molybdenum-based lubricant to the pad retainers, pad sides of shims and the back of the brake pads. Wipe excess paste off the pad shim and brake pads.
10. Install the new brake pads and pad shims. Install the brake pads with the wear indicator on the inside. The wear indicator should be on the top of the pad.
11. Gently push in the piston so the caliper will fit over the new rotor and/or pads.
12. Install the flange bolt and tighten it to 26 ft/lbs for the smaller system and 37 ft/lbs for the larger system.
13. Install the hose mounting bolt.
14. Test-drive the vehicle.
Rear Brakes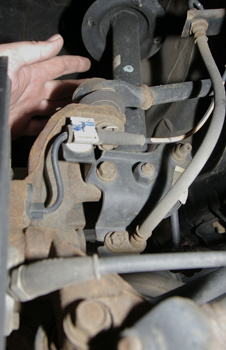
1. Remove the lower flange bolt while holding the flats behind the flange with a wrench. Do not spin the caliper pin in the bore. Damage can occur the the bore and pin boot.
2. Remove and inspect the pads. New pads should have a thickness of 8.9-9.1 mm and the pads should be replaced when the friction material is worn below 1.6 mm.
3. Remove the pad shims.
4. Remove the pad retainers.
5. Clean the caliper thoroughly; remove any rust and check for grooves and cracks.
6. Check the brake disc for damage and cracks.
7. Install the pad retainers.
8. Apply a thin coat of molybdenum-based lubricant to both sides
of the shim and to the back of the brake pads. Wipe excess lubricant off the pad shims and brake pads.
9. Install the brake pads and pad shims. Install the brake pad with
the wear indicator on the inside bottom. If you are reusing the brake pads, always reinstall the brake pads in their original positions to prevent a momentary loss of braking efficiency.
10. Rotate the caliper piston clockwise into the cylinder, then align the
cutout in the piston with the tab on the inner pad by turning the
piston back. Lubricate the boot with rubber grease to avoid twisting the piston boot. If the piston boot is twisted, back it out so it is positioned properly.
11. Install the caliper. Install the flange bolts, and tighten it to the specified torque, 17 ft/lbs.
12. Press the brake pedal several times to make sure the brakes work.
13. Test-drive the vehicle.
Parking Brake Check and Adjustment
1. Pull the parking brake lever with 44 lbs of force to fully apply the parking brake (use a fish scale). The parking brake lever should be locked within three to five clicks.
2. Adjust the parking brake. For vehicles with drum brakes, loosen the parking brake adjusting nut, start the engine and press the brake pedal several times to set the self-adjusting brake before adjusting the parking brake.
3. Remove the center console.
4. Pull the parking brake lever up one click.
5. Tighten the adjusting nut until the parking brakes drag slightly when the rear wheels are turned.
6. Release the parking brake lever fully, and check that the parking brakes do not drag when the rear wheels are turned. Readjust if necessary.
7. Pull the parking brake all the way up, and make sure the parking brakes are fully applied.
8. Reinstall the center console.
TECH TIPS & TSBs For the Seventh Generation Accord
Accord Front Wheel Bearing with Integrated ABS Tone Ring
On the seventh-generation Accord, one of the two seals on the front bearing has a built-in magnetic impulse wheel.
Caution should be taken to make sure that the seal with the impulse ring is installed in the correct direction. The side with the impulse ring needs to be installed closest to the sensor. The side with the tone ring can be identified either by placing a lightweight metallic object (such as a paper clip) to the magnetic side or by a close visual inspection. The close visual inspection will reveal the ABS impulse ring windows, which can be seen through the seal surface.
Courtesy of SKF
Clean Modulator Pump Motor Ground for DTC 51/53
Got an 1998-2004 Accord with an ABS DTC 51 (motor lock) or an ABS DTC 53 (motor stuck ON)? Although the service manual tells you to replace the ABS modulator unit if, during your test-drive, the ABS indicator comes back on and the DTC sets, don’t replace the unit just yet. First, try inspecting and cleaning the pump motor ground. A poor ground can also cause these DTCs to set.
Honda Service News
Click or Pop When Pressing the Brake Pedal
Got an Accord (2003-’04) in your shop that clicks or pops when you press the brake pedal? The culprit could be the brake pedal position switch. The switch plunger doesn’t fit squarely into the switch casing. When you press the brake pedal, the plunger rubs the side of the casing and makes noise. There’s a simple fix for this problem: Just turn the switch around so the connector lock now faces the 5 o’clock position.
Honda Service News
Soft or Excessive Brake Pedal Travel
Vehicles: Accord (2003-’08)
Symptom: When you apply the brakes, the brake pedal travels lower and feels softer than normal.
Cause: The ABS/TCS or VSA modulator-control unit has leaked air into the brake system.
Diagnosis: If the brake pedal travel is not lower than normal and the feel is not softer than normal, do not proceed with the diagnosis or the repair.
1. Inspect the brake system, and replace any leaking, worn, or damaged parts.
2. Manually bleed the brakes. Do not use a pressure or vacuum power bleeder.
3. Apply the brakes to check the height and feel of the pedal. If the brake pedal height and feel is now normal, the vehicle can be returned to the customer. If the brake pedal height and feel is still low and soft, continue with normal troubleshooting procedures. The recommended repair is to replace the ABS/TCS or VSA modulator control unit.
Honda Service News