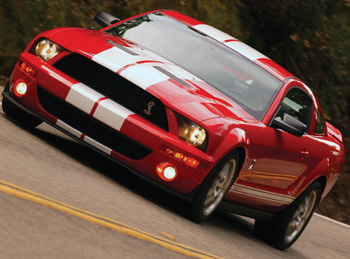
When Ford introduced the 2005 Mustang with its classic 1965-1968 Mustang retro styling, it was an instant hit. Since its introduction, Ford has sold more than 638,000 of these late model pony cars through model year 2009. Many of these cars are now reaching the point where it’s time for their first brake job. The original equipment front disc brake pads are typically lasting about 45,000 miles with normal driving. But many people who buy Mustangs don’t drive “normally.” Consequently, they may be wearing down the front pads in as little as 25,000 miles.
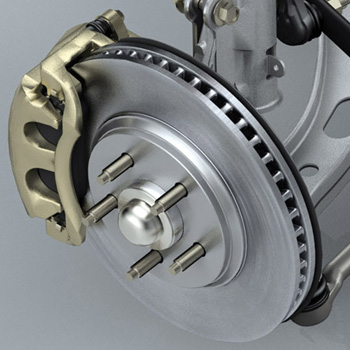
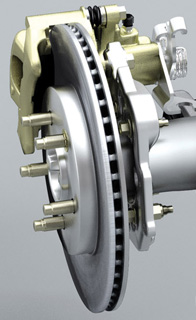
The brakes on the 2005 to 2009 Mustangs are fairly standard, with discs both front and rear. The front calipers are dual piston, while the rear calipers have single pistons. Four-wheel anti-lock brakes are standard on all models, and power assist is provided by a conventional vacuum booster.
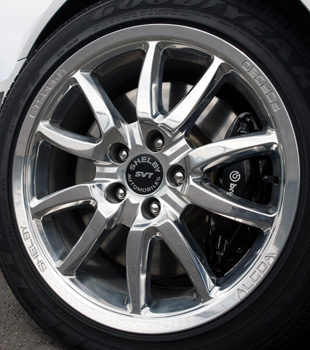
The only major difference in the brake systems between the base V6 models and the V8-powered GT models is the size of the rotors. The V6-powered Mustangs have 11.5 inch front rotors, while the GT models have larger 12.4 inch front rotors. The rear rotors on both models are 11.8 inches in diameter, but narrower than the ones up front. On the high performance Shelby GT 500 models, the front rotors are larger 14 inch discs supplied by Brembo, with four piston calipers.
BRAKE ISSUES
To date, there have been no major problems with the brakes on these Mustangs. Other than the normal wear one would expect, the brakes have been reliable and relatively trouble-free — with one exception.
On the 2005 and 2006 models, there have been some reports of the rear parking brake cables freezing up during cold weather. Apparently road splash gets past the parking brake cable end seals, puddles inside the cable, then freezes. This may prevent the parking brake from releasing, causing the rear brakes to drag. Ford issued a technical service bulletin (TSB 06-5-4 on 3/20/06 covering this problem, and recommends fixing it by replacing the original parking brake cables with new redesigned cables that are more water-resistant.
BRAKE INSPECTION
Like any other car, pad wear should be checked periodically to see if the pads are nearing the end of their service life. Ideally, this should be done when rotating the tires, or when other routine maintenance work is performed. Ford says the minimum thickness specification for the front and rear pads is 3.0 mm (0.118 inches). So if there’s less than 1/8th of an inch of friction material left on the pads, it’s time to replace them.
The pads should also be replaced if there is more than 3 mm of taper in any direction, if the pads have been contaminated with brake fluid from a leaky brake caliper, or if the vehicle owner is complaining about a brake noise problem such as squealing or groaning.
If the car needs new pads, you also need to measure the rotors to see how much they are worn — even if they appear to be relatively smooth with no serious grooving, cracking or visible hard spots (discolored patches). The minimum rotor thickness specification for the front rotors on both the V6 and V8 Mustangs is 28.4 mm (1.11 inches), and 17.4 mm (0.68) inches for the rear rotors. The minimum thickness specifications for the larger Shelby GT 500 front rotors is 30.0 mm (1.181 inches).
If a rotor still has enough metal left in it for another go around, but needs to be resurfaced to smooth up the surface, the minimum “machine to” spec is about 0.6 mm more than the minimum thickness specification: 29 mm for the V6 and V8 front rotors, and 18 mm for the rear rotors (30.6 mm for the Shelby front rotors). This will allow for wear until the next time the brake pads are replaced.
If you can’t successfully resurface the rotors without exceeding these minimum dimensions, the rotors are worn out and need to be replaced.
Do not reuse any rotor that has cracks, or that has hard spots. You can machine hard spots flat, but it won’t last. The metallurgical changes in the metal that cause the hard spots are still there, and will cause uneven wear. Within a few thousand miles, your customer may be back complaining his pedal pulsation problem has returned.
PERFORMANCE UPGRADE OPTIONS
Many Mustang owners are good prospects for brake performance upgrades. If the pads and/or rotors need to be replaced anyway, it’s not a hard sell to convince certain customers that stopping quick is just as important as going fast — especially if the car has been modified for more power (cold air package, aftermarket supercharger or a nitrous oxide kit), or has been upgraded with suspension handling products such as aftermarket performance shocks and struts, urethane suspension bushings and/or larger sway bars. One look at a customer’s car should tell you how interested they might be in performance upgrades.
The most popular brake upgrades include performance aftermarket brake pads made with friction materials that can handle higher braking temperatures, and drilled/slotted/grooved rotors that provide improved cooling and venting of hot gases from the pads. For serious stopping power, there are also numerous bolt-on aftermarket rotor and caliper kits that include larger 13 and 14 inch rotors. Some of these kits can be quite expensive, but are designed for the serious performance enthusiasts.
The nice thing about selling and installing performance upgrades is that it can add a great deal of profitability to what would otherwise be a standard brake job. Most of these upgrades are simple bolt-on installations that require few if any modifications. The only thing you have to watch out for is to make sure there is adequate clearance between the inside of the wheel and the caliper when larger rotors are installed.
The front rotors on a V6 Mustang can be upgraded to the larger stock V8 rotors, but require 17 inch or larger wheels for clearance. If a set of 13 or 14 inch aftermarket performance rotors are being mounted in place of the stock GT rotors, the wheels have to be 18 inches or larger depending on the calipers used.
Note: The limited production Bullitt, Shelby and Shelby GT 500 models come factory equipped with higher performance brake pads than the base V6 or GT models. Owners of the hotter models will obviously want replacement pads that provide equivalent or better performance, while those who drive GTs may want something that’s better than stock.
BRAKE JOB BASICS
If you’ve done a brake job on any late model Ford, there should be no surprises. The basic pad replacement procedures goes as follows.
Front Pad Replacement:
1. Check the brake fluid level in the brake fluid reservoir. If necessary, remove some fluid so the brake master cylinder reservoir is half full. This will allow for fluid displacement when you push the front caliper pistons in to accommodate the increased thickness of the new pads.
2. With the vehicle in NEUTRAL, position it on a hoist, raise the wheels off the ground and remove the wheels.
3. Remove and discard the 2 brake caliper guide pin bolts and position the brake caliper aside. Support the brake caliper using a length of wire.
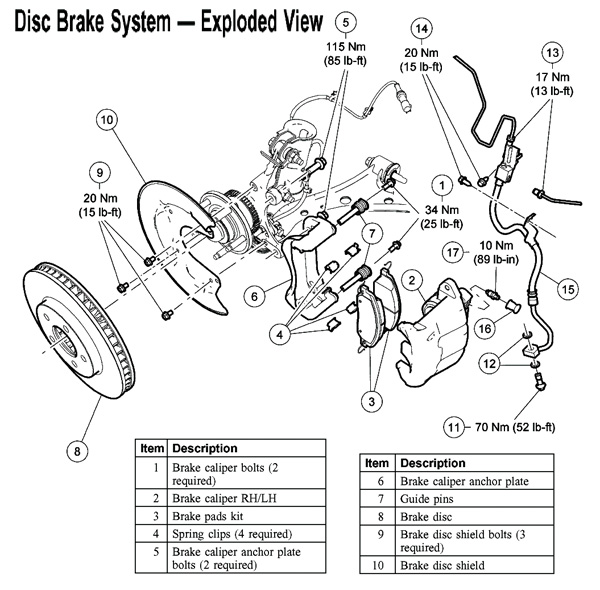
CAUTION: Do not use the caliper sight hole to retract pistons as this can damage the pistons and boots. Also, do not allow the brake caliper, brake pads and anchor plate assembly to hang from the brake hose or damage to the hose can occur.
4. Remove the brake pads and discard the four spring clips. Note: The original equipment pads have an adhesive backing that causes them to stick to the caliper pistons. This is a noise dampening trick that Ford uses to minimize brake noise.
5. Inspect the brake caliper for leaks or boot damage. High mileage calipers should be rebuilt or replaced.
6. Inspect the brake caliper anchor plate assembly. Check the guide pins and boots for binding or damage. Lubricate the guide pins with high temperature brake grease. Install a new brake caliper anchor plate if it is worn or damaged.
7. Measure rotor thickness, and resurface or replace as needed.
8. Use a C-clamp or similar tool to compress the caliper pistons into the caliper bore. Protect the pistons and the boots when doing this so they are not damaged.
9. Install four new spring clips, and then install the two new brake pads. If the pads come with rear adhesive shims, be sure to apply them to dampen vibrations. Or, apply a think layer of brake grease to the backs of the pads for the same purpose.
CAUTION: Do not allow grease, oil, brake fluid or other contaminants to contact the friction material.
10. Position the brake caliper on the anchor plate and install two new guide pin bolts. Tighten to 34 Nm (25 ft. lbs.).
Rear Pad Replacement:
CAUTION: Care must be used when servicing rear brake components if you are not disconnecting the parking brake cable from the brake caliper lever. Carefully position the caliper aside using a suitable support or damage to the parking brake cable end fittings can occur.
1. Remove the two guide pin bolts from the rear brake caliper, and position the brake caliper aside. Support the caliper with a wire.
2. Remove the old pads from the rear caliper and discard the old spring clips.
3. VERY IMPORTANT: Use special tool 206-026 (T87P-2558-A) or equivalent to screw in the rear caliper pistons for pad clearance. Do not attempt to force the rear pistons in with a C-clamp as this can damage the piston mechanism.
4. Inspect the brake caliper. If leaks or damaged boots are found, rebuild or replace the caliper.
5. Inspect the brake caliper anchor plate assembly. Check the guide pins and boots for binding and damage. Replace worn or damaged pins. Lubricate the pins with brake grease. Install a new brake caliper anchor plate if it is worn or damaged.
6. Measure rotor thickness. Resurface or replace as needed.
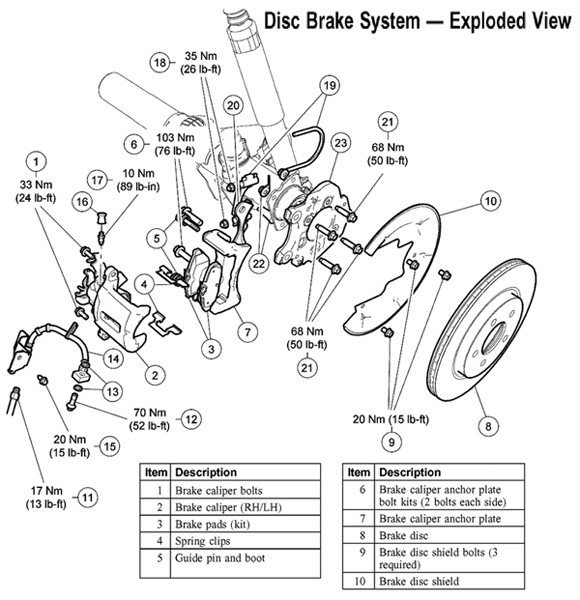
7. Position the notch in the caliper piston up and down to align with the alignment pin on the brake pad.
8. Install the two new spring clips and the brake pads. Be sure to use any shims that come with the pads, or apply a small amount of brake grease to the backs of the pads. Dot allow grease, oil, brake fluid or other contaminants to contact the friction material.
9. Position the brake caliper on the anchor plate and install the 2 brake caliper guide pin bolts until snug. Tighten the RH caliper guide pin bolts in the following sequence: First tighten the top bolt to 33 Nm (24 ft. lbs.), then tighten the bottom bolt to 33 Nm (24 ft. lbs.).
Tighten the LH caliper guide pin bolts in the following sequence: First tighten the bottom bolt to 33 Nm (24 ft. lbs.), then tighten the top bolt to 33 Nm (24 ft. lbs.).
10. Check the adjustment of the parking brake, and adjust as needed. Adjustments are made by removing a small access cover inside the center console bin. Position the brake handle at the fourth notch, loosen the adjuster nut lock nut, then tighten the main nut as needed to tighten the brake cables.
11. Flush and bleed the brakes using any method you choose (power bleeder, vacuum bleeder or manual bleeding). Flushing is important to remove the old contaminated fluid. This will restore the fluid’s ability to prevent corrosion inside the brake system that can damage the ABS unit, calipers, steel brake lines and master cylinder. Bleeding is essential to remove any trapped air inside the system so your customer will have a firm pedal and normal pedal travel.
The standard bleeding sequence is Right Rear, Left Rear, Right Front and Left Rear. Use DOT 3 brake fluid.
On the Shelby GT 500 models with the 5.4L supercharged engine, the front calipers have two sets of bleeder screws, so the bleed sequence goes as follows: RH rear caliper; LH rear caliper; RH front inner caliper; RH front outer caliper; RH front inner caliper (again); LH front inner caliper; LH front outer caliper; and LH front inner caliper (again).
If the ABS unit has been replaced or there is air in the system above the ABS unit, you will have to use a scan tool to bleed the brakes. The scan tool must have software that can access the brake system and cycle the ABS solenoids. Follow the prompts on the scan tool menu.
Finally, pump the brake pedal a few times to make sure the pedal feels firm and has normal travel. Be sure to do this BEFORE you start the car and attempt to move it. Nothing makes a Mustang owner more angry than to learn you just drove his car into the rear wall of your shop or the garage door.
Also, be sure to advice your customer on the proper break-in procedure for their new brakes. Take it easy for the first 100 miles or so with slow, gradual stops. No high-speed panic stops! This will give the pads time to fully cure and seat themselves to the rotors.