Passing the ASE A1 can be difficult. Do not go into this test with the notion that this is an exam for engine rebuilders. Many of the tasks in the A1 task list are required every day at general repair shops for top-end engine repairs.
From the ASE A1 Task List:
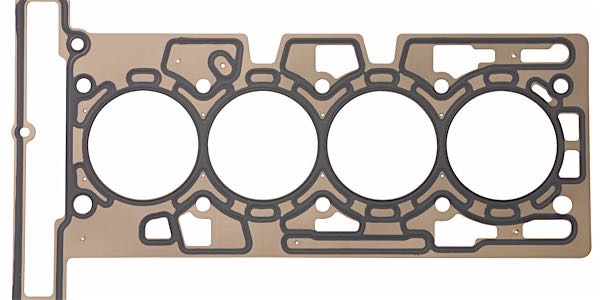
A1 #17: Inspect cylinder head mating surface condition and finish, reassemble and install gasket(s) and cylinder head(s); replace/torque bolts according to manufacturers’ procedures.
Surface Finish
The level of surface finish is determined not only by the engine materials, but also the gasket type. The aluminum cylinder head surface should be resurfaced to the cylinder head gasket manufacturer’s specifications. In short, the head gasket surface should appear polished rather than rough, with composite gaskets requiring a finish of no more than 45 roughness average (RA). The rougher the surface on an aluminum cylinder head, the shorter the cylinder head gasket life.
Inspection and Cleaning
Any debris that’s snagged and dragged across the metal by the milling head may mar the mating surface. Clean, bare metal is all you want to see following the initial cleaning process. Checking for cracks in cast iron heads requires a clean surface for the magnetic particle detection powder. Likewise, checking aluminum castings for hairline cracks with penetrating dye also requires a clean surface. Even porosity leaks in aluminum heads and blocks may be masked if there’s a heavy layer of gunk on the metal.
Failures and Cracks
The vulnerability of aluminum-head engines to experience head gasket failure is caused by the aluminum cylinder head expanding approximately 1.5 times more than the cast-iron block. Although measured in thousandths of an inch, this small and seemingly insignificant difference between the expansion rates of aluminum and cast iron will eventually wear out the head gasket and cause failure.
Cracks typically form when a cylinder head undergoes too much thermal stress. Loss of coolant, severe overheating as well as sudden changes in operating temperature from hot to cold can all create the kind of conditions that cause cracks to form.
Do Not Reuse Bolts
Bolt breakage and uneven gasket loading or loss of torque can cause a newly installed head gasket to leak. TTY head bolts are designed for one-time use because they stretch permanently once they are torqued down. This helps even out the clamping force of the cylinder head on the head gasket.
Head Bolt Installation
Dirty or damaged threads can give false torque readings as well as decrease a bolt’s clamping force by as much as 50%. Wire brush all bolt threads, carefully inspect each one and replace any that are nicked, deformed or worn. If a bolt doesn’t thread into a hole smoothly with finger force alone, there is a problem.
Dirty or deformed hole threads in the engine block can also reduce clamping force. Run a bottoming tap down each bolt hole in the block. The tops of the holes should also be chamfered so the uppermost threads won’t pull above the deck surface when the bolts are tightened.
Make sure the washers are positioned with their rounded or chamfered side up, and that there is no debris or burrs under the washers. Anaerobic sealant might be required for some head bolts that are exposed to the coolant in the water jacket. When using these products, make sure they are applied to the correct area of the bolt. Anaerobic sealers cure without the presence of air and have specific procedures when it comes to application, torque and cure times.
Always look up the specified tightening sequence and recommended head bolt torque values for an engine before installing the head gasket. Also, use an accurate torque wrench to tighten standard-type head bolts in three to five incremental steps following the recommended sequence and torque specs for the application.