Most of the early Jeep Grand Cherokee models (1993-1998) were powered by either an in-line 4.0L six-cylinder engine, or the larger 5.2L and 5.9L V8 Magnum engines. In fact, the Grand Cherokee 5.2L V8 made both the Car and Driver magazine’s 10 Best list, as well as Motor Trend magazine’s Truck of the Year for 1993.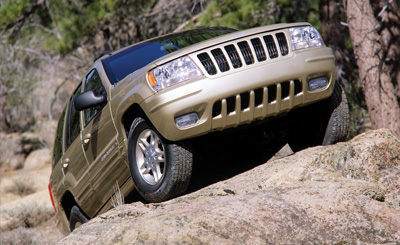
Over the years, the vehicle saw some changes to both the body and the V8 engine. The second-generation of the Grand Cherokees (1999-2004), still had the 4.0L I6, but the V8 Magnum engine was replaced with a 4.7L PowerTech V8.
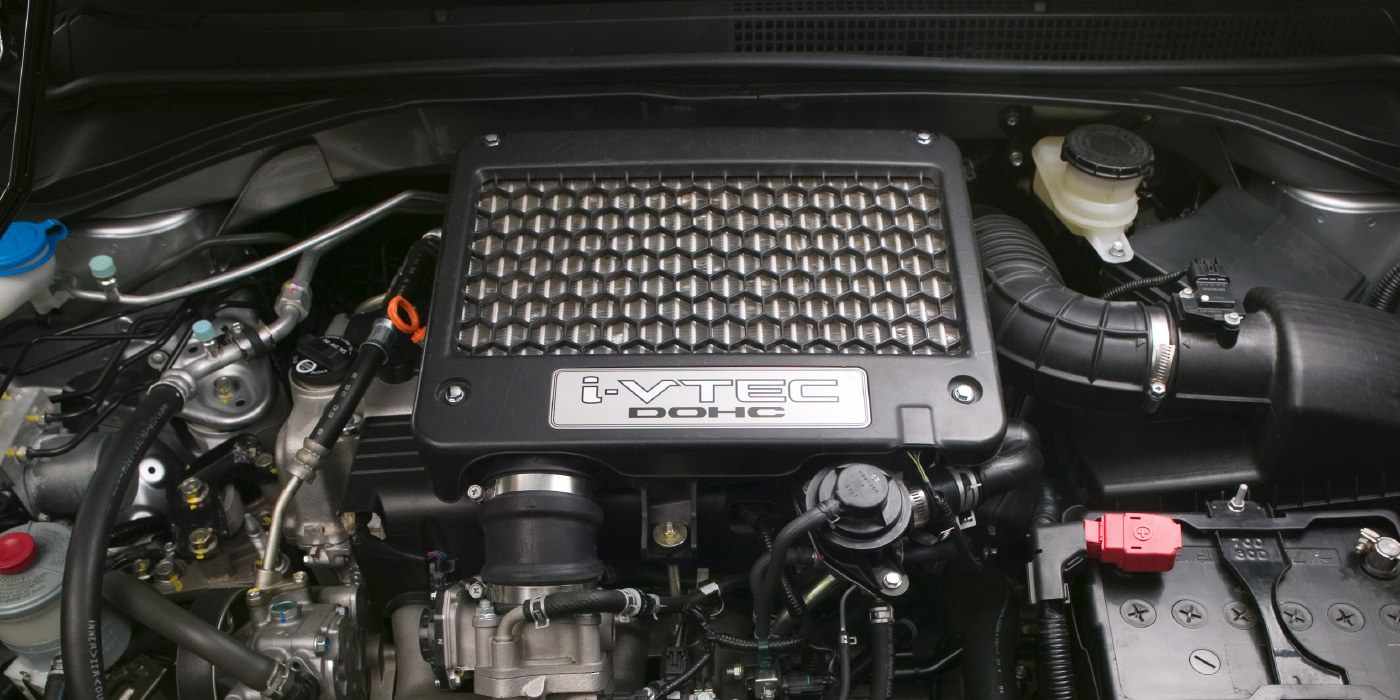
In 2005, a 3.7L V6 engine replaced the earlier I6 powerplants, and 5.7 V8 Hemis were made available under the hood, as well as a more powerful 4.7L PowerTech.
Grand Cherokees are prone to having some common mechanical problems, and many of you have probably serviced complaints of noisy differentials. While it is acceptable for Jeep differentials to make some noise, it’s not wise to ignore noises that are more than moderate or if your customer tells you that noise is noticeably getting louder as they rack up the miles.
Another common issue that puts Jeeps in repair shops is fuel pump related. In this article, we’ll address some fuel system complaints that have plagued these vehicles.
Technicians using Identifix have identified a repeated failure of a new fuel pump that’s due to either a film on the interior of the fuel tank that contaminates the fuel, or from a residue left in the fuel tank from a previously failed fuel pump.
This is a common occurrence to the 1993-’98 Jeep Grand Cherokees with the 4.0L and 5.2L engines, as well as 1998 models powered with the 5.9L engine.
To test the system, Identifix staff recommends you a take a fuel sample in a clean, clear jar. Check the fuel for a cloudy appearance. If the fuel looks cloudy, either the interior lining of the fuel tank is dissolving into the fuel or a residue left from the failed fuel pump is contaminating the fuel. Jeep has never really commented on the true cause.
The most reliable way to avoid repeated fuel pump failure for your customer is to replace the fuel tank and use fresh fuel.
Also, there have been some intermittent misfire issues — especially under heavy load with less than half a tank of fuel — on 1999-2002 4.7L, 5.2L and 5.9L Jeep engines. On these engines with the returnless fuel system, you may come across DTC P0300, P0301, P0302, P0303, P0304, P0305, P0306, P0307, P0308, P0309 and P0310.
If the symptoms only occur when there is less than a half tank of fuel, check the fuel pump volume. Hook up a fuel pressure gauge with a drain valve and hose to the fuel rail.
Next, start the engine and fully open the drain valve to let the fuel run into a suitable container. The system should pump at least 1 pint (or 1/2 liter) of fuel in 15 seconds. There should not be any air bubbles in the fuel, either.
If the test fails, remove the in-tank fuel pump. Replace the pump assembly or just the inlet filter, and clean out the tank.
Rough/No Starts
A TSB from Jeep released in July 1997 to address the film buildup issue in more detail goes as follows:
Symptom/Condition
Symptoms may include no start, rough idle, long crank times, driveway die outs or erratic fuel pressure. A new fuel pump has been released, which delivers improved performance. This pump should be used whenever fuel pump failures are encountered.
Diagnosis
Basic fuel system diagnostics should be used as outlined in the appropriate service manual. A brief recap of the basic diagnostics follows:
Fuel pressure specification — 49 psi – plus or minus 5 psi.
High fuel pressure indicates problems with the fuel pressure regulator. Refer to the service manual for regulator diagnosis. Do not replace the fuel pump for high pressure.
Low fuel pressure — Low pressure could indicate a pump problem or it could indicate a plugged fuel filter or restricted fuel line or no fuel in the tank. Be sure to check these items before replacing the fuel pump.
Fuel system leak down — When checking fuel pressure be sure to check the integrity of the system after shut down. With the fuel pressure gauge connected, shut the engine off and observe the pressure gauge. The system should maintain at least 24 psi for five minutes after shut down. If the pressure bleeds off quicker, it could indicate that an injector is leaking down or that the pressure regulator is leaking. This can lead to driveability problems and require further diagnosis.
Fuel Filter/Fuel Pressure Regulator Replacement on 5.2L Engine
Fuel filter replacement is a preventive maintenance procedure your shop will need to provide. The following is the procedure to service a 1998 Jeep Grand Cherokee (4WD) 5.2L engine.
The combination fuel filter/fuel pressure regulator is located on the fuel pump module. The fuel pump module is located in the top of the fuel tank. The filter/ regulator may be removed without removing the fuel pump module, although the fuel tank must be removed.
Removal
1. Remove the fuel tank.
2. Clean the area around the filter/regulator.
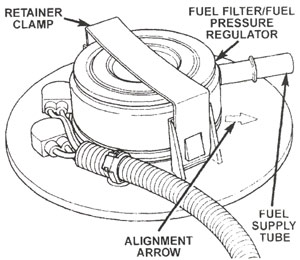
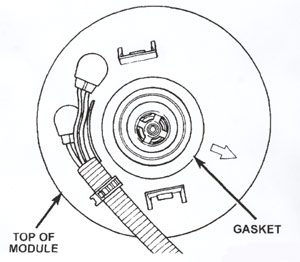
3. Remove the retainer clamp from the top of the filter/regulator (see Figure 1). The clamp snaps to the tabs on the pump module. Discard the old clamp.
4. Pry the filter/regulator from the top of pump module with two screwdrivers. The unit is snapped into the module.
5. Remove and discard the gasket below the filter/regulator (see Figure 2).
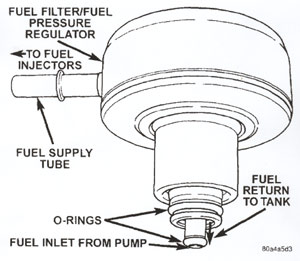
6. Before discarding the filter/ regulator assembly, inspect the assembly to verify that the O-rings (Figure 3) are intact. If the smaller of the two O-rings cannot be found on the bottom of the filter/regulator, it may be necessary to remove it from the fuel inlet passage in the fuel pump module.
Installation
1. Clean the recessed area in the pump module where the filter/regulator is to be installed.
2. Obtain the new filter/regulator (two new O-rings should already be installed).
3. Apply a small amount of clean engine oil to the O-rings. Do not install the O-rings separately into the fuel pump module. They will be damaged when installing the filter/regulator.
4. Install the new gasket to the top of the fuel pump module.
5. Press the new filter/regulator into the top of the pump module until it snaps into position (a positive click must be heard or felt).
6. The arrow (Figure 1) on top of the fuel pump module should be pointed toward the front of the vehicle (12 o’clock position).
7. Rotate the filter/regulator until the fuel supply tube (fitting) is pointed to the 11 o’clock position.
8. Install the new retainer clamp (clamp snaps over the top of the filter/regulator and locks to the flanges on the pump module).
9. Install the fuel tank.
Source: ALLDATA
Fuel Filter Service on 4.0L Engine
For fuel filter removal and installation on the 1996 Jeep Grand Cherokee (4WD) 4.0L I6 engine, follow this procedure:
Note: The fuel system is under constant pressure, even when the engine is off. Always release fuel pressure before servicing any fuel system component.
Removal
1. Disconnect the negative battery terminal, and remove the fuel tank cap.
2. Raise and support the vehicle for access.
3. Remove fuel filter hoses and clamps from the inlet and outlet fuel nipples. Remove the retaining strap bolt, and remove the filter.
Installation
1. Install the new filter in the retaining strap. Check the direction of flow by the markings on the filter, and ensure it is correct.
2. Install the retaining strap bolt, and torque to 12 Nm (8.8 lb-ft) as seen in Figure 4.

3. Install the inlet and outlet hoses, and clamps. Tighten the clamps securely. Lower the vehicle. Reconnect the negative battery terminal.
4. Using the DRB II select the Automatic Shut Down (ASD) Fuel System Test to pressurize the fuel system and check for leaks. Refer to Powertrain Management / Computers and Control Systems / Testing and Inspection / Procedures.
Caution: Unless the test is stopped or the ignition switch is turned to the off position, the fuel pump relay and the ASD relay will remain energized for seven minutes by the ASD Fuel System Test.
Source: ALLDATA