It’s axiomatic in the diagnostic trade that, as soon as one thinks he has command of a particular system, the gods of technology pitch a curve ball that unerringly slips under the swing of the diagnostic bat. Not that I’ve never seen a 4.0L Jeep engine before; I’ve serviced dozens, perhaps hundreds of them. The engine is a very simple, durable design that’s been around for decades. In fact, I spent a season of desert racing prepping a venerable 258-cubic inch version that had been professionally built to produce well over 300 horsepower. The engine was extremely durable and faster than many of the V8 engines it had to compete against.
During the late 1980s, Jeep equipped the 4.2L version of the engine with the Renix (Renault and Bendix) electronic fuel injection system which, with the exception of the troublesome variable reluctor-style crankshaft position sensors, proved extremely reliable. When Chrysler Corporation bought the Jeep name and production line, the configuration remained essentially the same with the exception of Chrysler electronics replacing the Renix designs used during the American Motors/Renault partnership.
All in all, the Chrysler electronics has proven very reliable. I’ve experienced some trouble with the Hall effect crankshaft position sensors and have had a few ignition coil failures, but have otherwise had very little difficulty quickly diagnosing both hard and intermittent failures in these systems — until recently, that is.
Twin Jeeps
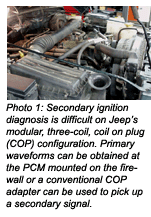 Several months ago, I had two nearly identical 4.0L Jeep Wranglers come into the shop with some unique driveability complaints. See Photo 1. The first was a 2000 model-year Wrangler equipped with a manual transmission. The second was a 2001 model, painted the same green color, but equipped with an automatic transmission. Unlike the bone-stock 2000 Wrangler, the 2001 Wrangler had received the full body lift treatment, complete with power winch and full off-road gear. Even more uniquely, this Jeep was owned by a doctor who depended upon the vehicle to climb to a high mountain cabin she used as a respite from her itinerate medical practice.
“It’s Just a CE Light”
The complaint on the 2000 model Wrangler was very simple: the check engine light had come on and the owner wanted the problem diagnosed while he waited. I don’t know about you, but “waiters” always seem to bring with them a special set of problems. The diagnostic memory contained four trouble codes: a P1391, which indicates a camshaft position (CMP) or crankshaft position (CKP) sensor failure and the next three, a P0352, P0353 and P0351, which indicated a coil primary ignition failure. Some archival research on a hotline website indicated that the last three codes were often incidental to the P1391 trouble code.
At this point, I decided to look at the CMP and CKP signals with a digital storage oscilloscope (DSO) to determine if the signals were of the correct shape and amplitude. To complicate matters, both signals appeared text-book perfect on the scope. With that in mind, I removed and inspected the CKP to make sure that no clutch debris had attached itself to the sensor and that the sensor and its mountings were rock solid. Because the CMP generated a perfect waveform on the scope, I made the assumption that all was well with what should be a simple, single-shutter, single magnet camshaft position sensor.
During testing, I noticed that the Jeep would occasionally require an extra-long cranking time before it started. Each time I cleared the P1391 DTC, it would re-appear after the engine was started. Questioning the owner, I discovered that, indeed, the Jeep had not been starting as well as it should. As testing progressed, the starting condition worsened until the Jeep finally failed to start. Each time the P01391 was cleared, it would reappear as soon as the engine started. At this point, I asked the owner to leave the vehicle overnight for further testing.
Synchronization Roulette
The next morning, the Jeep started perfectly. As the day progressed, the Jeep would produce a CE light and a P1391 code each time the engine was cranked. Obviously, the mechanical relationship between the CMP and the CKP was changing — sometimes a little, sometimes a lot. Further TSB and archival research indicated that the 4.0L historically has had a problem with the bearing seizing in the cam position sensor and twisting the housing out of synchronization with the crankshaft sensor and producing the DTC P1391 and the accompanying P0352, 353 and 351 DTCs.
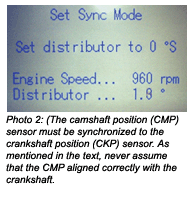 Fortunately, many aftermarket scan tools can detect CMP synchronization problems in the 4.0L through a synch mode feature included in the scan tool menu, see Photo 2. Simply put, the CMP can be adjusted in the synch mode to within +/- 1 or 2 degrees tolerance.
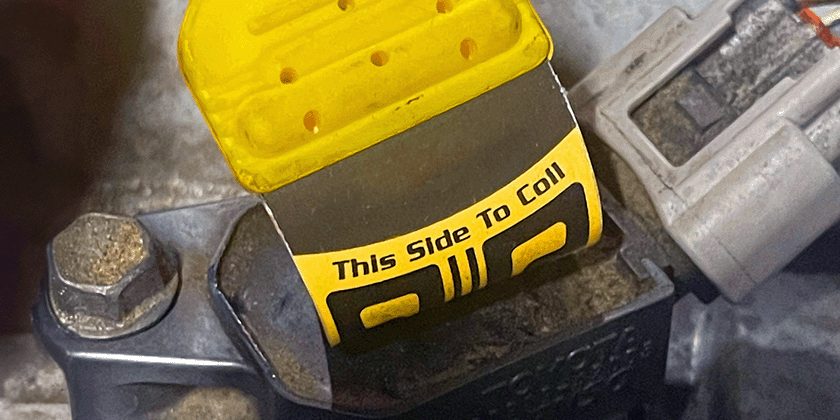
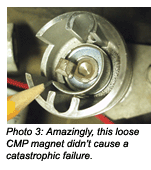
In this case, the CMP synch was nearly perfect, which dismissed any problems with a seized cam sensor bearing. I might say at this point that I normally don’t start a diagnosis by disassembling components because a faulty connection might be re-established or a cracked circuit board might be reactivated. But, in this case, I removed the cam sensor only to discover the magnet stuck to the CMP’s shutter! See Photo 3.
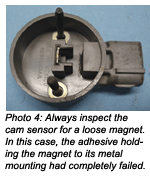
 Clearly, I had taken the “scenic route” on this diagnosis by not inspecting the CMP for loose components in the first place, see Photo 4. But, the loose magnet clearly was causing an intermittent synchronization problem that had created a roulette wheel effect that resulted in the occasional slow-start or cranking/no-start complaint that cropped up after the vehicle came into the shop. The diagnostic curve ball in this case was clearly the unexpected issue of a magnet coming loose in the camshaft position sensor without causing a catastrophic failure.
 Doctor Mobile The diagnostic process can also be complicated by the customer needing to use his/her vehicle. In the case of the 2001 Wrangler, the doctor needed the Jeep to get to her mountain cabin.
Consequently, on some occasions I could have the Jeep for two or three days while she left town to pursue her medical practice. On others, I had time for only a quick code pull and casual inspection.
To complicate matters, the Wrangler had a history of mechanical problems. Most recently, the Wrangler had visited the dealership on three different occasions to remedy an overheating problem. Following the third visit, the engine seized and was replaced with a Chrysler remanufactured unit by an independent shop 100 miles away.
One-hundred miles later during the trip home, the check engine light came on. An on-the-spot scan tool analysis revealed a P0301 trouble code indicating a misfire on #1 cylinder. At first glance, a P0301 DTC shouldn’t be difficult to diagnose. After all, the installing technician might have cracked or incorrectly gapped a spark plug. Or the spark plug boot might have concealed a carbon track caused by running the spark plugs well past their recommended replacement interval.
Platinum Spark Plugs?
When the doctor found time to drop her 2001 Wrangler off for repairs, a scan tool analysis revealed not only a P0301, but also a P0302 misfire code. Upon removing the spark plugs, I discovered that platinum spark plugs had been installed with a 0.055” gap instead of the standard spark plugs with a 0.035” gap. Road testing the Wrangler with a scan tool attached indicated that excessive misfires were occurring on all cylinders at highway speeds.
The question was, of course, if the extra-wide gap was causing a misfire condition on cylinders 1 and 2. Because my experience indicated that most 4.0s with excessive spark plug gaps would set misfire codes, I decided to replace the platinum spark plugs with the standard, 30,000-mile OE units. After again extensively road-testing the Wrangler, the misfires had disappeared with the exception of light misfiring on cylinders 1 and 2. This case was not closed, but it was time to return the Jeep to its owner.
Misfire Issues
Although much has been written about misfire diagnostics, the issue of cylinder misfires revolves primarily around how the PCM has been programmed to detect and interpret misfires. The more we work with misfires, the more we see that misfire detection strategies vary widely among vehicle applications.
With that said, TSB and archival research indicates that the 4.0L engine has a problem with misfires being caused by insufficient exhaust valve guide clearances allegedly causing the valves to stick open under high-load, high-speed operating conditions. Anecdotal evidence also indicates that carbon buildup on the exhaust valve stems may cause a misfire to occur for the very same reason.
Obviously, a new engine with only 100 miles on it wouldn’t have a carbon buildup problem. It could, however, have a tight valve guide clearance or a valve seat contact problem. With that in mind, I ran a cranking compression test indicating that, while all cylinders would produce equal compression readings, #1 and #2 were slower building compression. According to my interpretation, the valve seats on those cylinders probably had some burrs left from machining that would likely disappear as the valve faces mated to their seats.
Synchronization Nightmares
Remembering my experiences with the 2000 Wrangler and its CMP synchronization problem, I decided to add the final touch by fine-tuning the CMP synch with my scan tool.
After re-synching the CMP, I discovered that the check engine light would immediately begin flashing as soon as the engine was revved past 3,000 rpm. Wow, this was a completely unexpected result! Why would a simple re-synch intensify the misfires on cylinders 1 and 2?
Speculation
Sometimes the most important part of the diagnostic process is to get a good night’s sleep in order to get a fresh look at the problem the next day. In review, I had already scope-tested the fuel injectors, primary and secondary ignition, the cam sensor and the crank sensor. Extensive scoping had not indicated an ignition or fuel delivery problem.
At this point, I might add that the single-line fuel injection systems have a tendency to clog the injectors nearest the ends of the fuel rail. During road-testing, the short-term fuel trims had not indicated any fuel delivery problems whatsoever. Nevertheless, cylinders 1 and 2 and 5 and 6, located at the ends of the fuel rail, seemed to have the most misfire problems.
Since re-synching the CMP was now causing the CE light to come on by revving the engine to 3,000 rpm in the shop, I attempted to eliminate the lean misfire theory by adding propane to the intake when the misfires occurred. Despite adding propane, the misfires occurred in the same proportion with #1 and #2 remaining the primary offenders.
Despite the cam sensor synch testing perfectly on the scan tool, the engine clearly had a synchronization problem that caused the PCM to “see” a serious misfire when none was obviously apparent. In fact, the engine always started and ran perfectly each and every time. The only issue was the CE light flashing a “Type A” misfire when the engine reached 3,000 rpm.
Out of curiosity, I posted the problem on the International Automotive Technician’s Network (iATN). An acquaintance of mine immediately responded by saying that the cam position sensor had been installed 180° out of synchronization.
Because the engine started and ran perfectly and two different scan tools indicated perfect CMP synchronization, I had made the assumption that the cam sensor had been correctly installed. Upon removing the CMP sensor, it was obvious that the sensor had, indeed, been installed 180° out of time. Here again is that diagnostic curve ball: never assume that the PCM is smart enough to understand everything it “sees”!
The CMP installation process is straightforward. The engine is rotated by hand until #1 cylinder reaches top dead center on compression stroke. The cam sensor housing has a small hole in the side that accepts a small drill bit or pin that locks the shutter in the correct installation position. For best performance after installation, the CMP synch should be fine-tuned using the scan tool. Re-installing the CMP in correct relationship with the CKP remedied the misfire problem.
Begging the Question
Of course, why would a faulty CMP installation cause a “false” misfire on cylinders 1 and 2? In review, installing the OE-recommended spark plugs originally reduced the cylinder misfires to a very low level. Next, bringing the cam position sensor into exact synchronization with the crankshaft sensor actually aggravated the misfire conditions on cylinders 1 and 2 to the point that the condition could be duplicated by simply revving the engine to 3,000 rpm. My take on this issue was the synching the CMP simply brought the injection timing closer to misfire conditions. But, why would a synch problem cause “Type A” misfires on cylinders 1 and 2 and, to a lesser degree, on cylinders 5 and 6? On the one hand, we have the sticking exhaust valve theory. On the other, we have the clogged fuel injector theory. Another issue might simply be the contributory effects of torsional vibration, which is very common in a six-cylinder crankshaft, but that’s pure speculation on my part.
My best guess is that minor valve seating problems on cylinders 1 and 2 caused those cylinders to develop “Type A” misfires more readily. In addition, the fuel injectors located at the ends of the fuel rail may have aggravated the misfire by being slightly clogged, but adding a slight amount of propane should have eliminated this problem.
Three weeks later, the doctor with the 2001 Wrangler reappeared with, you might guess, the check engine light on again. She said that the light came on when she “gunned” the engine climbing a high mountain pass. The freeze-frame data corresponded exactly with her account. Again, the codes indicated misfires on cylinders 1 and 2. I cleared the codes to turn off the light and asked that she report back if the check engine light came on again. I haven’t seen her since, either because the new engine was breaking in as it should or because she gave up in sheer disgust. Myself, I would bet on an exhaust valve problem in cylinders 1 and 2 that was slowly rectifying itself.
Such are the issues of diagnosing problems with newly remanufactured engines and such is another day in the life of a diagnostic technician.


